Ways to Navigate Using the Top Bar of Dashboard
The best thing about Eqvista is that you can manage your shareholders, common equity, cap tables, and company filings right from your dashboard.
Navigate your dashboard
Here are the steps to follow:
Step 1: Log into Eqvista and choose your company.
On this page, you will find some options on the top bar that will help you manage your cap table right from the dashboard.

A detailed feature-by-feature analysis of the top bar will help you understand it better.
Step 2: On the dashboard, click on the company name to get a drop-down menu as shown below.
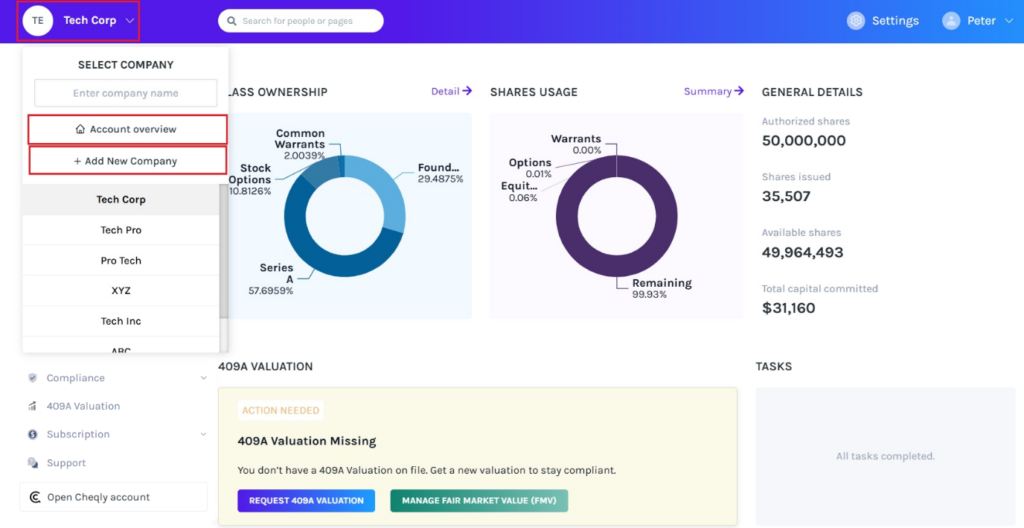
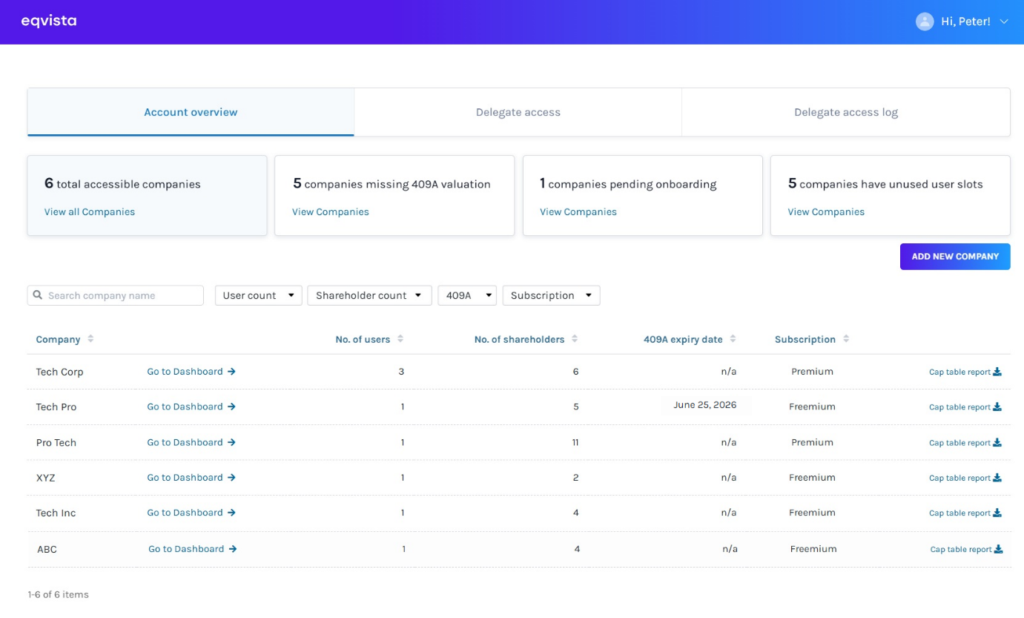
Account overview
The account overview page will help you manage your multiple company accounts.
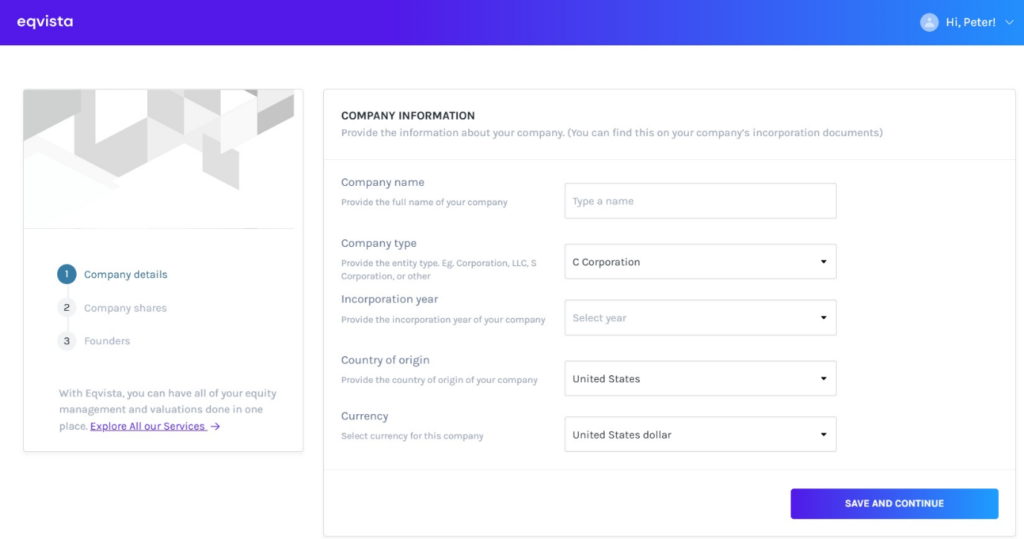
Add new company
On this page, fill in the details of your company, including the company name, type, incorporation date, country of origin, and currency.
Note: To know more about how to add a new company, check out the support article here.
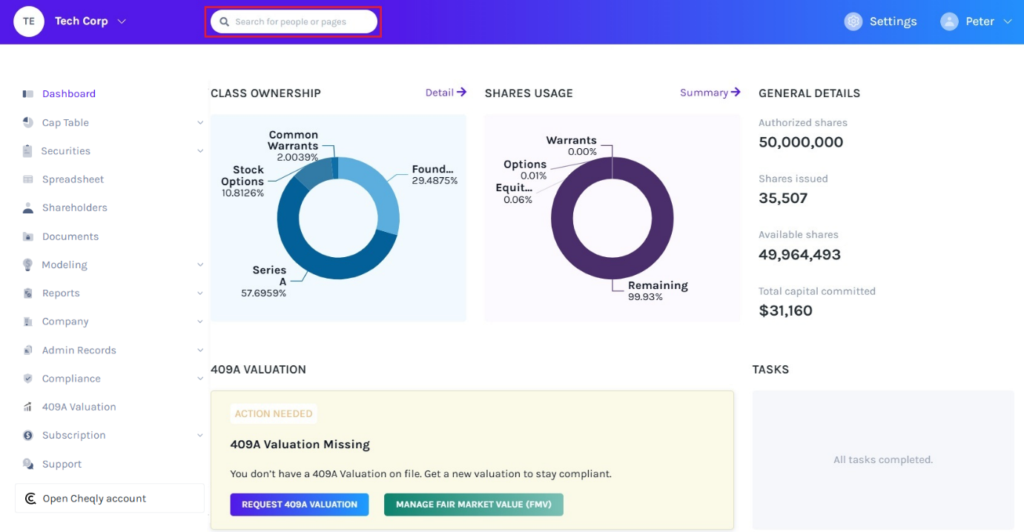
Search box
Step 3: On the dashboard, click on the search box on the right of the company name drop-down menu. Here, you can search for people and pages to navigate quickly.
Note: The search feature is only available for company users, not for shareholder accounts.
Search for people
Let’s assume that you want to search for a shareholder using their name. To do so, type the name in the search bar as shown below.
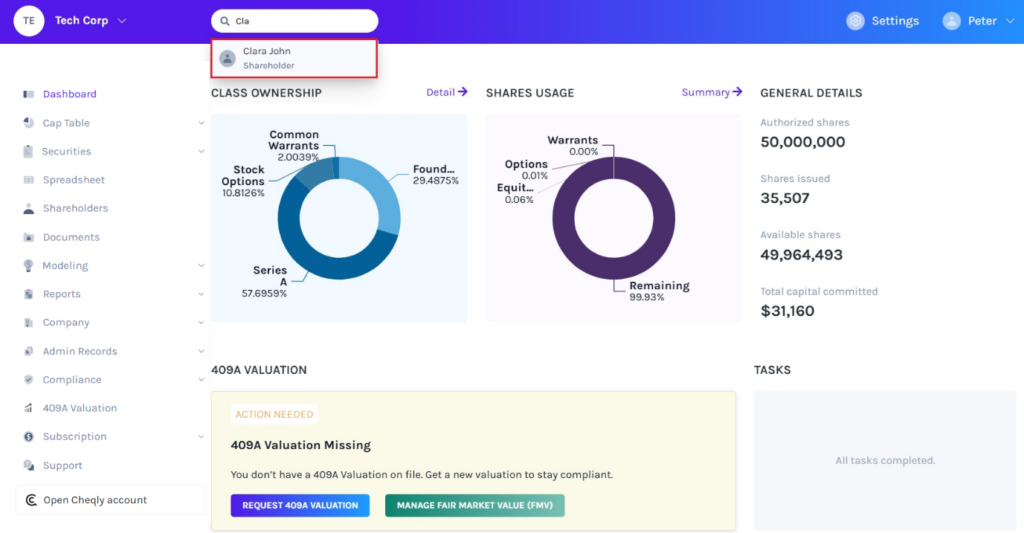
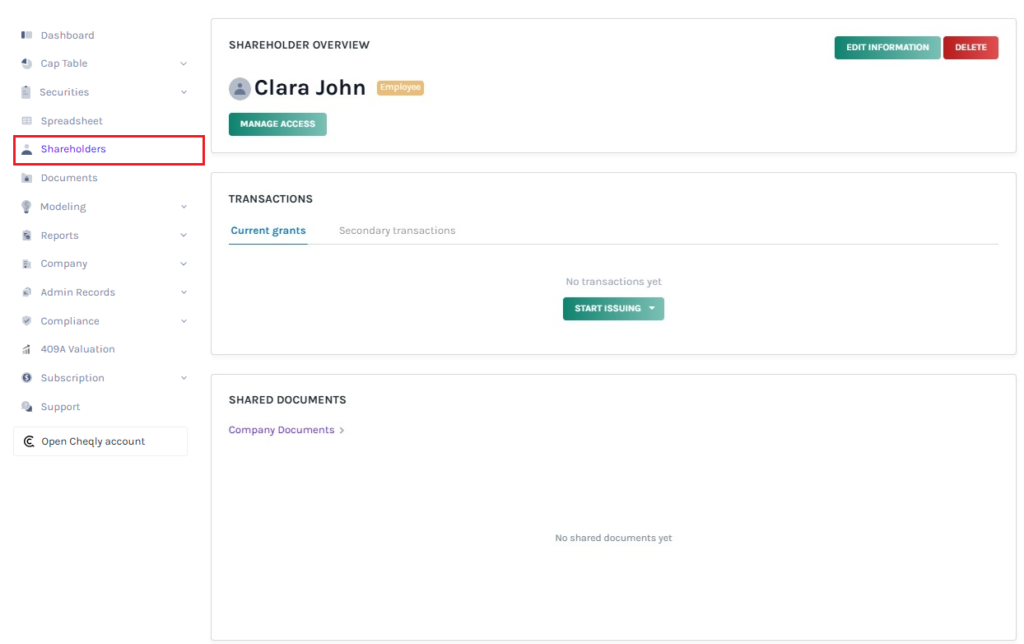
Then, select the shareholder’s name, and you will be redirected to the shareholder overview page.
Search for pages
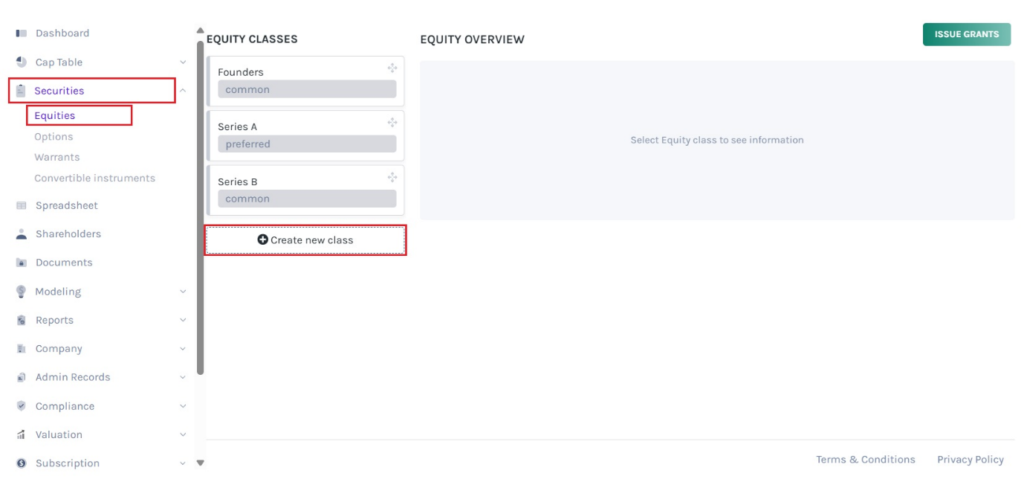
Suppose you want to search for a page and type the name in the search bar as shown below. In this case, we’ll enter “Equities” in the search box.

Once you click, you will be redirected to the equities page. Here, click on “Create New Class” to create an equity class. If you already have one, you can issue shares and implement a vesting schedule.
Search for grants
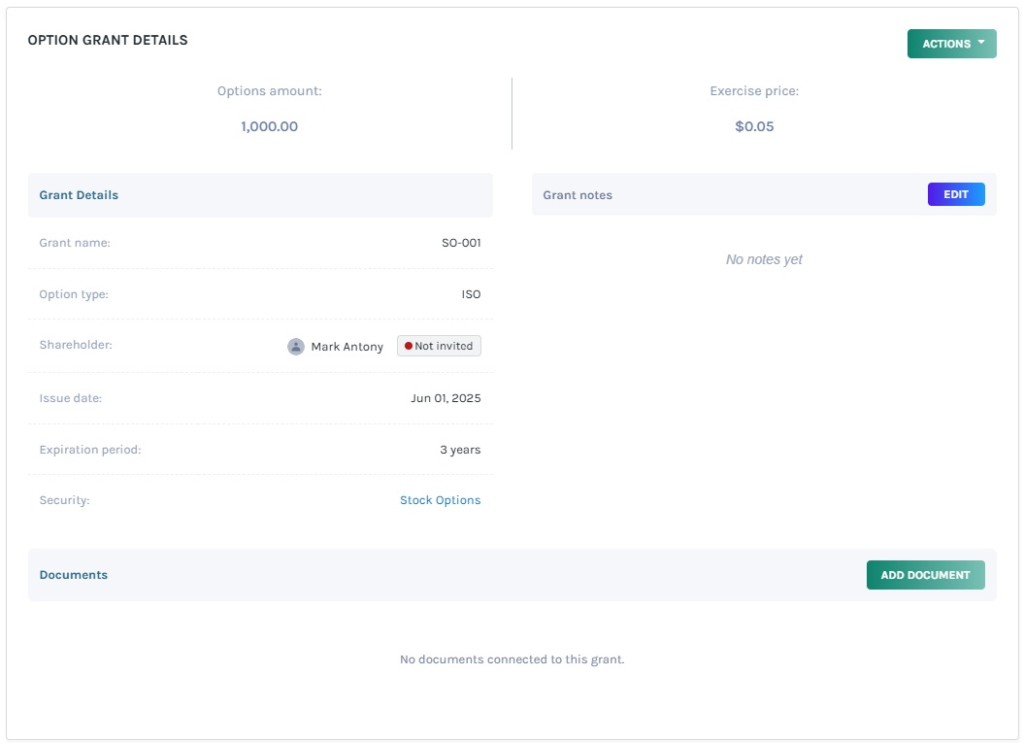
If you want to search for a grant, type grant name in the search bar as shown below. In this case, we’ll enter “SO-001” in the search box.

Then, you will be redirected to the grant details page.
Note: You can add a document to the grant by clicking on “Add Document”. Check out the support article to learn more about adding documents to grants.
Settings
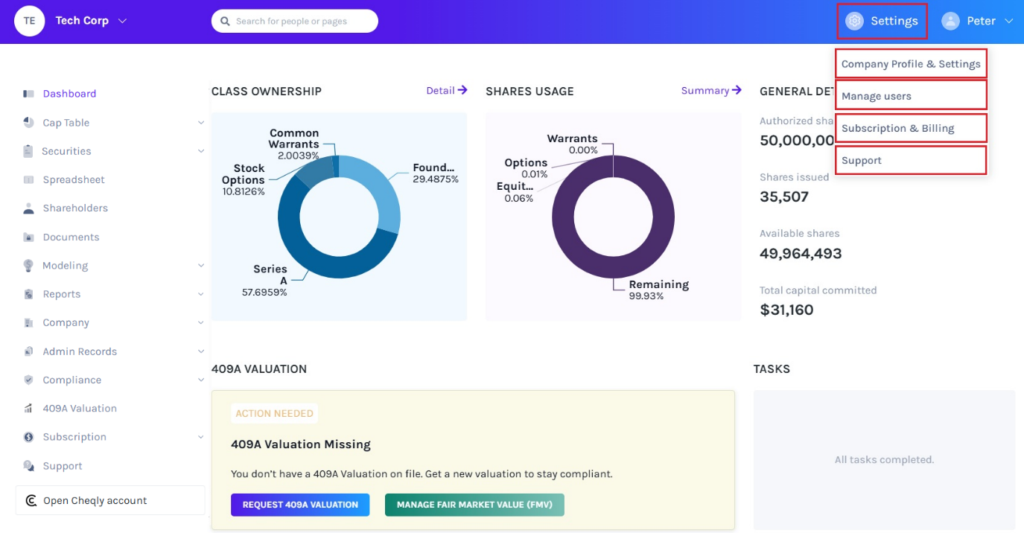
Step 4: On the dashboard, click on “Settings” on the left to get a drop-down menu as shown below.
Note: The settings are only available for company users, not for shareholder accounts.
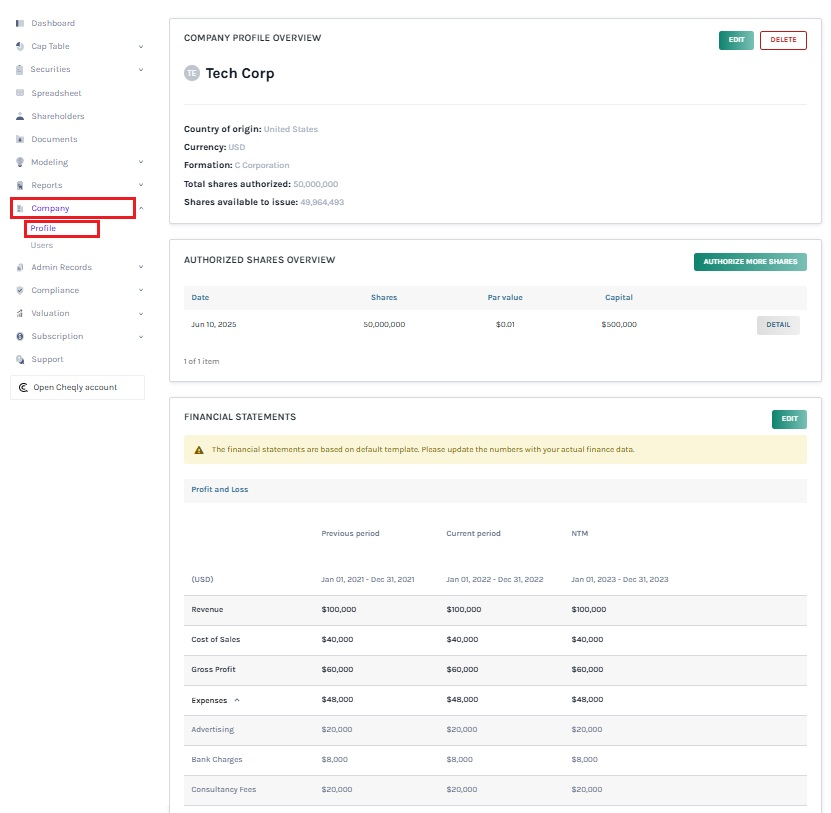
Company profile & settings
In the company profile section, there are three sections on this page: Company Profile Overview, Authorized Shares Overview, and Financial Statements.
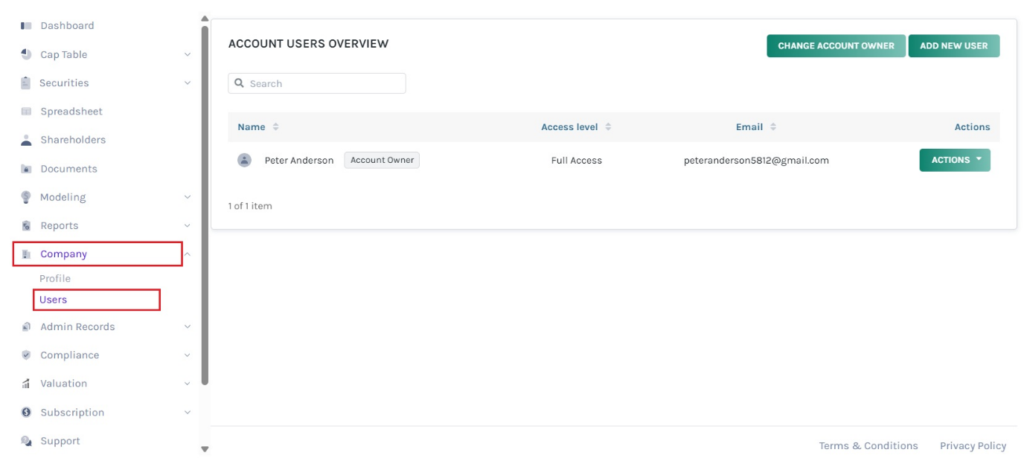
Manage users
On this page, you can easily assign user roles and appropriate access levels to the stakeholders of the company.
Note: A superuser is the one who handles all major decisions about the cap table –adding users, share access, and deleting them.
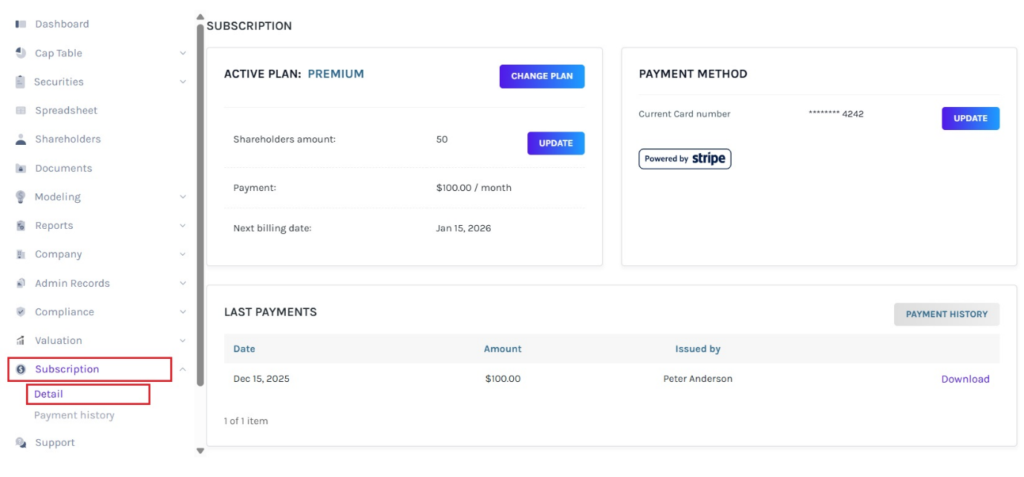
Subscription & billing
Here, you can view all your subscription details, such as your payments, billing, and subscription plan.
Support
Eqvista provides support articles and assistance to help you manage your cap table. If you need additional help, you can contact us, and we will help you.
Your name
Step 5: On the dashboard, click on “your name” on the right to get a drop-down menu as shown below.
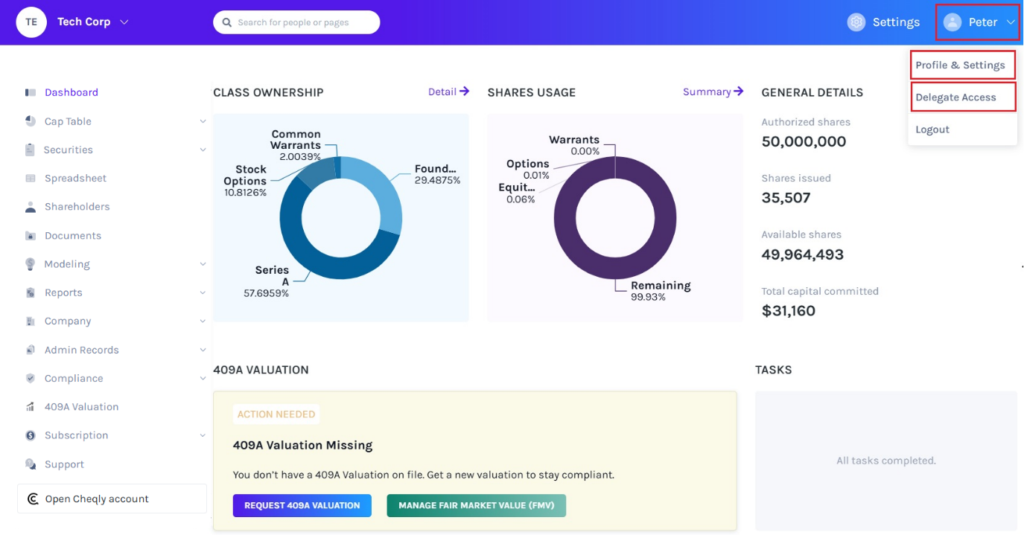
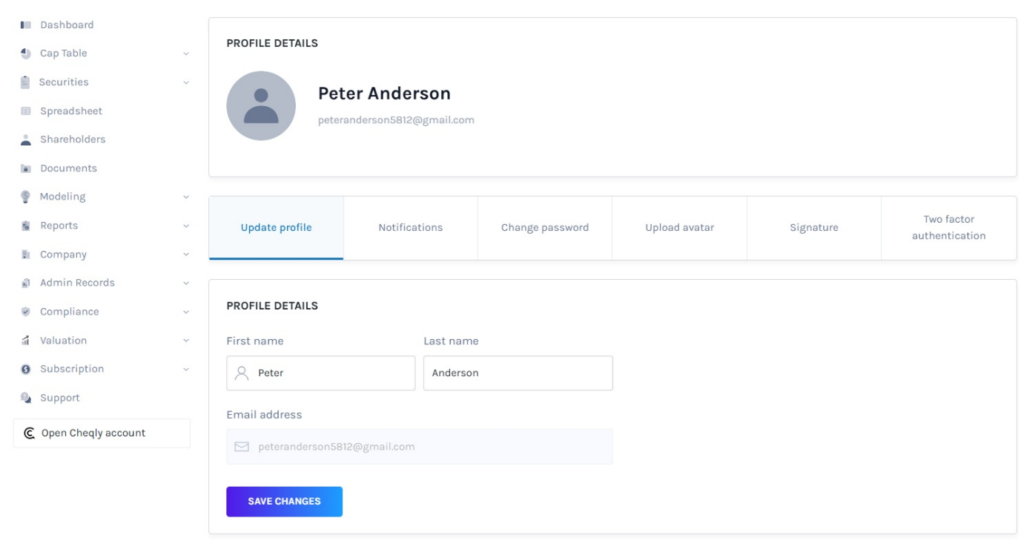
Profile & settings
Here, you can view the profile details along with options: Update profile, Notifications, Change password, Upload avatar, Signature, and Two factor authentication.
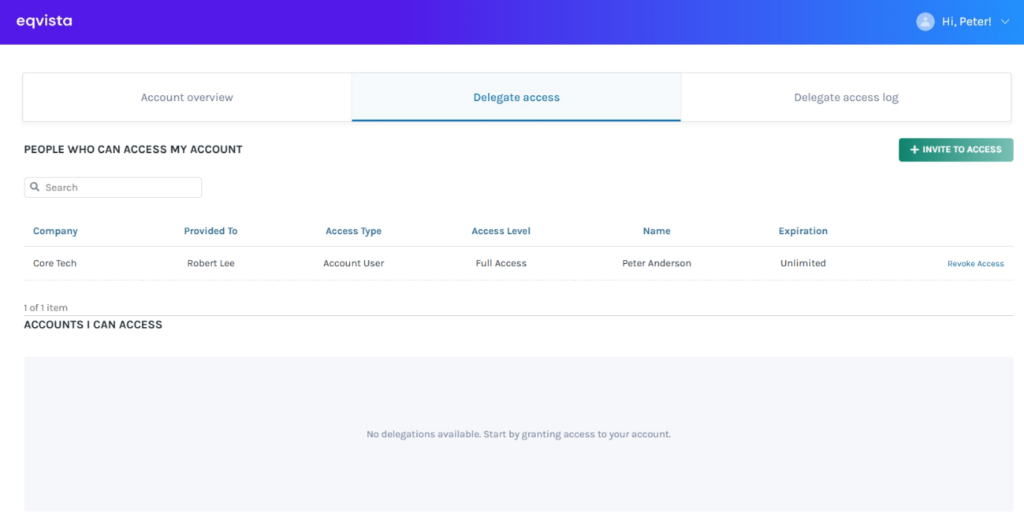
Delegate access
The page displays all the users with delegated access to the company account, along with an option “Invite to Access”. There are two access types that you can choose from:
- Account User Access: Under this option, the user will get access to the cap table based on access levels.
- Shareholder Access: In this option, the user will only be able to view the grants, participate in board resolutions, sign and request electronic certificates, and sign grant acceptances.
If you want to understand Eqvista, check out our support articles or contact us today!
