How to Assign User Roles and Access Levels?
A user can view the cap table and access company information based on the kind of access they have.
Assign user roles and access levels
With Eqvista, you can easily assign user roles and appropriate access levels to stakeholders of the company.
Note: The add new user feature is only available for premium account holders. To unlock this feature, kindly upgrade your account.
Here are the steps to follow:
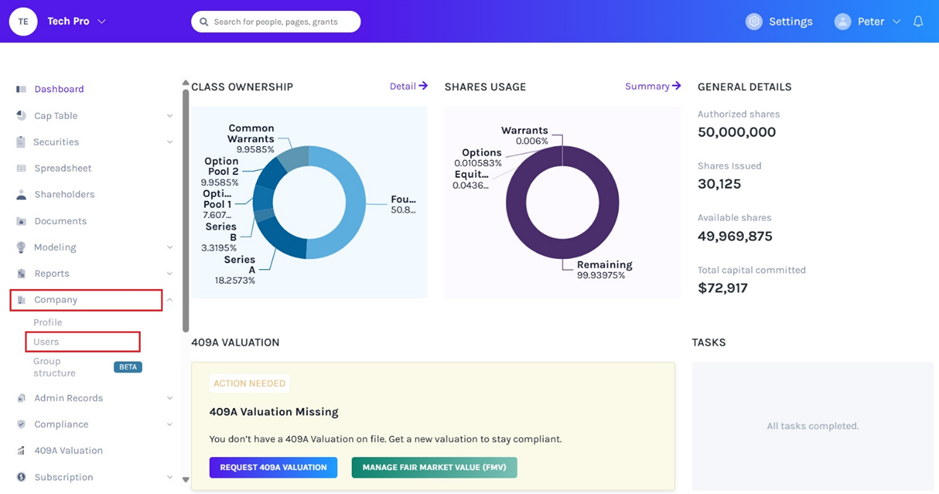
Step 1: Log into Eqvista and select your company account.
On the dashboard, click on “Company” on the left side to get a drop-down menu and select “Users”.
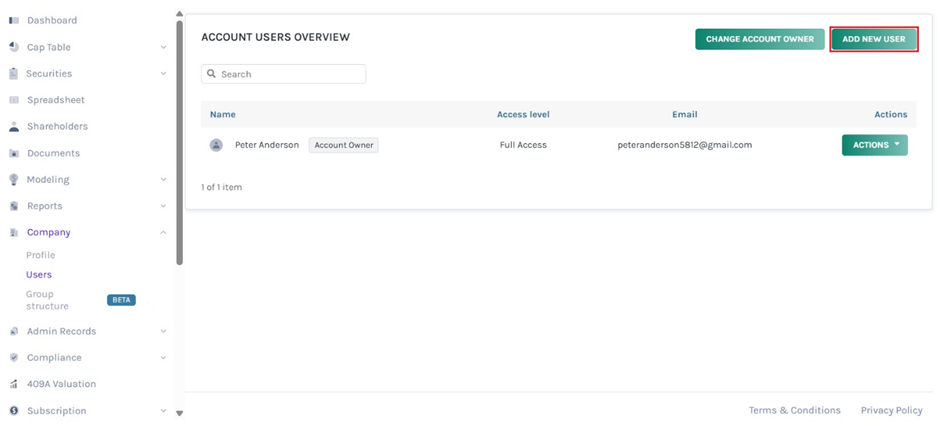
Step 2: Then, you will be directed to the next page where you can add users and assign access to them. On this page, click on “Add New User” at the top right side of the page.
Note: A superuser is the only one who handles the cap table – add users, share access, and delete them.
Step 3: When you click “Add New User”, a window will appear as shown below.
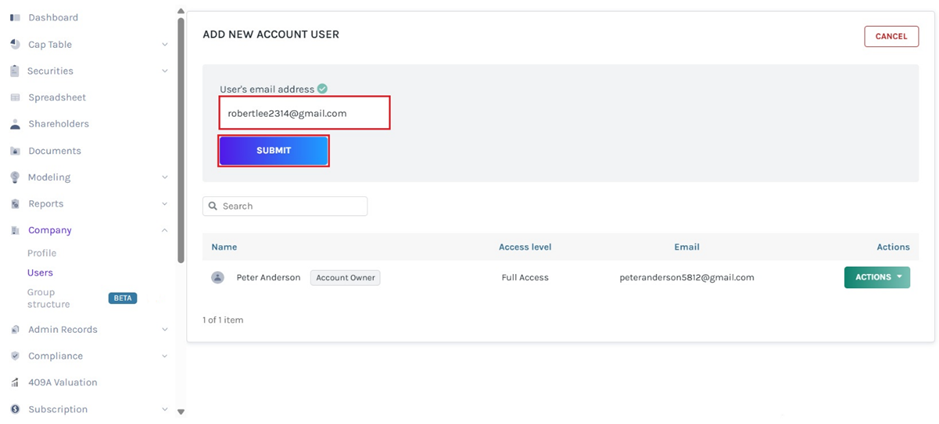
Enter a valid email and you will get the option to proceed. Then, click “Submit” and another window will appear.
Step 4: Once you click “Submit”, new fields will appear to fill in the details – the first name, last name, the role of the user, and access level.
There are four user roles with respective access levels that can be added to the cap table as explained below.
| User Role | Access Level | Description |
|---|---|---|
| Administrator | Full Access | View and make changes to all details on the cap table. |
| Officer | Full Access | View and make changes to all details on the cap table. |
| Secretary | Full View | View the cap table and cannot make any changes to the information. |
| Advisor | Limited View | View specific information about the company, and changes cannot be made. |
Note: The four roles have different access levels. To know more, click on the button “Support article” as shown below.
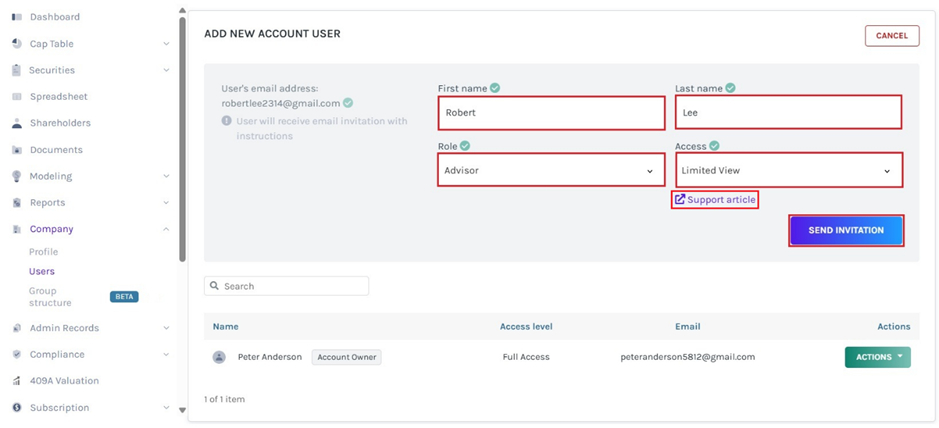
After you have filled in these details, click “Send Invitation”.
Step 5: Here, you can see the details of the added user and the status of the invitation.
The user has been added to the cap table and will receive an email with the invitation to access the cap table based on the access given.
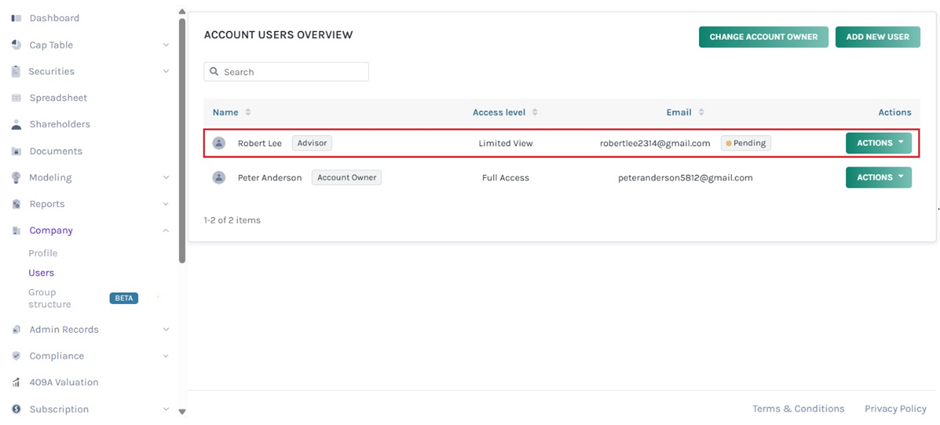
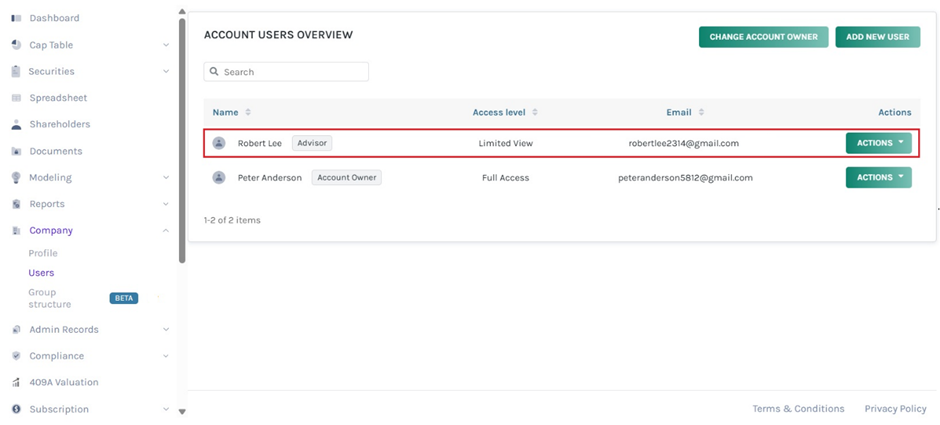
When the user accepts the invite, the status will disappear as shown below.
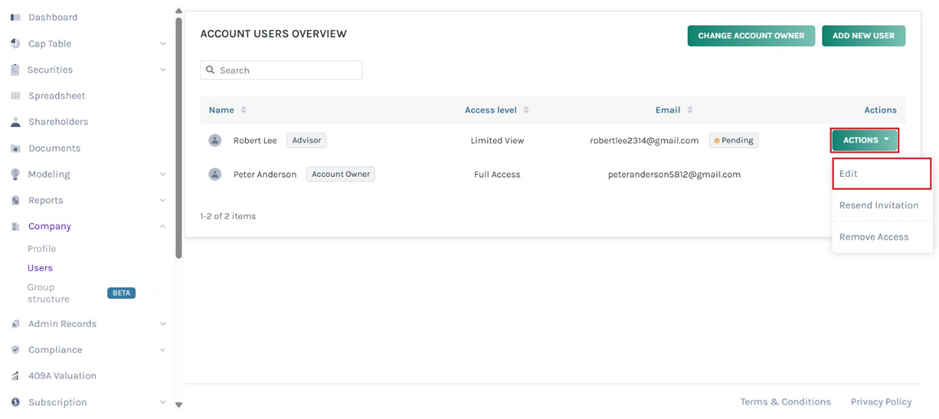
A superuser can perform various functions apart from adding users to the company account. To help you further understand, we have explained each function below:
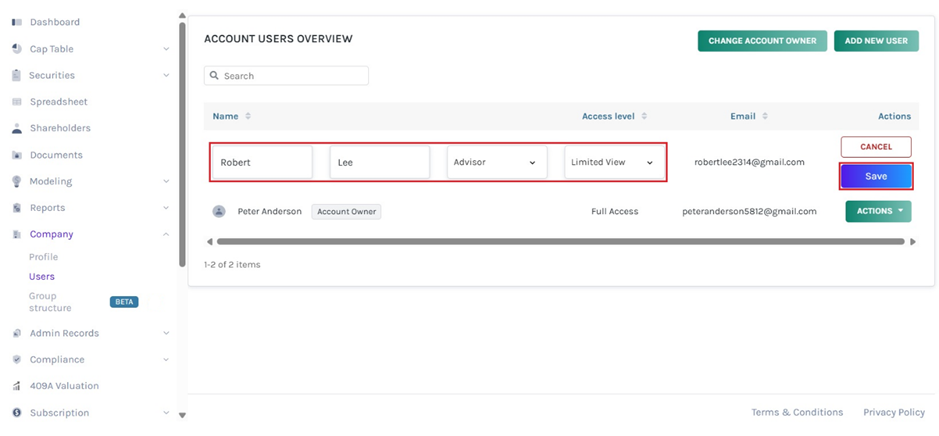
Option 1 – Edit
Suppose you want to change the details of the user (name, role, and access level), click on “Actions” on the right side to get a drop-down menu. Then, select “Edit” to change the details of the user.
Once you click, you will be redirected to the below page.
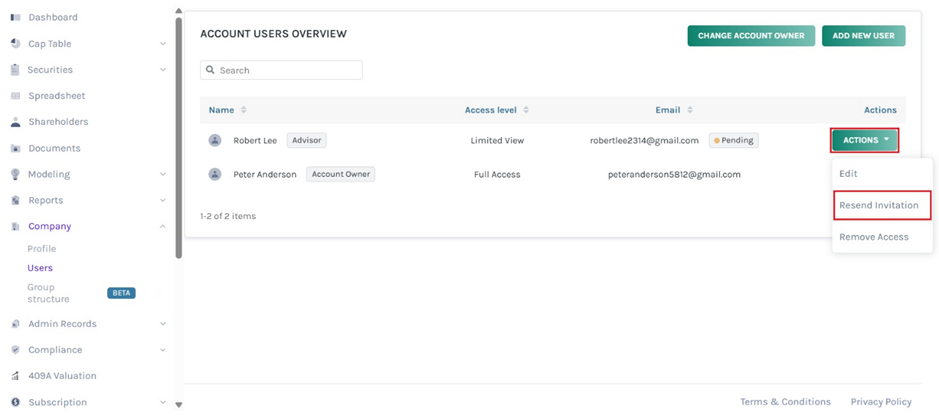
Option 2 – Resend invitation
In case, the user has not received the invite yet, you want to resend the invitation. Then, click on “Actions” on the right-hand side to get the drop-down menu. Then, click “Resend Invitation”.
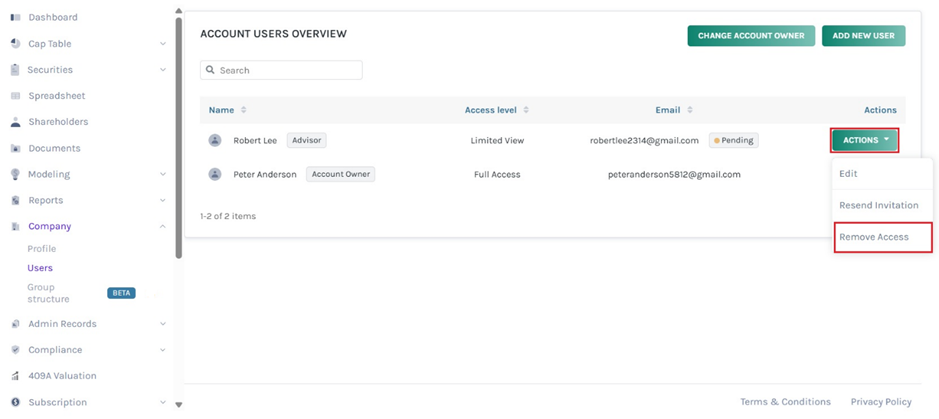
Option 3 – Remove access
To revoke the access given to the user, click on “Actions” on the right-hand side to get the drop-down menu. Then, click “Remove Access”.
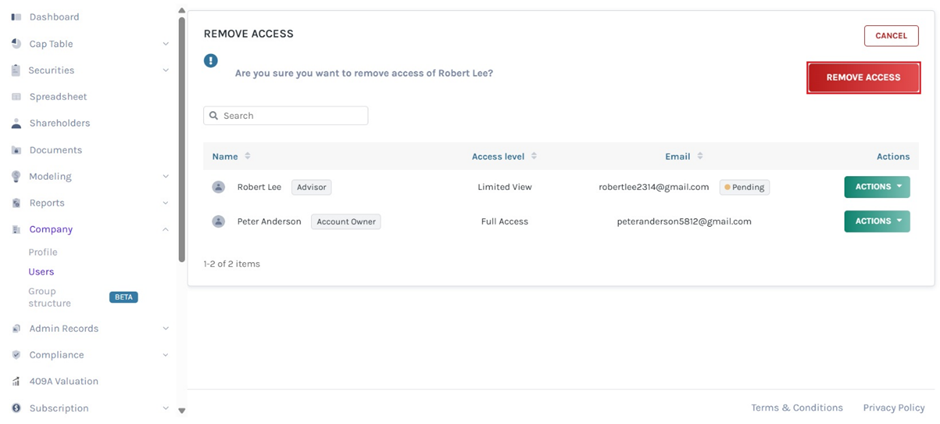
When you click, a new panel will appear asking if you are sure you want to remove access. If you want to remove it, click on “Remove Access”.
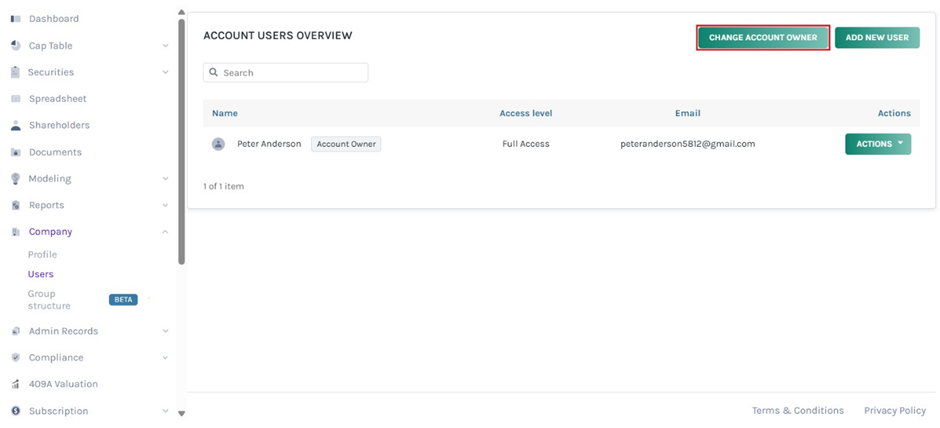
Option 4 – Change account owner
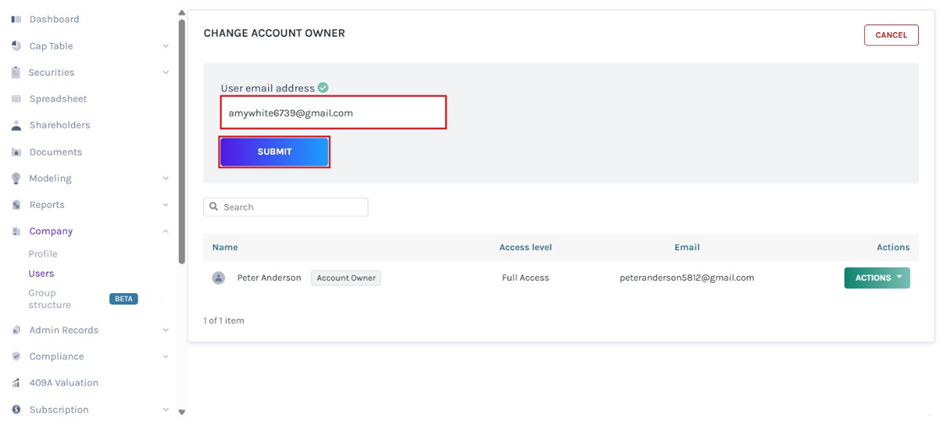
Let’s say you want to change the account owner, then click on “Change Account Owner” and you will be redirected to the below page.
Enter a valid email and you will get the option to move ahead. Then, click on “Submit”.
To know more about Eqvista’s processes, check out our support articles and knowledge base. For further queries, get in touch with us!
