Eqvista understands that you do not just need shareholders and employees to view the cap table, but also accountants, administrators, external advisors, and secretaries. They help you in making a lot of decisions and, they need to have a look at your cap table.
Add important roles to your cap table
Eqvista allows you to add users and provide access to the cap table based on their roles.
Note: The add new user feature is only available for premium account holders. To unlock this feature, kindly upgrade your account.
Here is a step-by-step guide on how to add these important roles to your cap table, which will give them specific permissions only based on their roles.
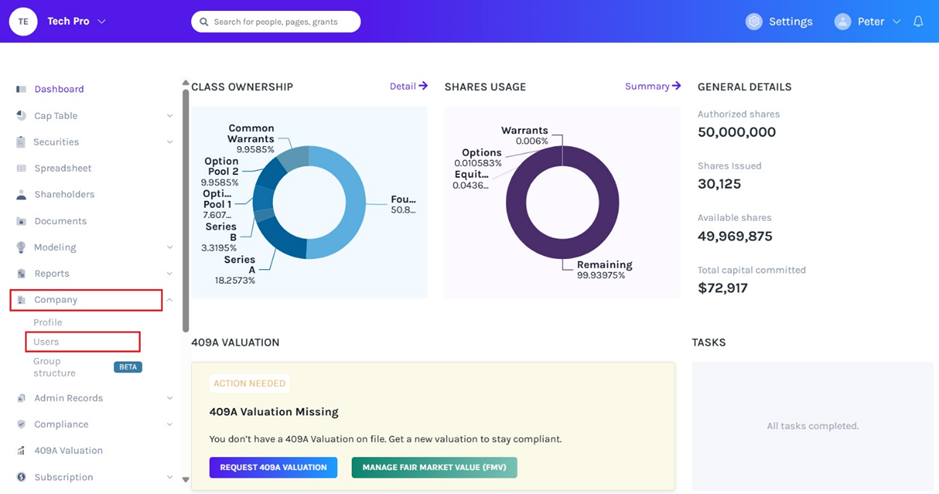
On the dashboard, click on “Company” on the left-side panel. By clicking on this, a sub-menu will appear, and then click on “Users”.
Step 2: As soon as you click on “Users”, you will be directed to the next page where you find an option to add a user.
Note: A user is not necessarily a shareholder in the company. A user can be someone who just needs to view the cap table. A user can only access a specific amount in the app based on the kind of permissions they have.
As of now, there are four main kinds of users you can add to your cap table. They are:
Administrator (Admin)
Officer
Secretary
Advisor
Let’s take the example of adding an Advisor to the cap table.
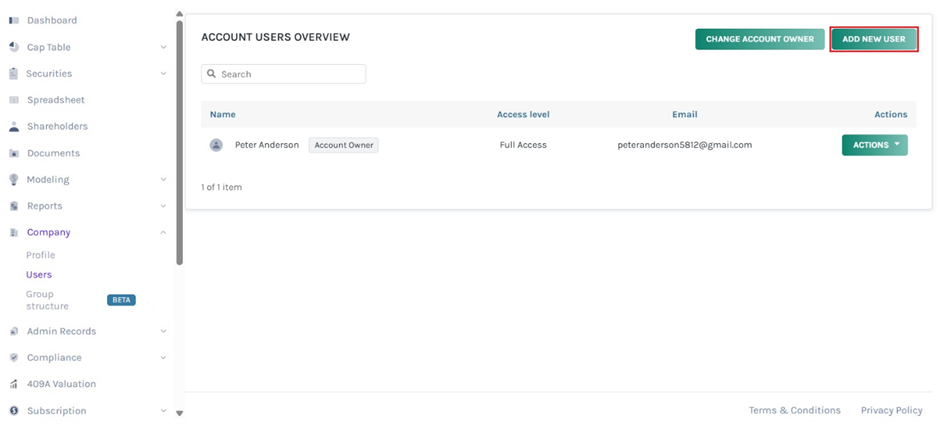
On this page, you will see a button that says “Add New User” at the top right-hand side of the page. Click on this button to add a new user to the cap table.
Note: A superuser is the only one who handles all major decisions about the cap table –add the users, share access, and delete them.
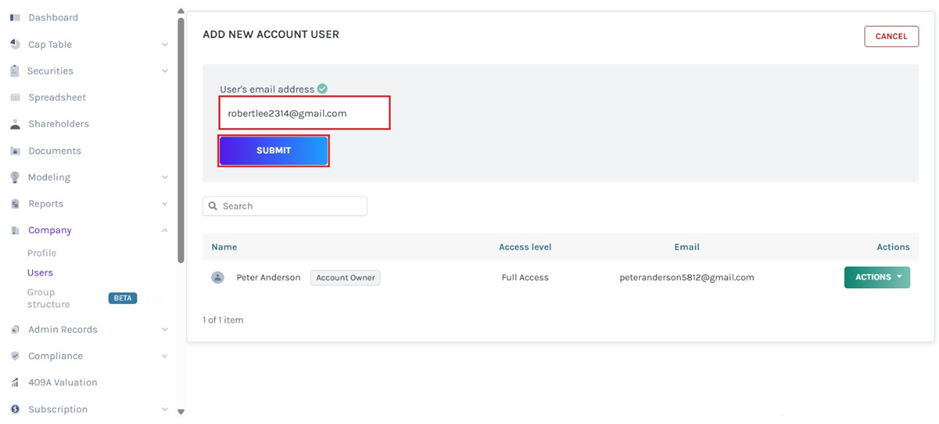
Step 3: By clicking on “Add New User”, a new panel will appear where you will need to add the email of the person to invite to the cap table as shown below:
Add in the valid email and you will then get the option to move ahead. After this, click on the button “Submit”.
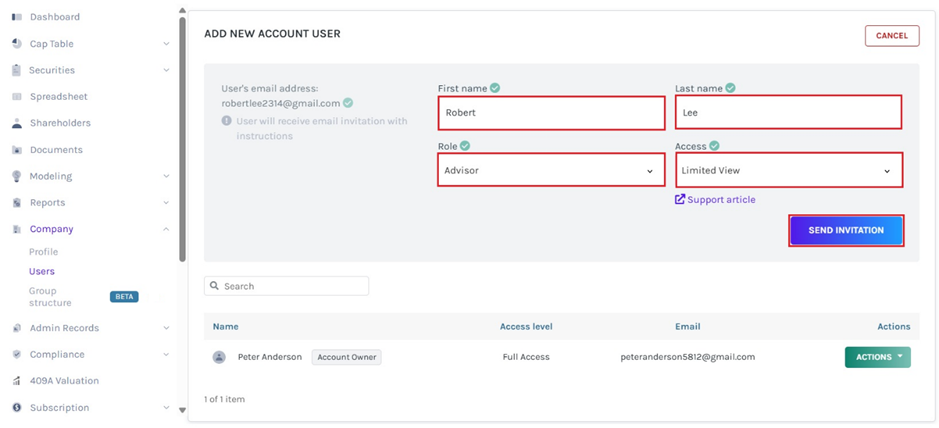
Step 4: Once you do this, new fields will appear where you will fill in the details like the first name, last name, and the role of the user.
There are four roles available for you to choose from – Administrator, Officer, Secretary, and Advisor.
Note: The four roles have different access levels. The administrator and officer have “Full Access”. The secretary has “Full View” and Advisor has “Limited View”. To know more about assigning user roles and access levels, check out the support article!
Once you have filled in these details, select the button that says “Send invitation”.
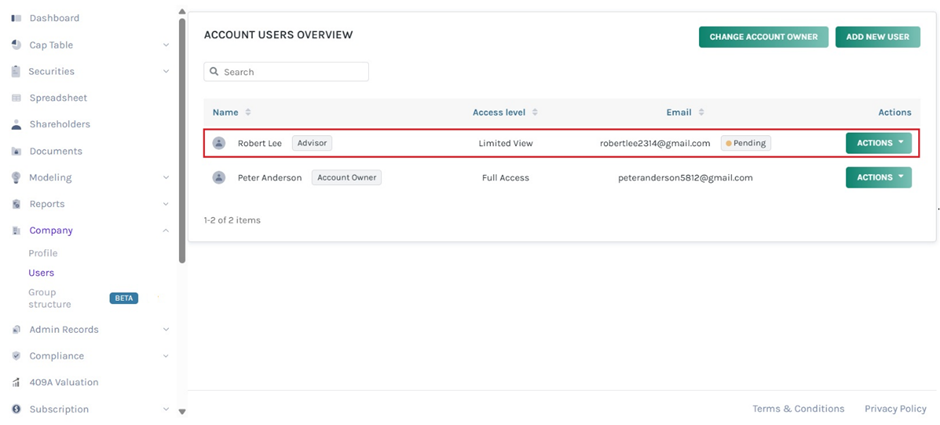
Step 5: As soon as you click on “Send Invitation”, you will be directed to the following page below.
With this, a user has been added to the cap table and would have received an email for the invitation to view the cap table as an advisor.
Here, you will be able to see the added user and the status of the invitation.
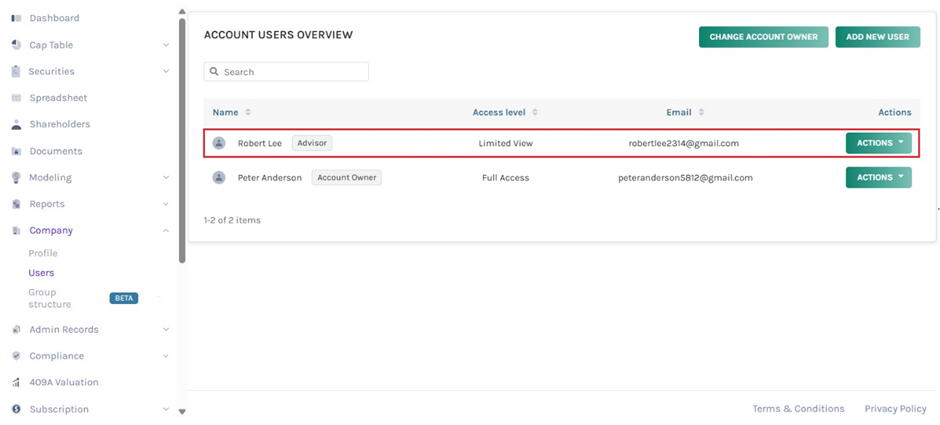
Once the invite has been accepted by the user, the status will disappear as shown below.
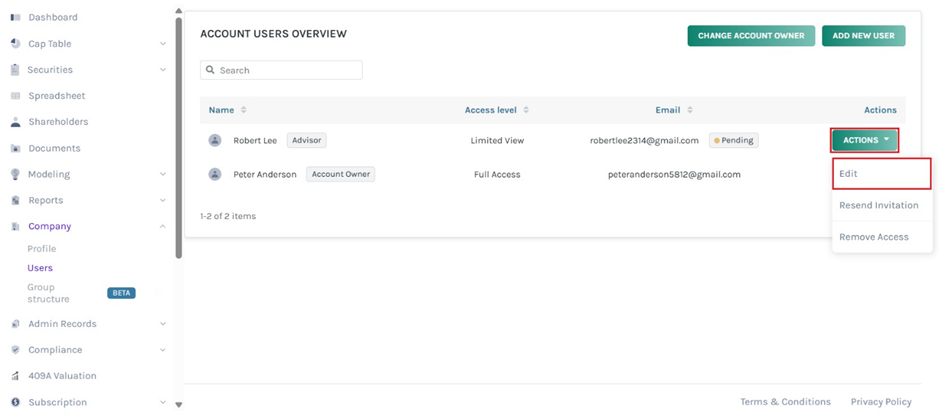
Apart from adding users, a superuser can perform various functions – Resend Invitation, Edit, Remove Access, and Change Account Owner. To help you further understand, we have explained each below:
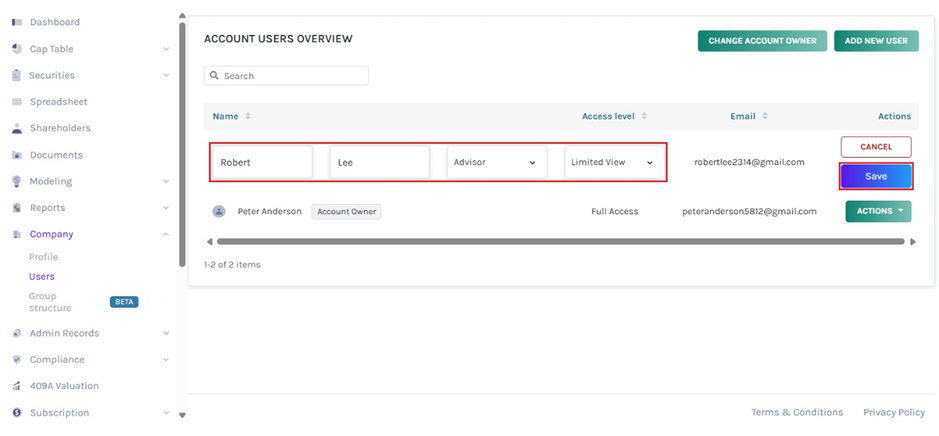
Option 1 – Edit
SupposIf you want to change the name of the user and their role, click on “Actions” on the right-hand side to get the mini drop-down menu. Then, click “Edit” to change the details of the user.
Once you do this, you will be redirected to the below page.
Option 2 – Resend invitation
Suppose the user has not received the invite yet, you want to resend the invitation. Then, click on “Actions” on the right-hand side to get the mini drop-down menu. Then, click “Resend Invitation”.
Option 3 – Remove access
In case you want to revoke the access, you can easily click on “Actions” on the right-hand side to get the mini drop-down menu. Then, click “Remove Access”.
When you click on this, a new dialogue will appear asking if you are sure you want to remove access. If you want to remove it, then click on “Remove access” and if you do not want to remove it, then click on “Cancel”.
With that, the user would be removed from the list and the email they received would no longer help them access the cap table.
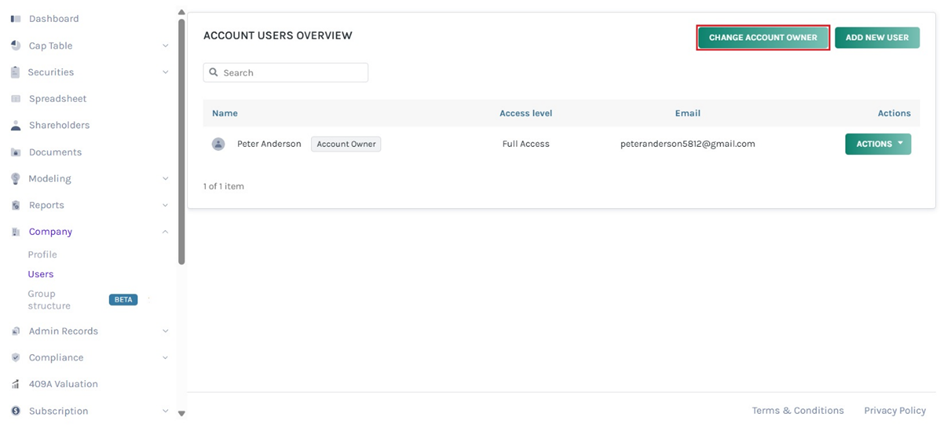
Option 4 – Change account owner
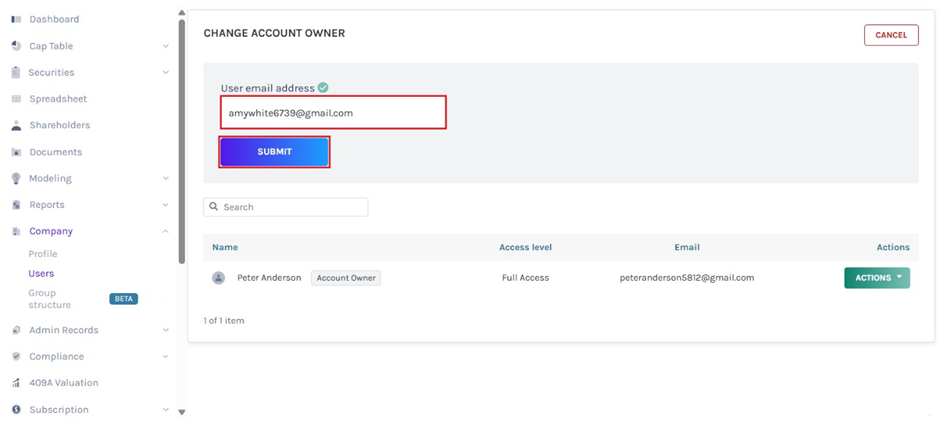
Let’s say you want to change the account owner, then click on “Change Account Owner”. Once you click, you will be redirected to the below page.
Then, enter a valid email and you will then get the option to move ahead. After this, click on the button “Submit”.
Just like this, you can easily add the other users as well with their specific roles. If you have any doubts or want to know more, check out the other support articles here or contact us!