Authorized Shares Overview
Here we will explain how to check the number of authorized shares in your company account on Eqvista.
View authorized shares overview
Eqvista allows you to view your authorized shares and update them. Here is the step-by-step guide on how to view the authorized shares overview or even edit the number of authorized shares in a company.
Step 1: You will first need to log into your Eqvista account and then click on the company account that you want to view the authorized shares overview.
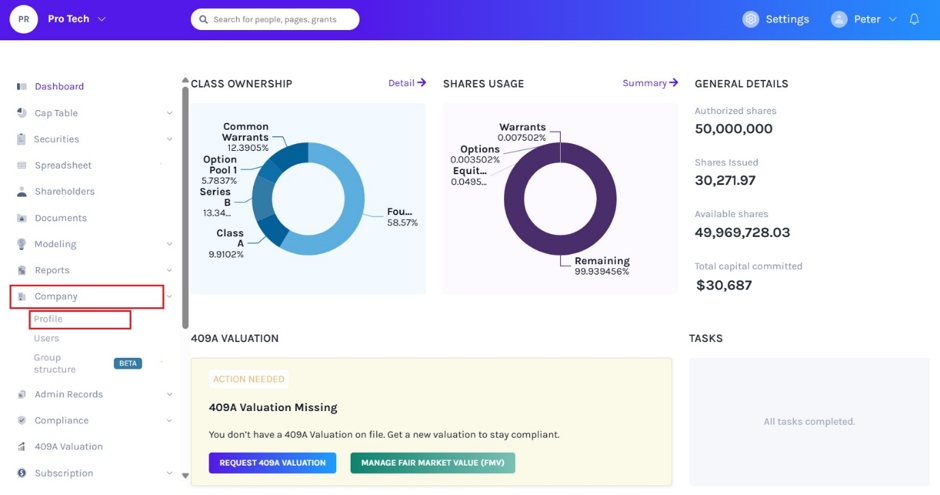
Once you are done with this, you will reach the main dashboard and click on “Company” on the left-hand side of the dashboard to get a drop-down menu. From this menu, click on “Profile”.
Step 2: By clicking on this, you will be directed to the next page that shows all the details of the company.
Note: On this page, you will see three sections – Company Profile Overview, Authorized Shares Overview, and Financial Statements. To further understand the various sections in detail, check out the support article here!
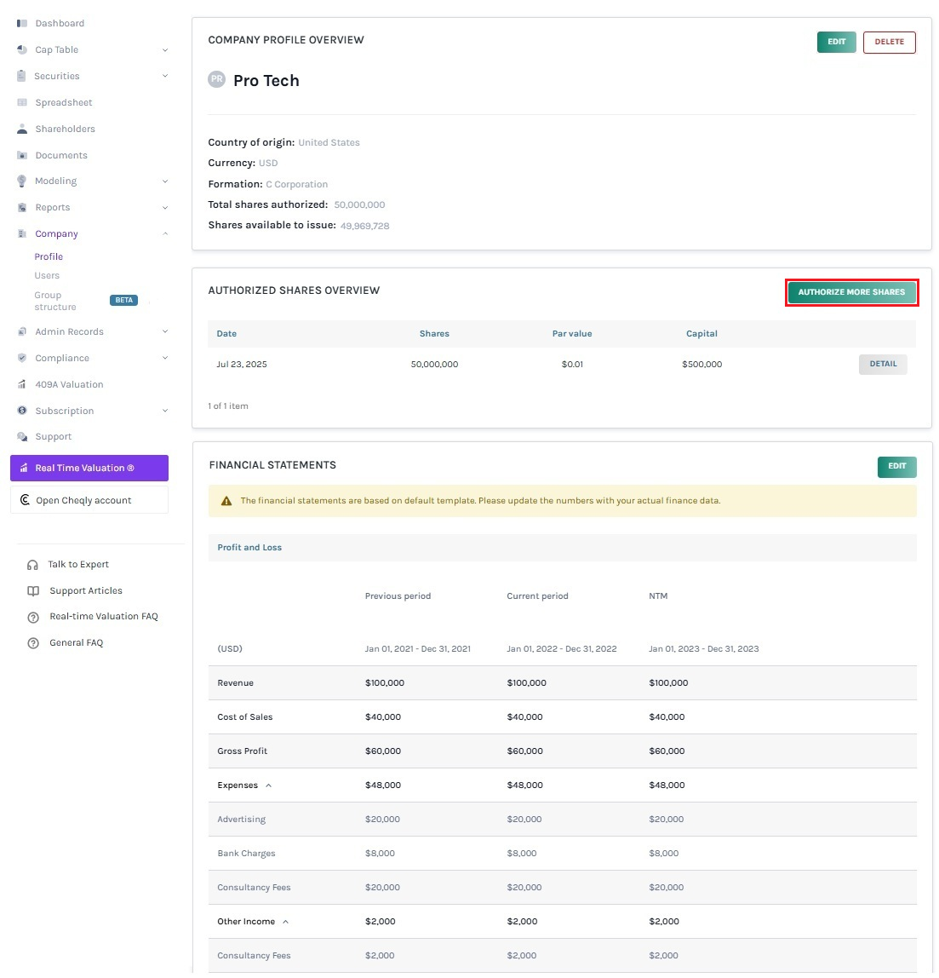
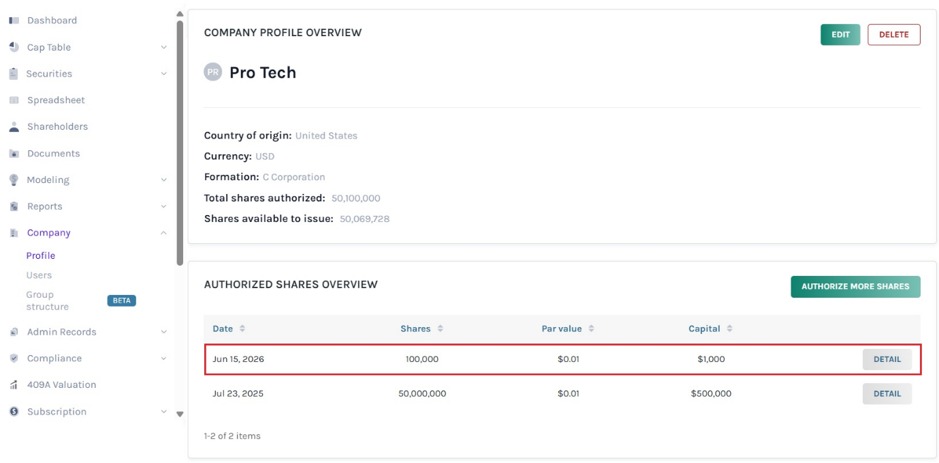
The second panel under the company’s details is the authorized shares overview of the company.
Here, you will be able to see the date on which the shares were issued to the company, how many shares were issued, the price per share, and the committed capital. You can also add authorized shares in the company with the button “Authorize More Shares”. This button is on the right side of the selected area in the above image.
Note: If the state/country allows the total number of the company shares to be unlimited. We suggest keeping 10,000,000 shares as we calculate the threshold for authorized shares and prevent over-issuing shares.
Authorize more shares
Step 3: Let us say that you want to increase the shares of your company as your company has been authorized with more shares. In this case, click on the button “Authorize More Shares”.
A pop-up box will appear as shown below.
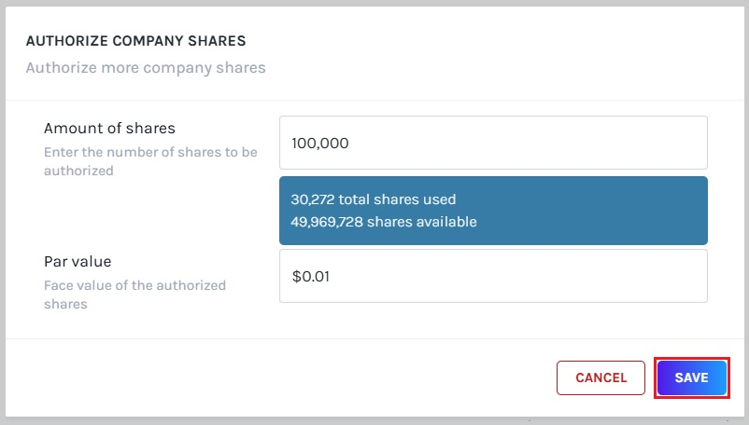
In this box, you would get the default values as shown above. All you need to do is add in the number of additional shares that your company has received. Also, you would have to add the updated par value of the shares.
Once you are done, click on “Save”.
All the details would be saved and you would be directed back to the page where you can easily see the authorized share overview.
Step 4: If you want to view the details of the authorized shares, click on “Detail”.
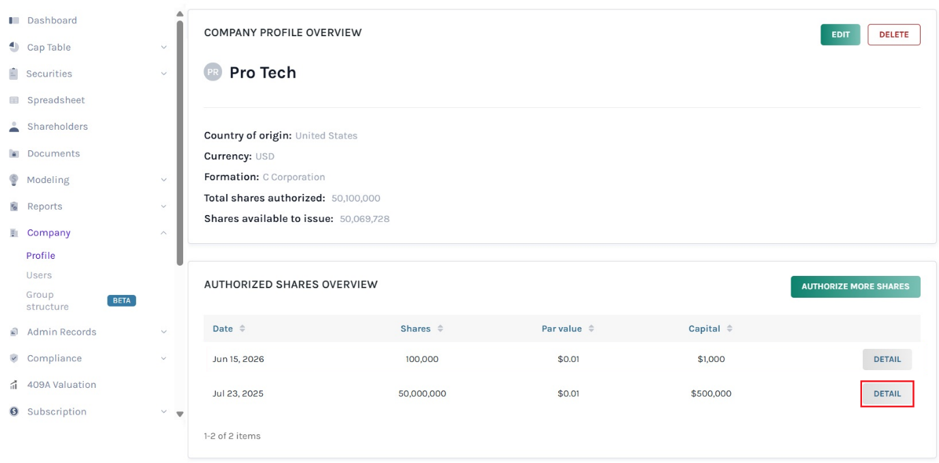
Once you click, you will be redirected to the below page. There are two options here:
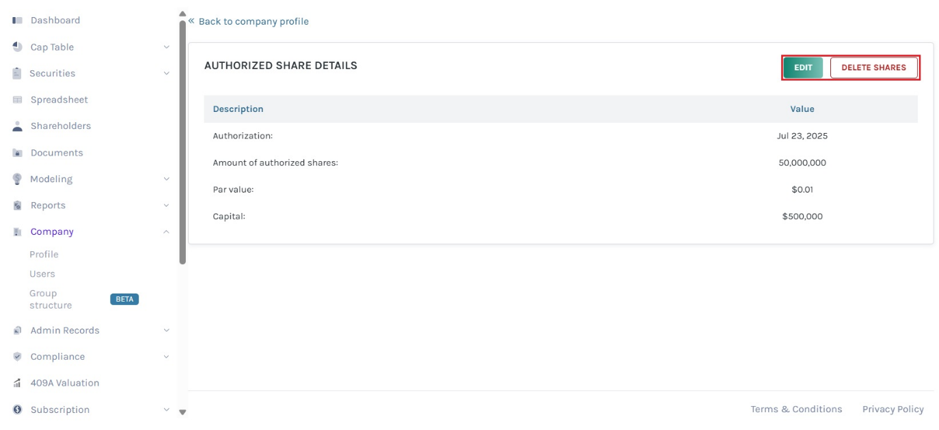
Option 1 – Edit
Here, you can edit the details of authorized shares – authorization date, number of authorized shares, and par value.

Once done, click on “Submit Changes”. If you want to cancel the process, you can click on “Cancel Edit”.
Option 2 – Delete
If you want to delete the authorized shares you added, then click the option “Delete Shares”. By clicking on this, you will get a dialogue box as shown below with the button “Delete”. If you want to cancel the process, you can click on “Cancel”.
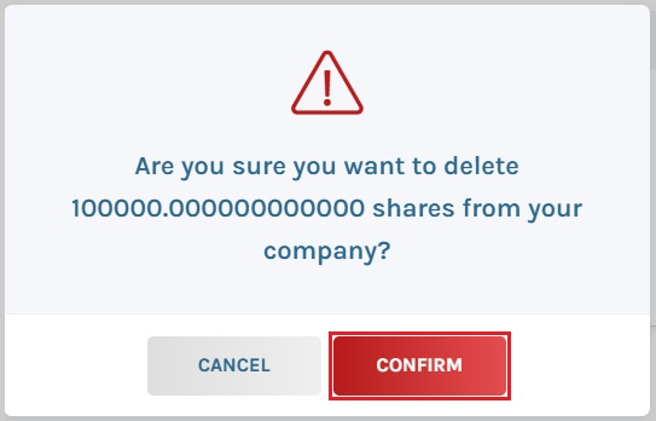
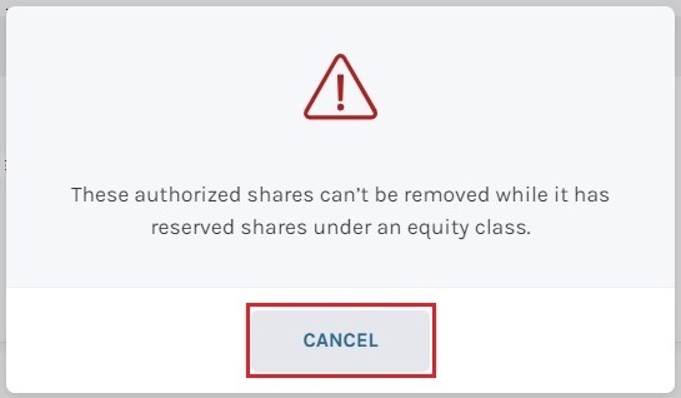
Kindly note that you cannot delete all the authorized shares of the company. If doing so, you will be informed that these authorized shares can’t be removed as shown below. Click the button “Cancel” to go back.
Note: If you want to see a more detailed summary of the authorized shares and how they are distributed, you can follow the next steps.
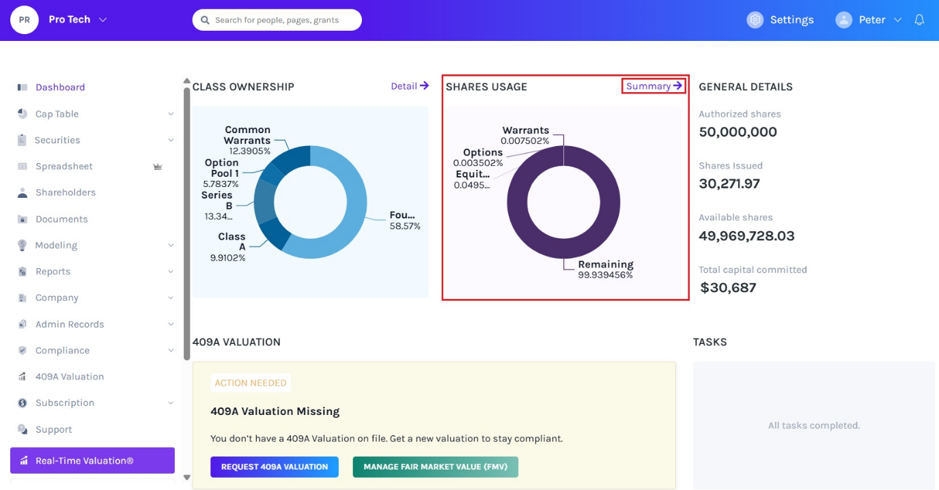
Step 5: Get back on the main dashboard by clicking on “Dashboard” on the left-hand side panel of the screen. From here, there are two ways through which you can view the authorized shares overview as below.
On the dashboard, you will see a small summary of the “shares usage” on the top right-hand side of the dashboard. In this box where you can see the summary, there is an option that says “Summary →”. Click on this as shown below.
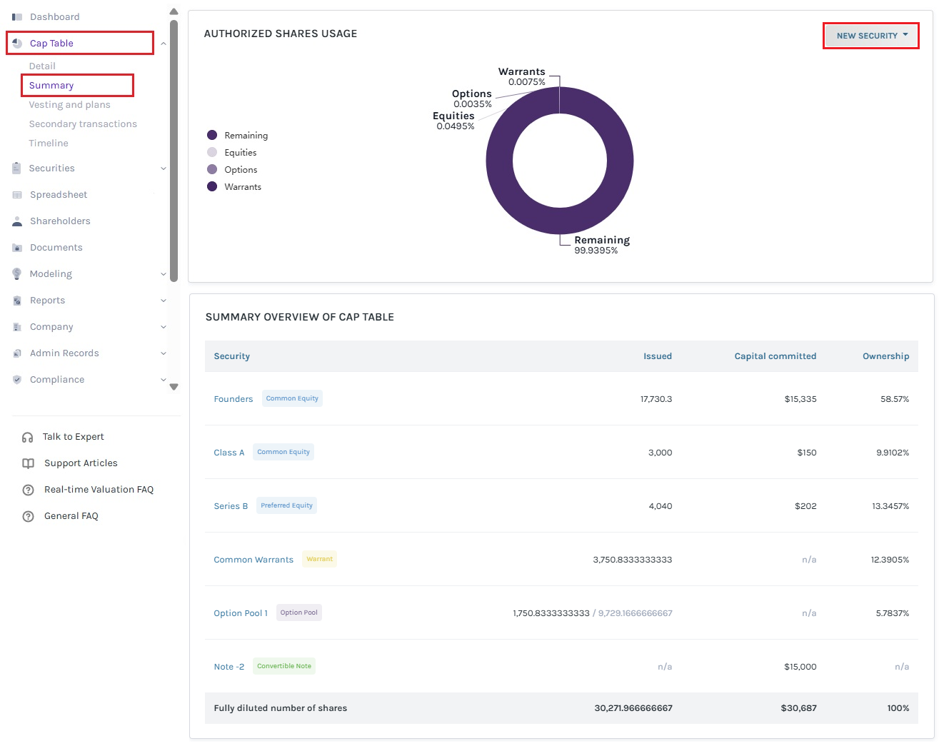
The second method is by selecting the option “Cap Table” on the left-hand side of the dashboard to get a drop-down box. From here, select the option “Summary”.
Step 6: By following any of the above two methods, you will be directed to the following page. Here, you will be able to see all the details of the share classes that have been created using the authorized shares and how many of them have been issued, capital committed, and ownership.
Note: You can issue shares, options, warrants, and convertible notes by clicking the option “New Instrument” and a drop-down will appear and select the security. Check out the respective support article to learn more about this.
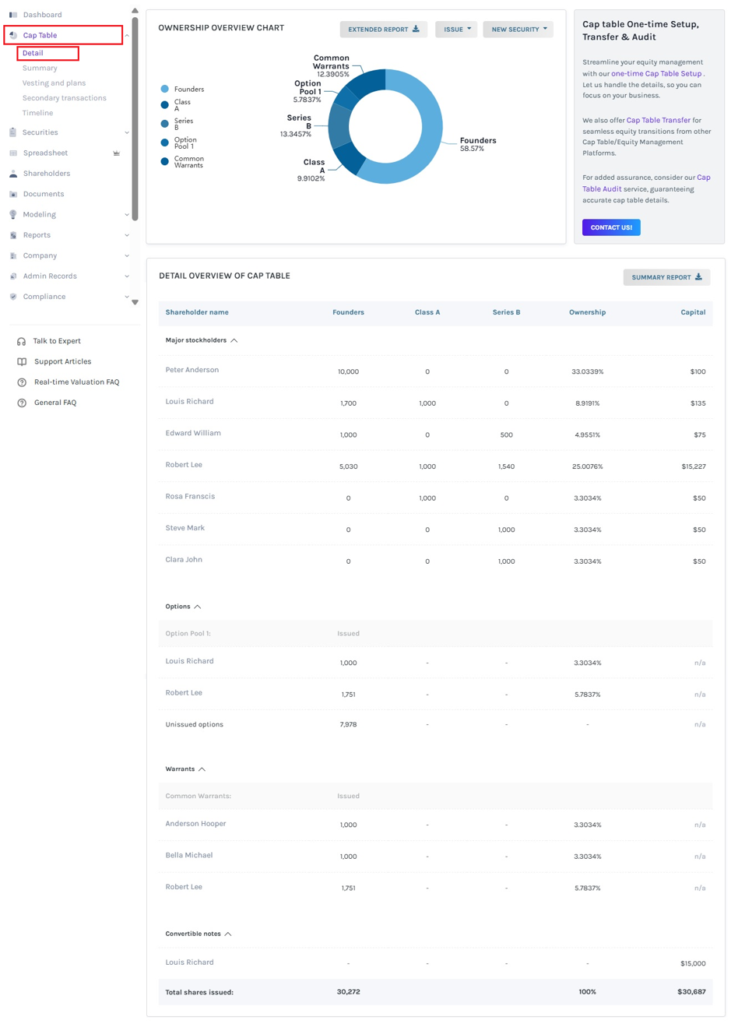
Step 7: If you want to see a much more detailed overview of who has been issued what kind of share and how many, click on “Cap Table” on the left-side of the page to get a drop-down menu and select “Detail”.
Note: You can download an extended report and a summary report by clicking “Extended Report” and “Summary Report”. To understand how to download a summary and extended report from the cap table section, check out the respective support article!
If you want to know more or understand any other process, check out the other support articles here or contact us!
