Adding Your Secretary to Your Cap Table
Eqvista understands the need to have your lawyer check the cap table now and then to help you make the right decisions.
How to add your secretary to your cap table?
On Eqvista, you can easily add your secretary to your company account, allowing them to view the cap table of your company.
Note: The add new user feature is only available for premium account holders. To unlock this feature, kindly upgrade your account.
Here is the step-by-step guide on how to add your secretary to your cap table.
Step 1: Once you have logged into your account on Eqvista, select your company account.
Then, click on “Company” on the left-side panel on the dashboard. A sub-menu will appear. Click on “Users” on the sub-menu as shown below.
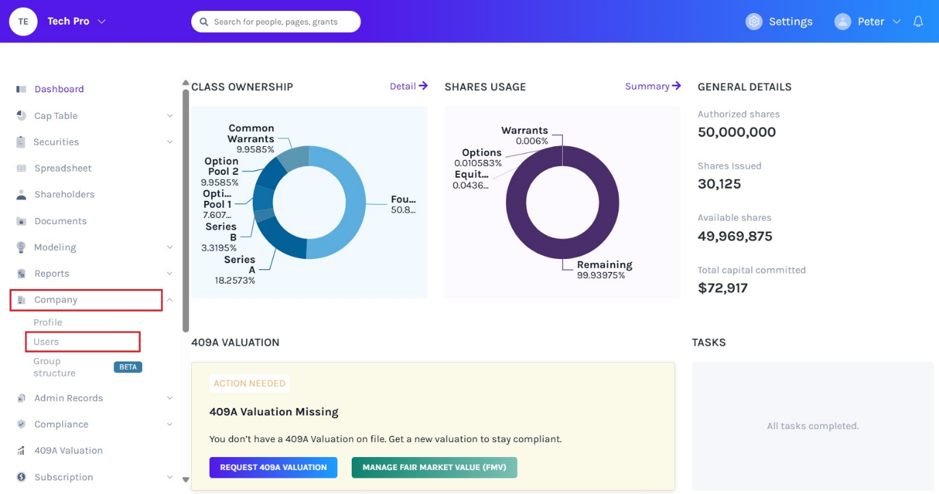
Step 2: By clicking on “Users”, you will be directed to the next page where you find an option to add a user.
Note: It is important to understand that a user is not necessarily a person who owns shares in the company. Basically, a user is a person who can view the cap table and manage the cap table as well, if the superuser (the person who creates the profile on Eqvista – which is you) gives permission.
A superuser is the only one who handles all major decisions about the cap table –add the users, share access, and delete them.
A secretary is a person who helps you manage your company’s cap table. This is one of the main reasons why you might need to add your secretary to your company’s account.
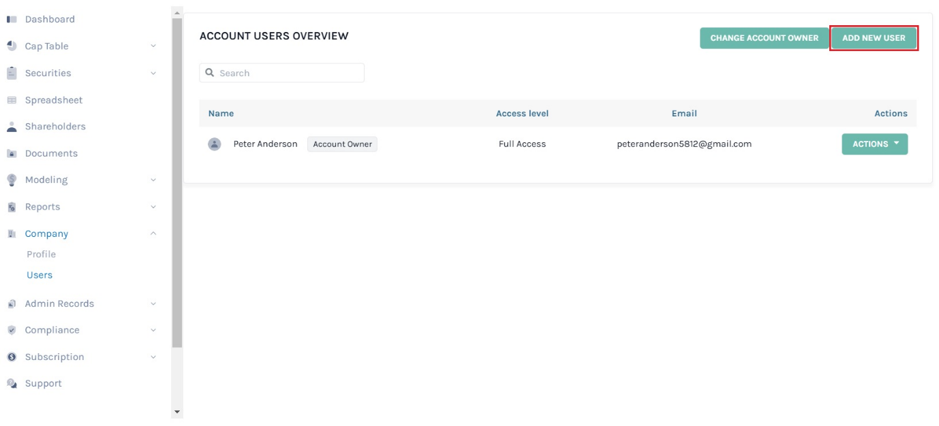
Once you reach this page, click on “Add New User”.
Step 3: When you click on “Add New User” a pop-up dialogue box will appear as shown below:

Add in the valid email and you will then get the option to move ahead. After this, click on the button “Submit”.
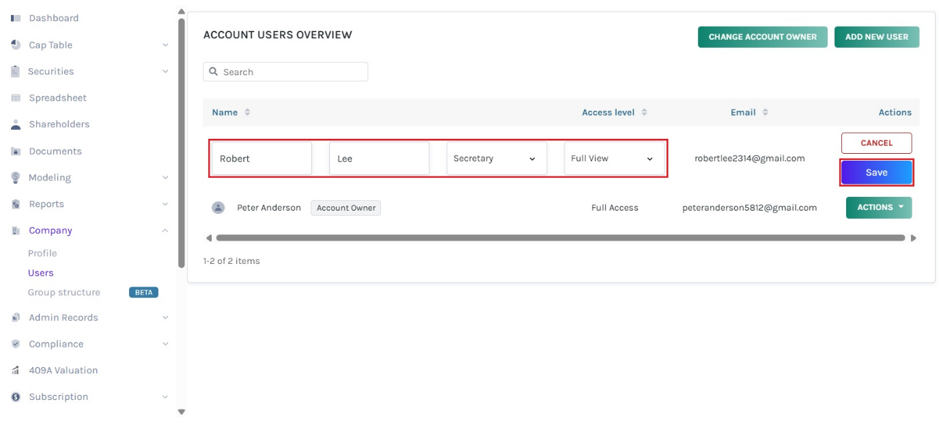
Step 4: Once you do this, new fields will appear where you will fill in the details like the first name, last name, and the role of the user. In this case, we are adding a user with the role of Secretary.
There are four roles available for you to choose from – Administrator, Officer, Secretary, and Advisor.
Note: The four roles have different access levels. The administrator and officer have “Full Access”. The secretary has “Full View” and Advisor has “Limited View”. To know more about assigning user roles and access levels, check out the support article!
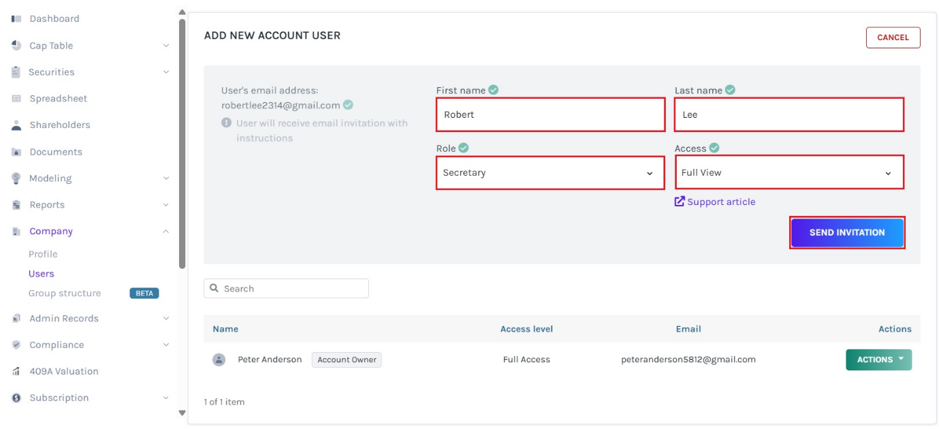
Once you have filled in these details, select the button that says “Send invitation”.
Step 5: As soon as you click on “Send Invitation”, you will be directed to the following page below.
With this, a user has been added to the cap table and would have received an email for the invitation to view the cap table as a secretary.
Here, you will be able to see the added user and the status of the invitation.
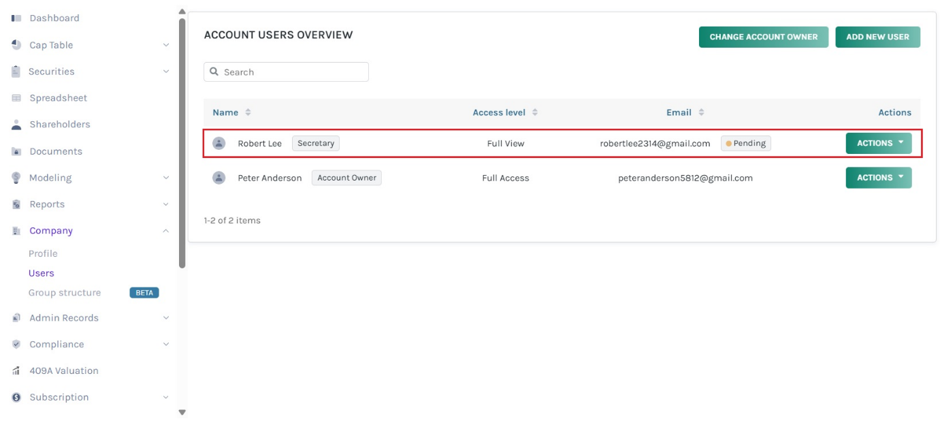
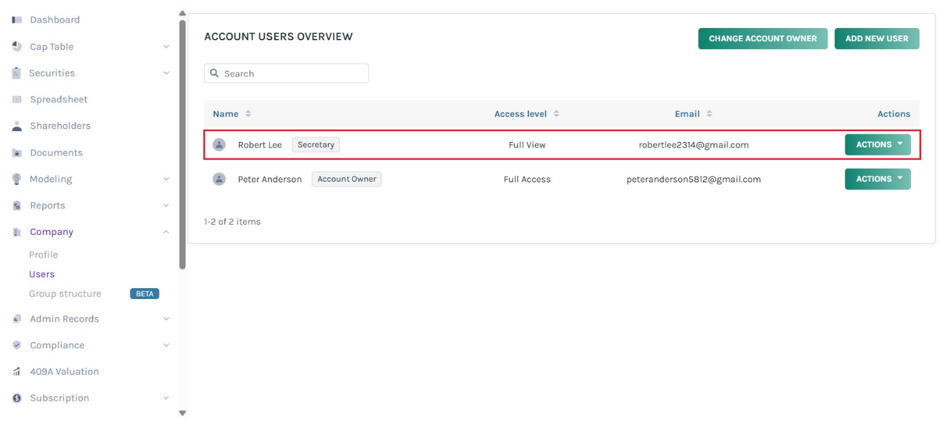
Once the invite has been accepted by the user, the status will disappear as shown below.
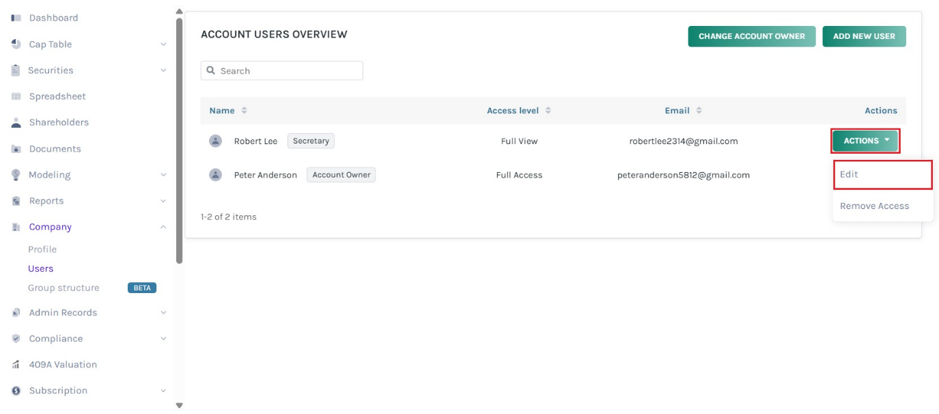
Step 6: If you want to change the name of the user and their role, click on “Actions” on the right-hand side to get the mini drop-down menu. Then, click “Edit” to change the details of the user.
Once you do this, you will be redirected to the below page.
Apart from adding users, a superuser can perform various functions – Resend Invitation, Remove Access, and Change Account Owner. To help you further understand, check out the support article!
If you have any doubts or want to know more, check out the other support articles here or contact us!
