Dashboard
To make your user experience better, we have created a dashboard that has shortcuts for all the main actions you might need on the cap table.
View Eqvista Dashboard
Here is a guide to help you understand how to view and use the dashboard on Eqvista.
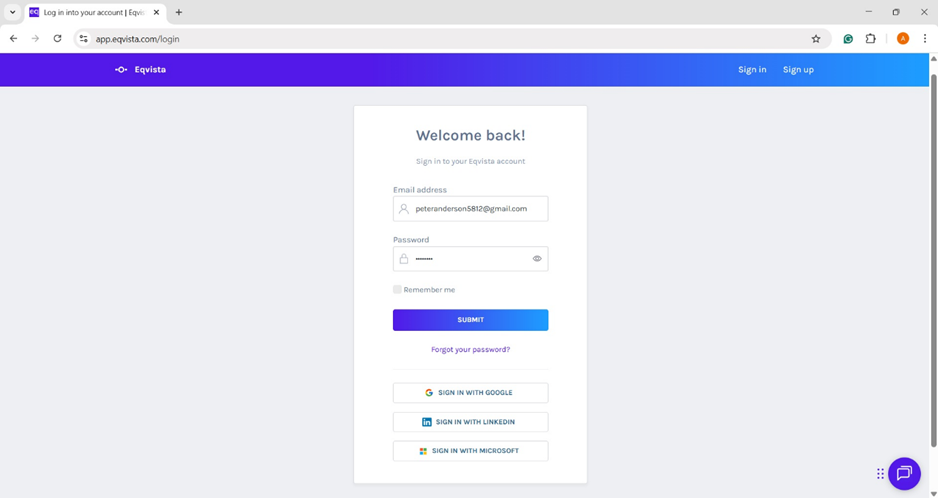
Step 1: Once logged into your Eqvista account and select the company account, you will be directed to the main dashboard.
Step 2: On this main page, you will find some shortcuts that will help you with your cap table. You can easily manage your cap table right from the dashboard of the app. Here is what the page would look like.
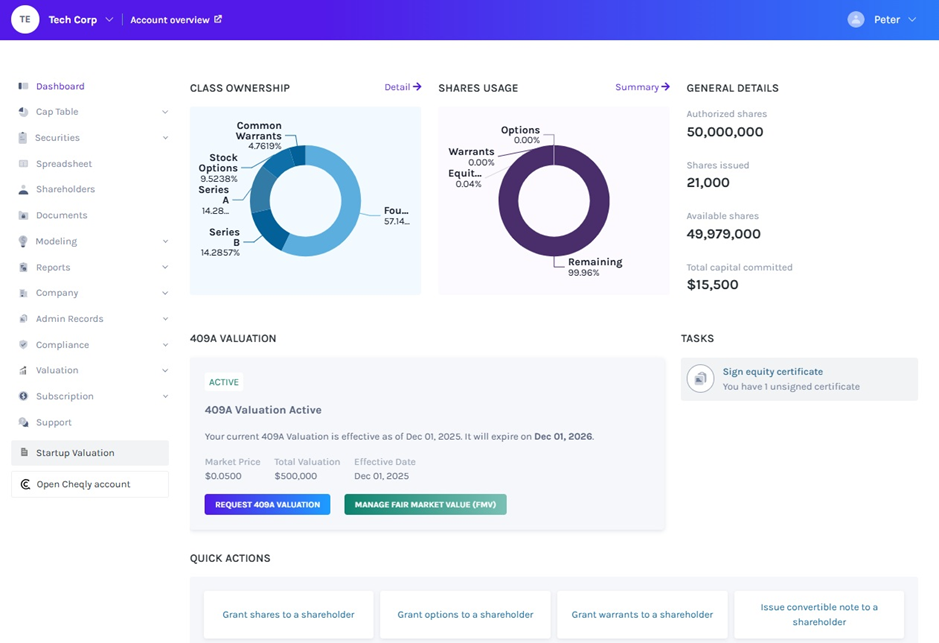
Let us talk about each part of the dashboard.
Panel 1
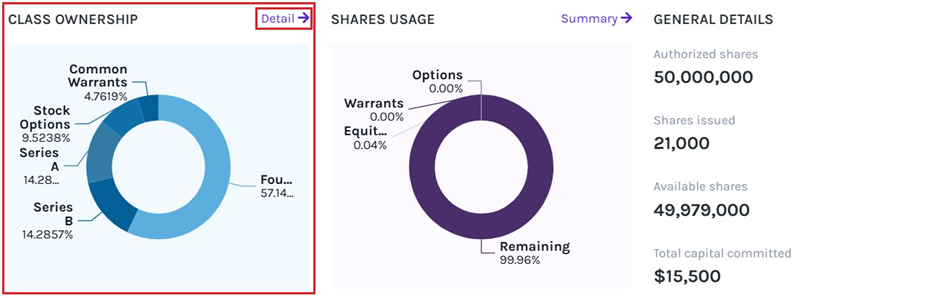
On the top left side of the page, you will be able to see a graph about the ownership of the company that says “Class Ownership”. Under the heading, a graph shows which equity makes up how much of the company’s ownership. There is also a link above the graph that says, “Detail →”. By clicking on this, you will reach the page that shows you an overview of all the shares and equity classes in the company, as below.
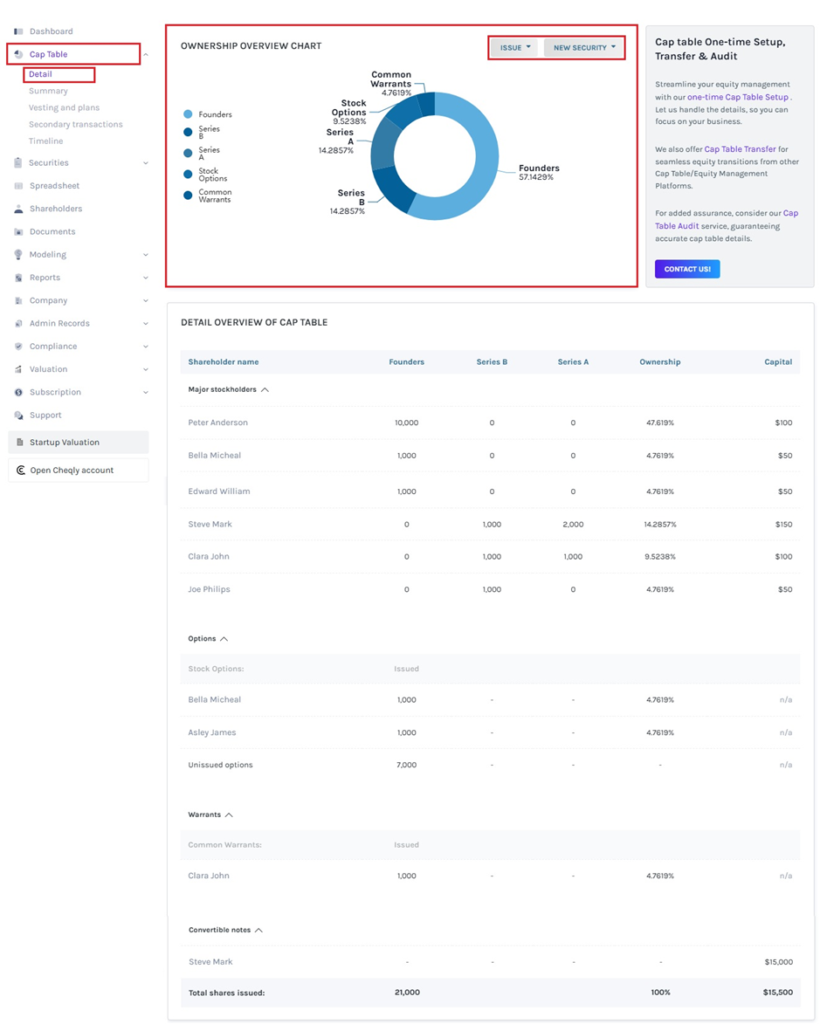
From here, you can issue the shares, create new equities, and view all that has been done under the ownership.
Note: You must add a shareholder profile to issue shares. To know all about issuing shares to a shareholder, check out the support article here!
Panel 2
Moving to the next part of the dashboard, there is a panel for “Authorized Shares Usage” on the top right side of the page as shown below.
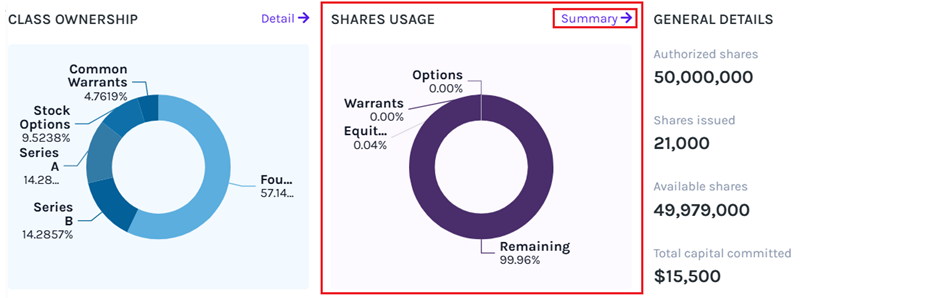
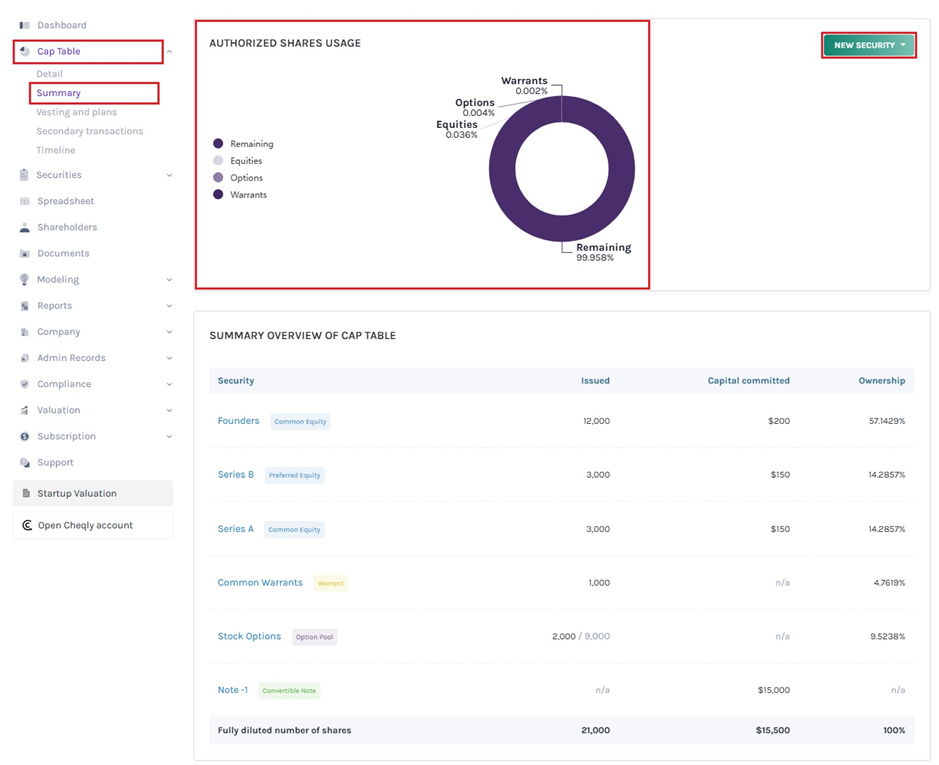
In this part of the page, you will be able to see the details of the percentage of shares added for each kind of security, and the percentage of shares left. To view the parts, you will need to hover the mouse pointer over the chart to see each kind of security. A link above the graph says, “Summary →”. This would take you to the following page to see the summary view of the company’s cap table.
Note: You must add a shareholder profile to issue security instruments. To know more on how to add a security instrument, check out the support articles here!
Panel 3
The next panel shows the general details of the company including the number of authorized shares, shares issued, available shares, and total capital committed to the company.
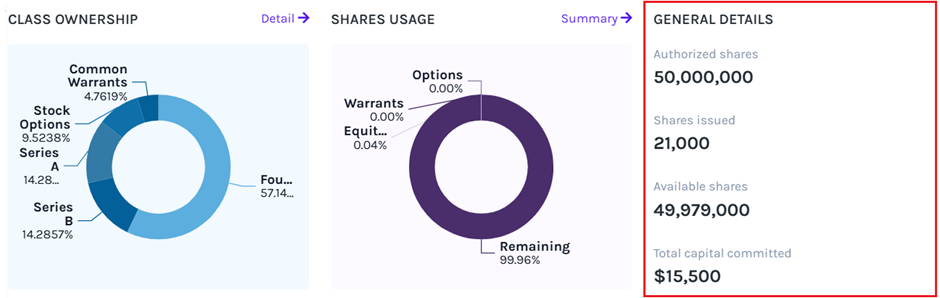
It is just like a basic overview of the shares owned, issued, available, and capital committed by the company.
Panel 4
The next panel on the dashboard is dedicated to the “409A Valuation”. Here you can see if you have completed or requested any 409A valuations in the past along with two options.
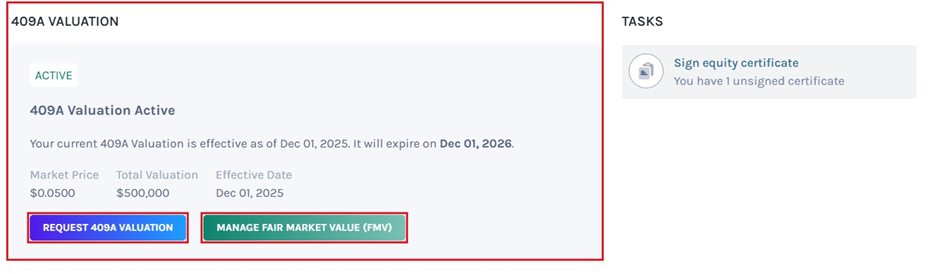
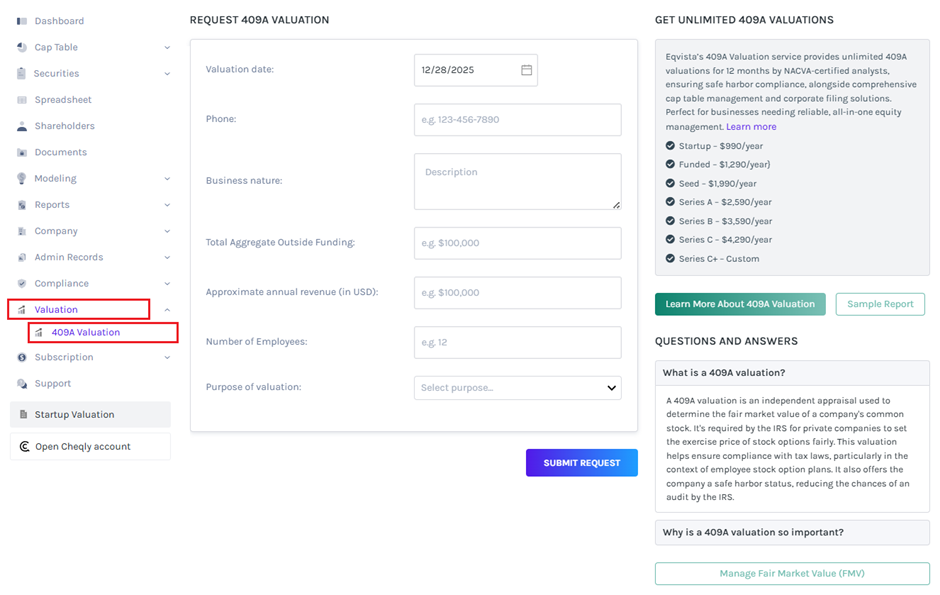
A. Request 409A Valuation: When you click on this, you will be redirected to the page where you need to add the details to request for 409A valuation as shown below.
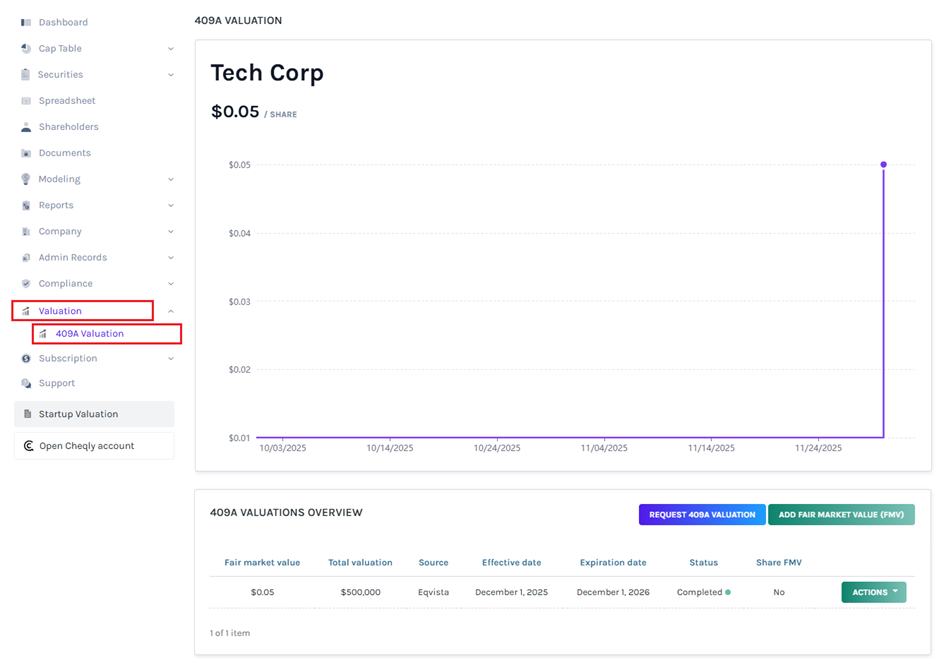
B. Manage Fair Market Value (FMV): Once you click this on the dashboard, you will be redirected to the page where you can view the details of fair market value (FMV) as shown below.
Note: To know more about 409A valuation and our service click here! Check out our support articles to request, add, edit, and share the FMV.
Panel 5
The last panel is dedicated to the “Tasks”. Here, you can see a list of tasks assigned to you.
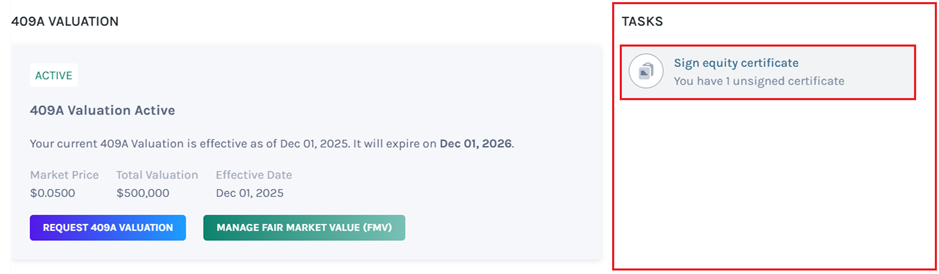
When you click on the task, you will be redirected to the source page where you can see the details of the tasks assigned to you as shown below.

Panel 6
The next panel below the above one has FOUR buttons. All these buttons come under this panel that is named “Quick Actions”. It was created to allow you to directly issue various kinds of security right from the dashboard instead of going through the other longer steps.

The four buttons from left to right are:
- Grant shares to a Shareholder: Under this option, you will be taken to a page where you can easily begin to issue shares to a shareholder.
- Grant options to a Shareholder: By selecting this, you will be taken to a page where you can issue options to a shareholder.
- Grant warrants to a Shareholder: If you choose this option, you will be taken to a page where you can grant warrants to a shareholder.
- Issue convertible note to a Shareholder: This option would take you to the page where you can create a convertible instrument like KISS or SAFE and issue it to a shareholder.
Note: To know more about how to issue shares and security instruments to shareholders, check out the respective support articles.
If you want to know more or understand any other process, check out the other support articles here or contact us!
