Issuing Shares to Investors on Eqvista
About to take up an investment for your company and need to issue shares to your investors? With Eqvista, everything can be done easily.
There are two situations or ways in which you can issue shares to investors in Eqvista.
Here is a step-by-step guide on how to issue shares to investors through Eqvista.
Issue shares to investors
On Eqvista, there are two methods through which you can issue shares to your investors, making it easier to manage your equity. Whether you’re a startup or a growing company, our platform is designed to facilitate the issuance of shares efficiently.
Step 1: Log into your Eqvista account and select your company account to issue shares.
Situation 1
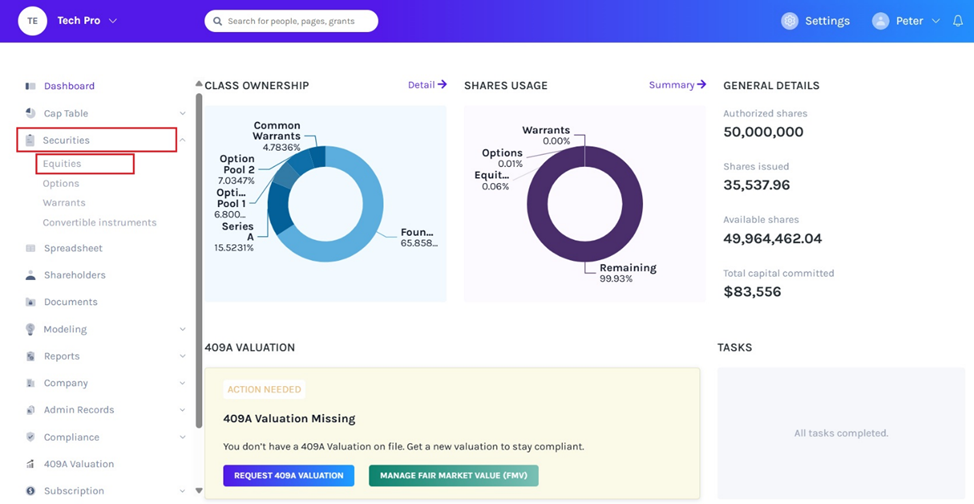
You will then reach the company’s dashboard. From here, click on “Securities” from the left-hand side and click on “Equities”.
Step 2: By clicking “Equity”, you will be directed to the following page where you can easily begin the process of issuing shares.
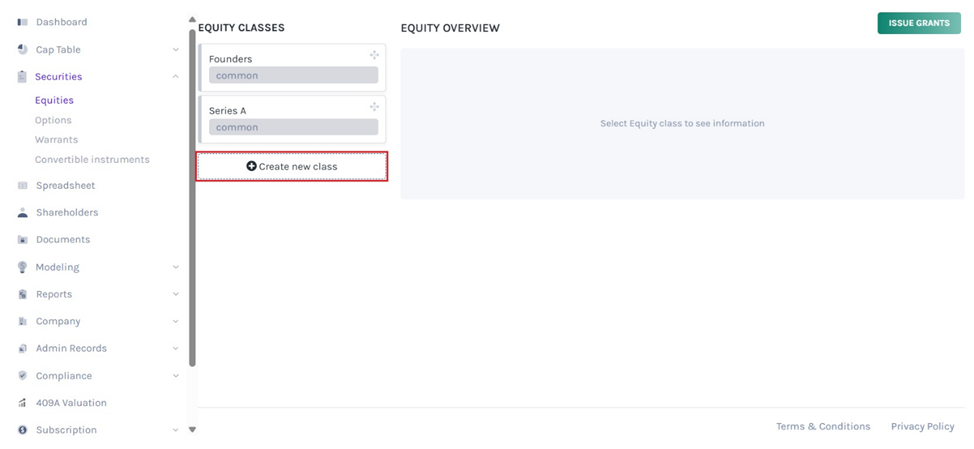
But as mentioned before, you might have to first create an equity class in case you haven’t created one yet. This is mostly if you have just started your company and have just issued shares to the founders.
If you have already raised a funding round in your company, you might have a class of equity for it – such as an equity class – Series A. In this case, you would still have to create a new class for the next capital round, name the equity class Series B as an example, and so on.
Assuming that the first round is already raised, we would create a share class with common and preferred shares and name it Series B. For this, we need to click on “Create New Class”.
Step 3: By doing this, you will be directed to the following page:
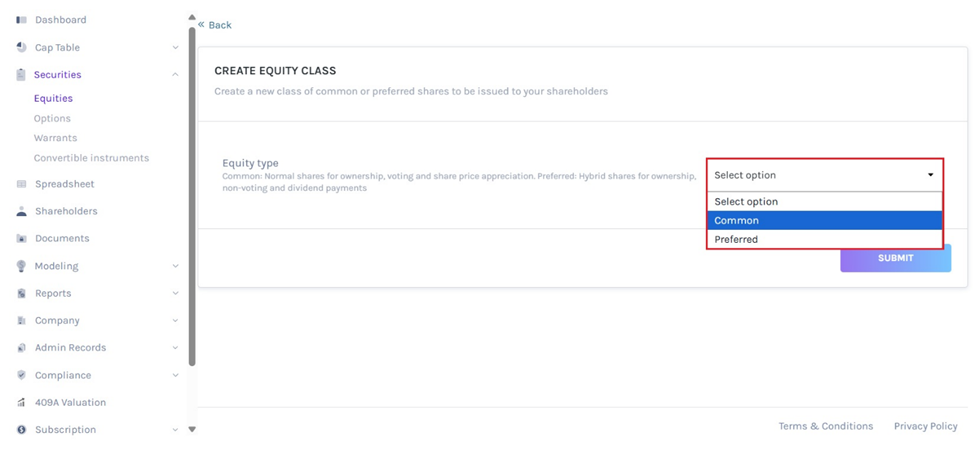
Here, you will have to choose the kind of shares that the class would hold. You have two options to choose from – common shares or preferred shares. Select the one that is most suitable as per the deal.
In this case, we selected common stock.
Step 4: After selecting the option “Common” in the drop-down list of the Equity Type, an additional field appears where you need to provide a name to the equity class you are creating.
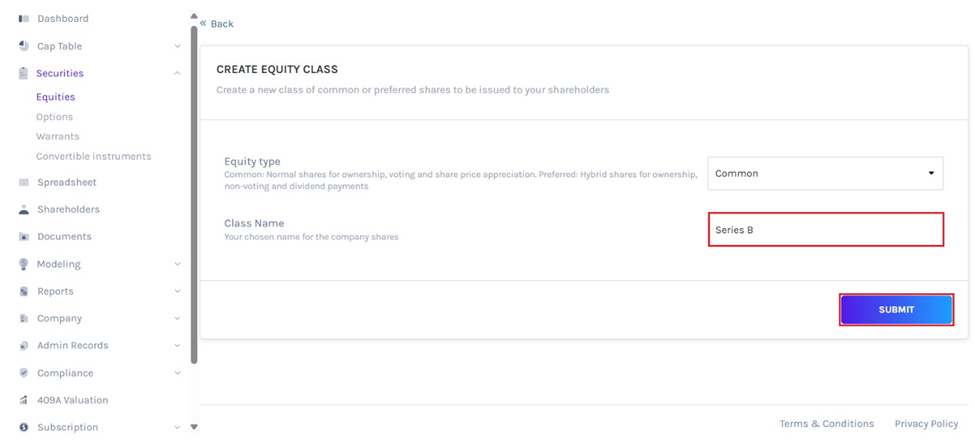
Once you give a name to the class, click on “Submit”.
Step 5: With this, the class is created and you are taken to the next page where you can now begin the process of issuing the shares to the investor.
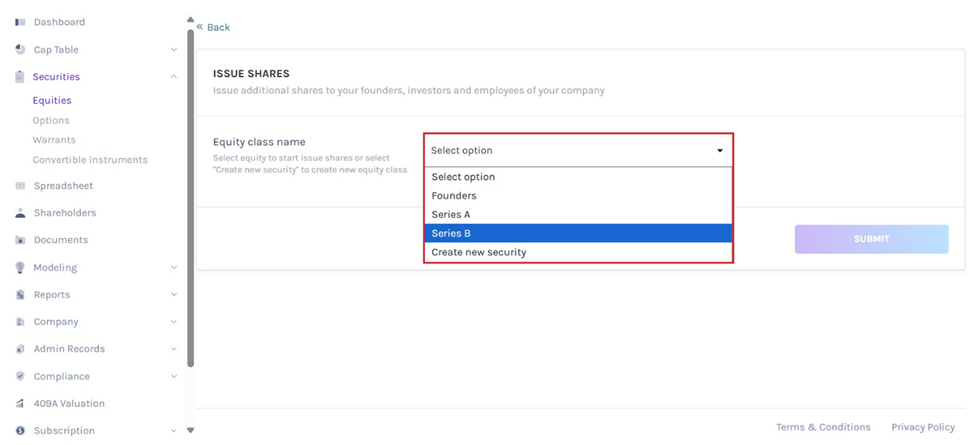
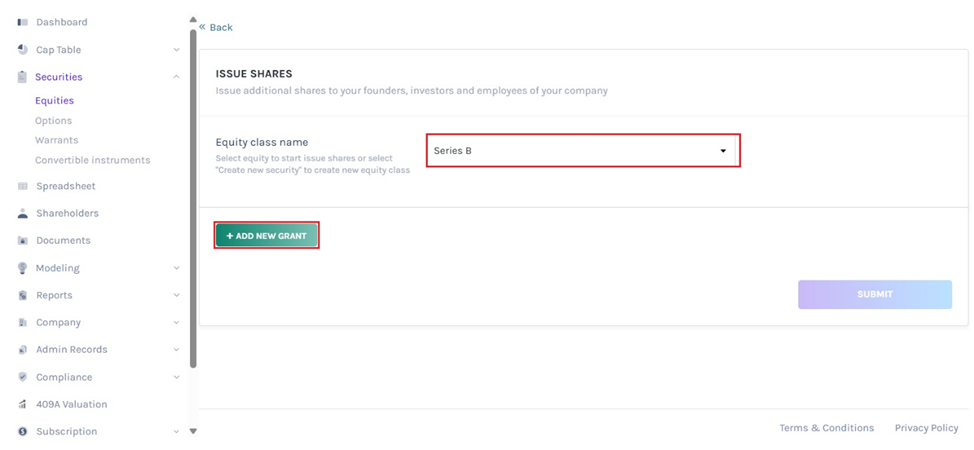
The first step to issuing the shares to the investor is to select the equity class name.
Step 6: As soon as you select the equity class name, a button shows up below it that says, “Add new grant”.
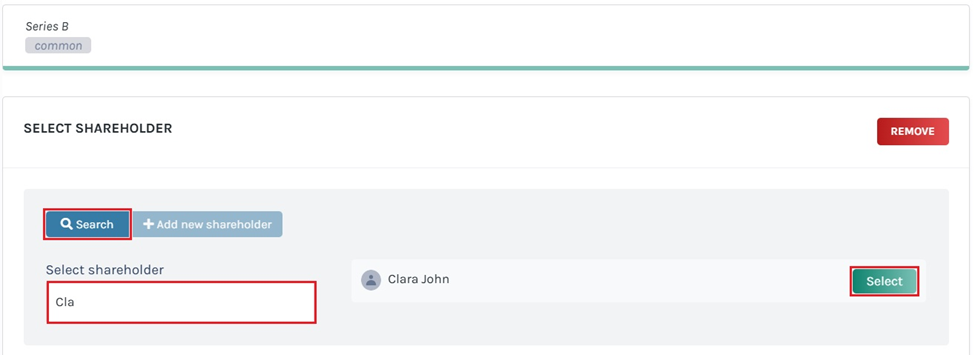
Step 7: This would take you to the next page where you now have to find the shareholder (investor) to whom you want to issue the shares.
Here, you have the option to search for a shareholder or to add a shareholder from here directly.
Note: You need to have the shareholder profile already created. Check out the support article to add a shareholder. If you do not have it created, you can choose the option “Add New Shareholder” here too.
Method 1
If you have already added the shareholder profile in the cap table, you can just type in the name in the search box and the name will appear on the side of it. Click on “Select” and begin the process of issuing the shares to this investor.
Method 2
The second way is by adding a new shareholder profile while issuing shares. This is when you have not added the shareholder profile in the cap table. In this case, we have not added the shareholder. So, we will click on the option that says, “Add New Shareholder”.
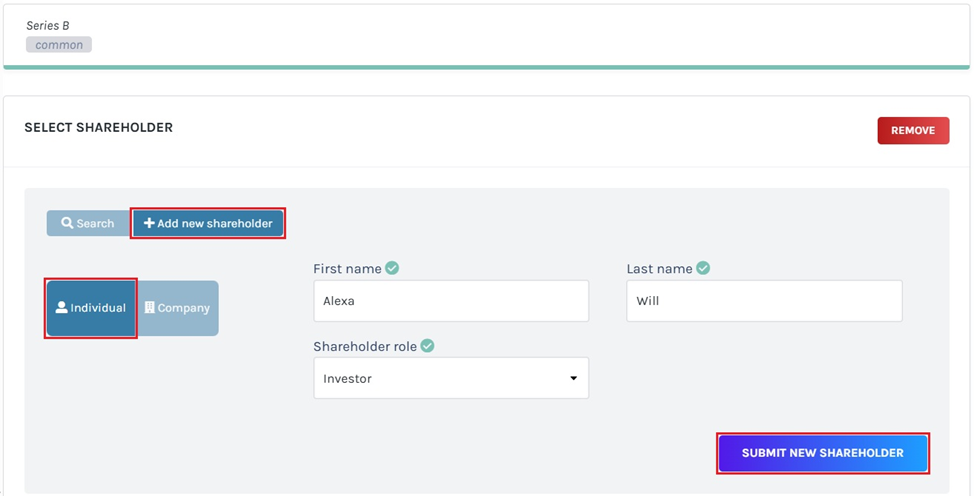
When you do this, you will get a new panel where you can now add the details of the shareholder. First, select if this investor you are adding is an individual or a company. For a company, you will need to add their name and their role. For an individual, it is the same with two fields for the first name and last name, and the person’s role.
Here, we selected “individual” and added in the details. Once done, click on “Submit New shareholder”.
Step 8: Doing this would bring up another panel as shown below.
Add in the details including the number of shares issued select the option anti-dilution, price per share, date of issuance, share name (share certificate number), and select if there is a vesting schedule or not.
Note: You can add a vesting schedule while issuing shares, options, and warrants. In addition to this, you can create your vesting plan or choose from six default plans. To know more about vesting plans, check out the support article here!
In this case, we selected “No” for the vesting schedule.
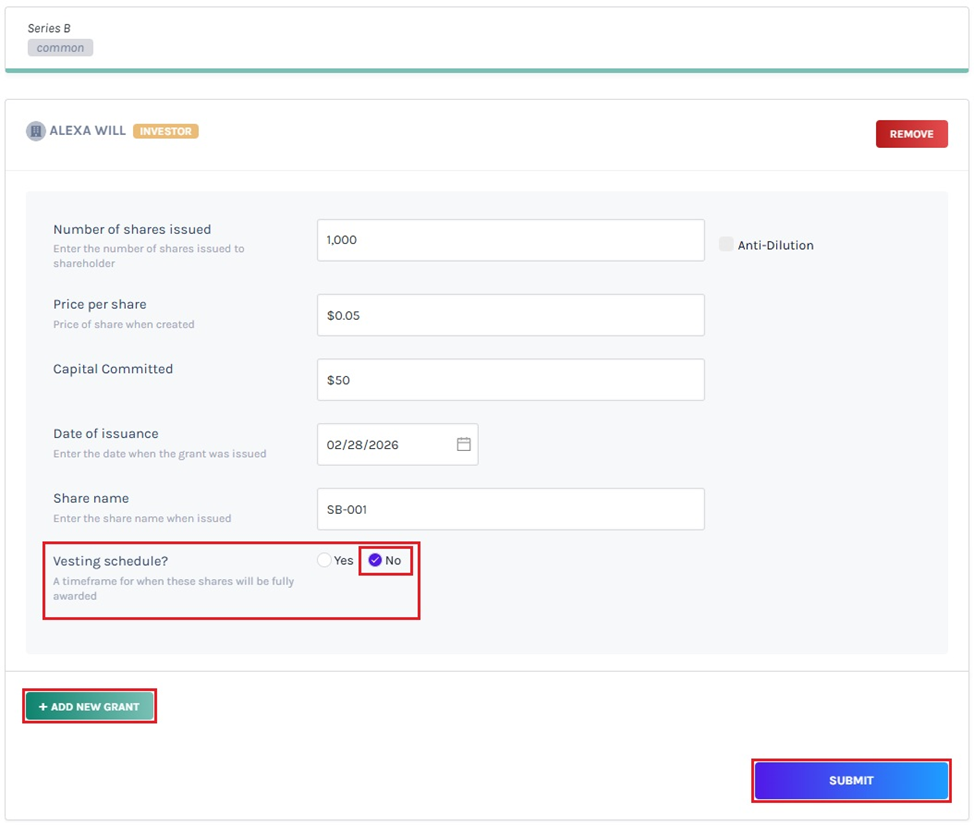
Once done, click on “Submit”.
Note: You can add another grant using the “Add new grant” button. This is if you want to issue shares from the same equity class to more than one shareholder. All you need to do is click on “Add new grant” and then select the shareholder profile or add a new shareholder and fill in the details.
Most importantly, all this can be done without losing any of the first grant details.
Step 9: By clicking on “Submit”, the shares will be issued to the investor and you will be redirected back to the following page where you can see the equity class and the details.
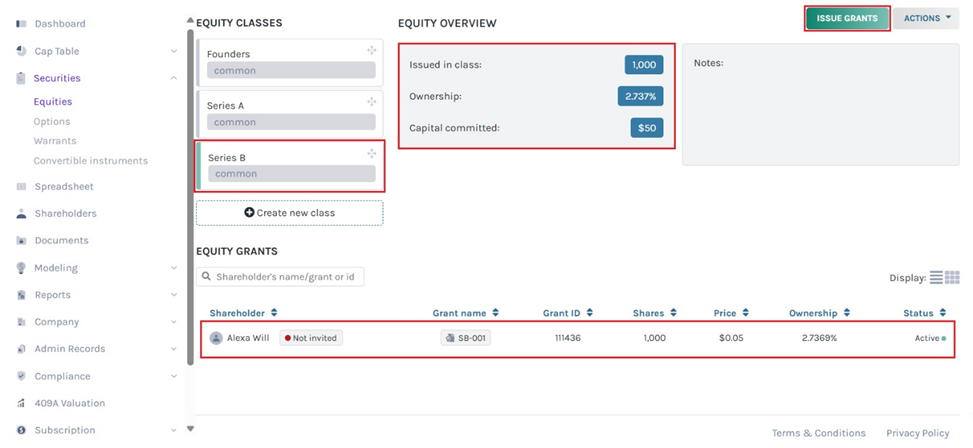
Note: Suppose you want to issue another equity from the class you just created. Then, click on “Issue grants”. Just ensure that you have already selected the equity class from which you want to issue equities.
If you want to see the details about the issuance, click on the shareholder’s name. In this case, click on “SB-001”.
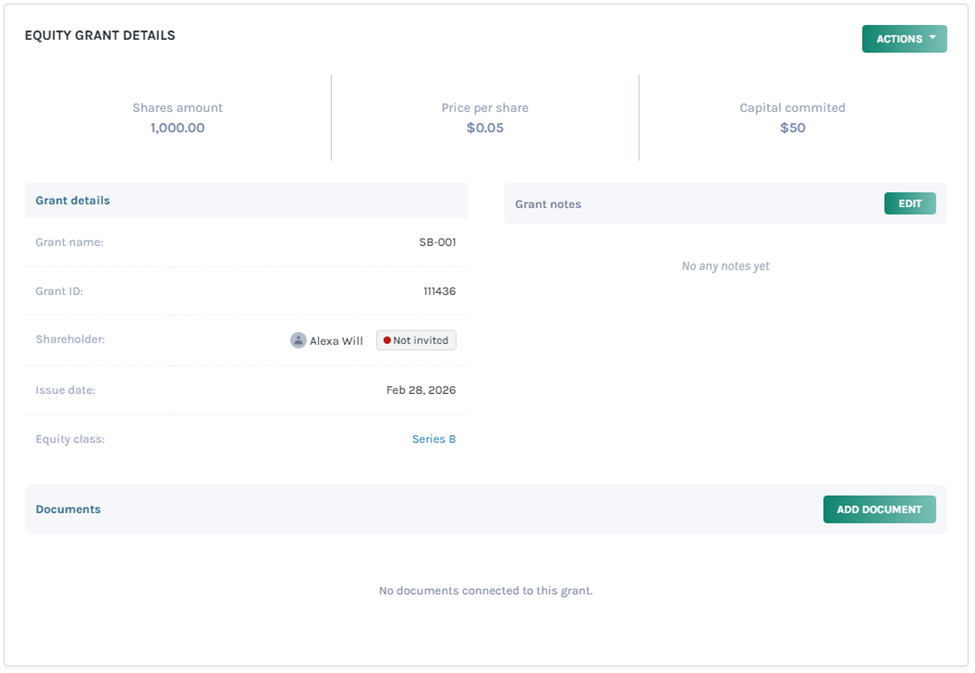
This would take you to the page where you can see the details of the share issuance.
Note: You can add document to the grant by clicking on “Add Document”. Check out the support article to know more about adding documents to grants.
Situation 2
There is another way where you can issue shares to an investor. Let us take an example where you need to issue additional shares to “Alexa Will” as he made another deal just 4 months after the last one. In this case, the deal is still considered to be in the Series B round. So, keeping this in mind, we can issue more shares to him using another method on Eqvista.
Step 1: Go to the dashboard of the company account. Under the Ownership panel, click on “Detail”
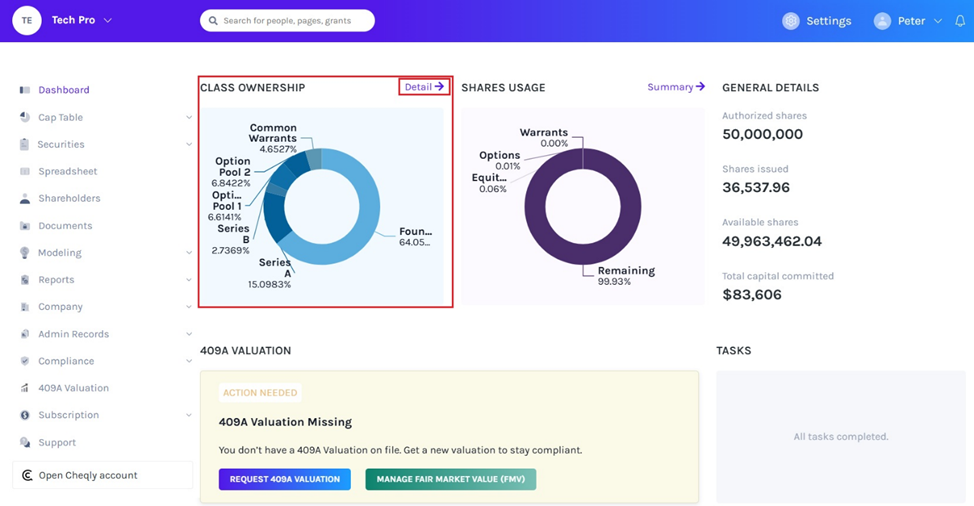
A new window with the ownership overview chart will open then click on “Issue” to get a mini drop-down menu and select “from Equity Class”.
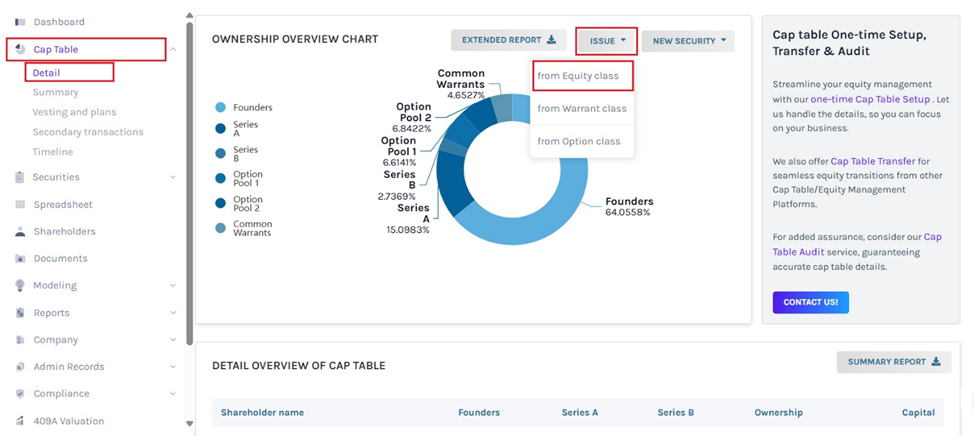
Step 2: When you do this, you will reach the page where you now have to select the equity class from which you want to issue shares.

When you select the class, the “Add New grant” button appears. Click on that.
Step 3: Now, since you have already added “Alex Will” as the shareholder in the cap table, all you need to do is search for him before you can issue the shares to him. So, type in the name in the field available.
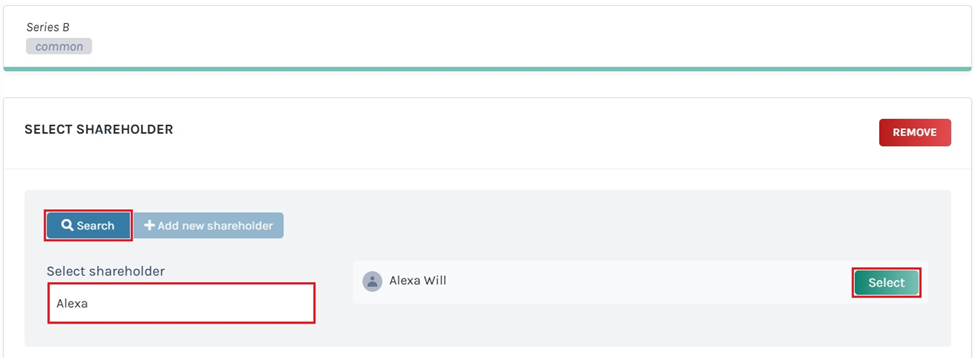
Click on “Select” beside the same on the right-hand side of the page.
Step 4: When you do this, a new panel will appear where you can add the share issuance details.
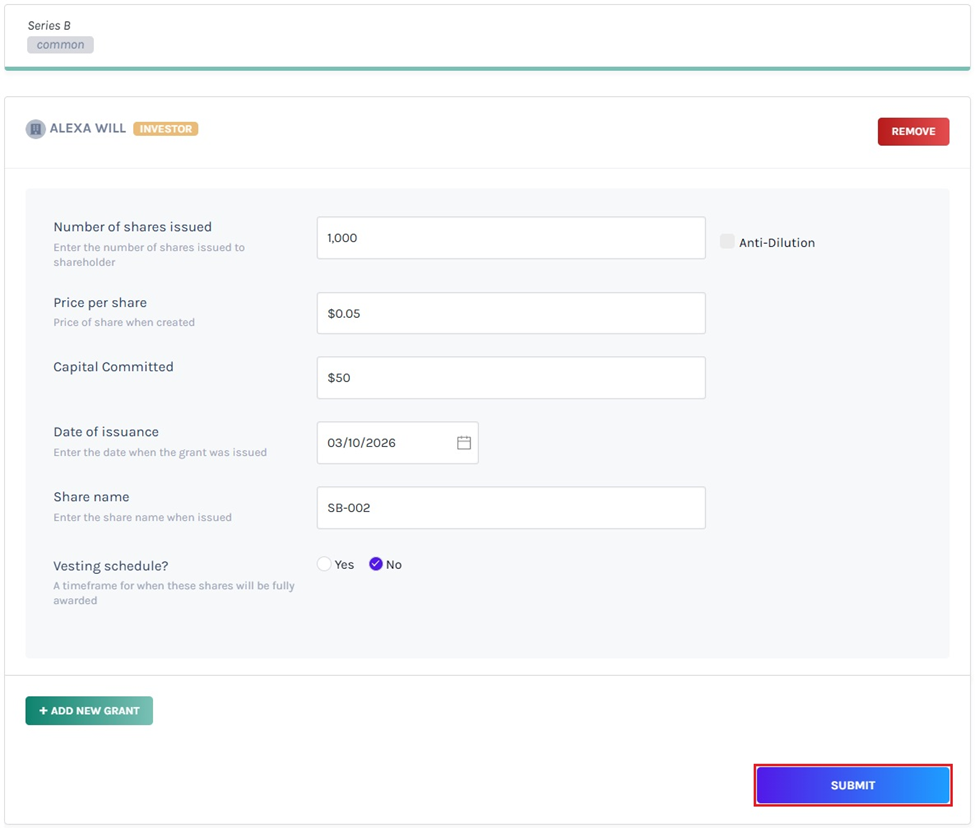
Add in the information and then click on “Submit”.
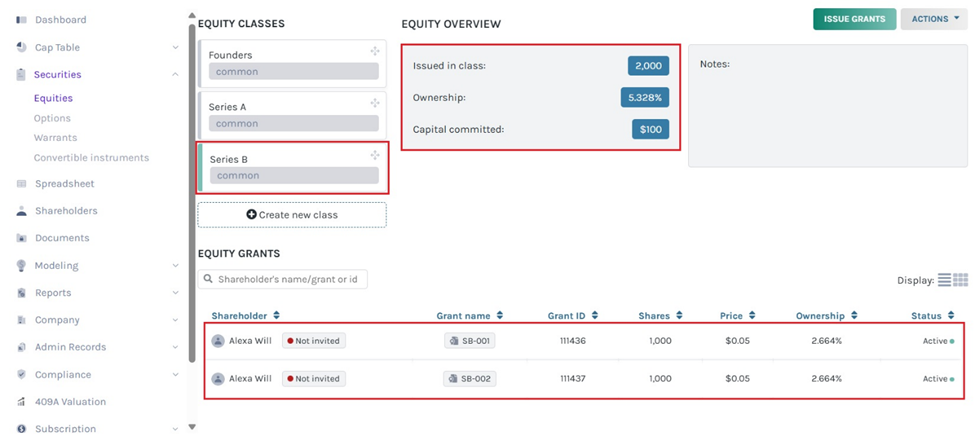
Step 5: You will be redirected to the page where you can now see both the share issuances under the Series B equity class done to an investor.
Just like this, you can easily issue shares to an investor on Eqvista.
If you have any doubts or want to know more, check out the other support articles here or contact us!
