How to Set Authorized Shares for Equity?
On Eqvista, you can set authorized shares for each equity class through your company profile settings. Track the maximum number of shares your company can issue, gain a clearer view of your equity structure, and plan future share issuances with confidence.
Set Authorized Shares for Equity
The authorized shares setting is set to “No” by default. Enable it to enter or update authorized shares for each equity class. These values appear in the Cap Table Summary, Equity Overview, and Extended Cap Table Report.
Open company profile
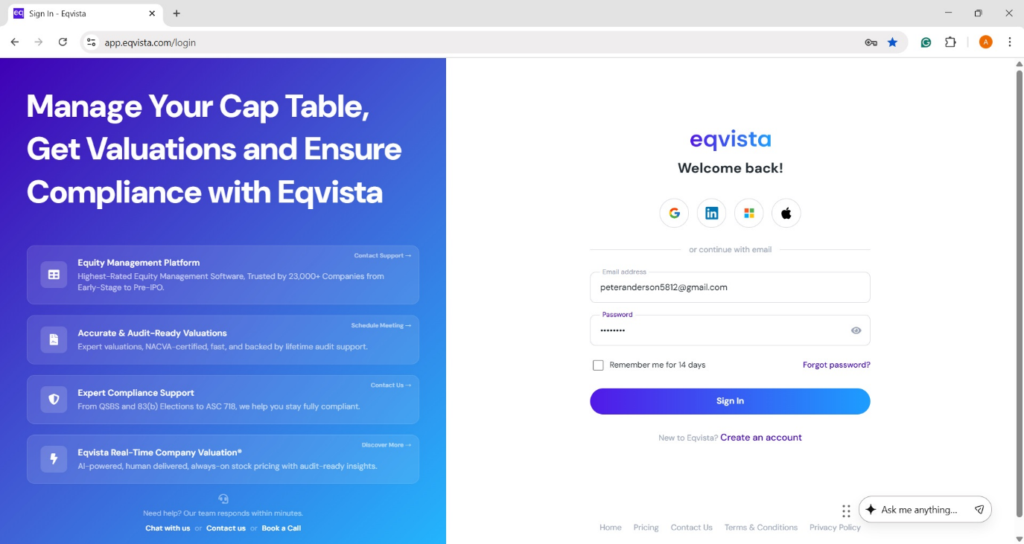
Step 1: Log into Eqvista and select your company account.
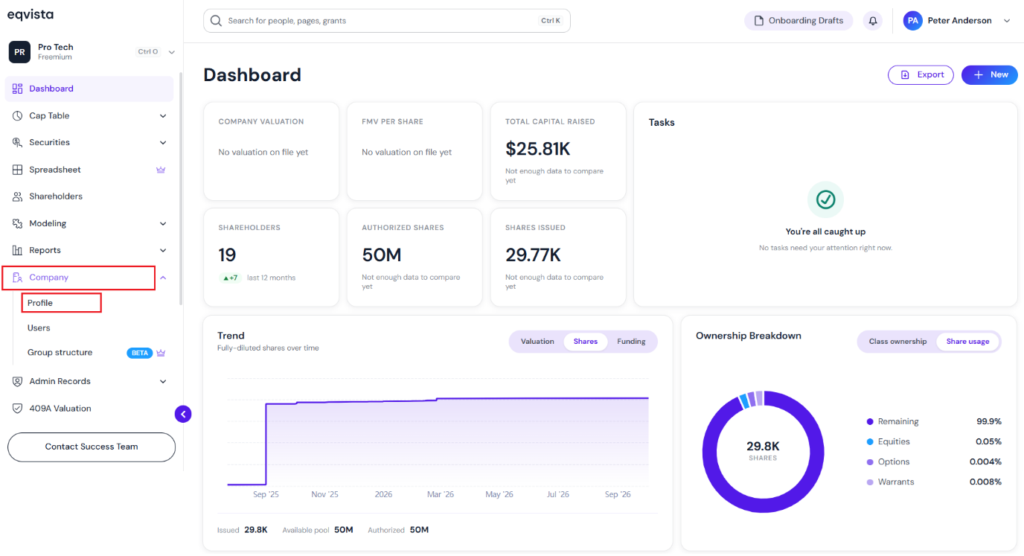
On the dashboard, click on “Company” on the left side to open the drop-down menu and select “Profile”.
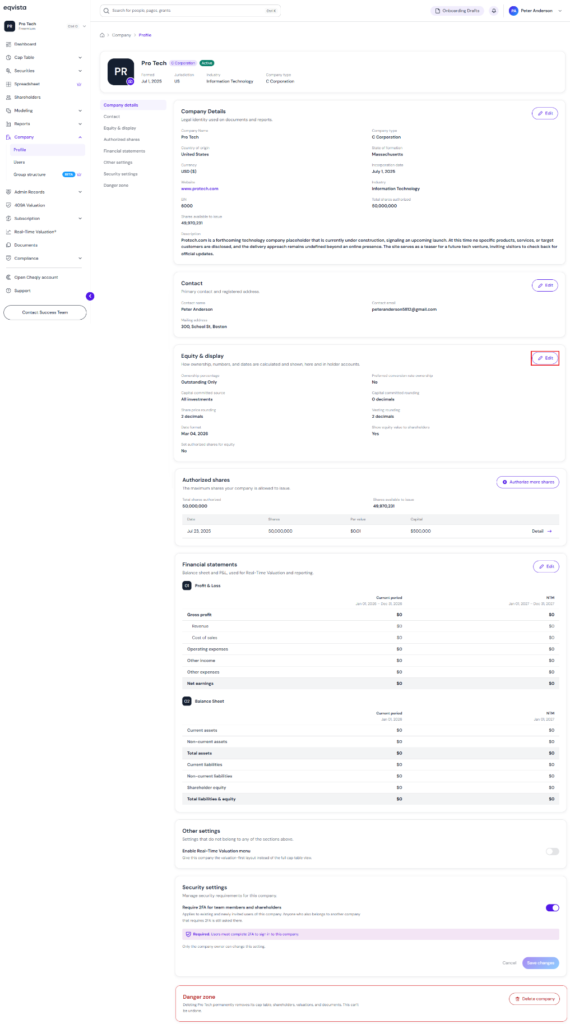
Click edit in equity & display section
Step 2: Here, you will be able to see all the details of the company, such as the incorporation date, the formation (entity type), total shares authorized, and the shares available to issue.
On this page, under the “Equity & Display” section, click on “Edit”.
Note: On this page, you can view Company Details, Contact, Equity &Display, Authorized Shares, Financial Statements, and Other Settings. To further understand the various sections in detail, check out the support article here!
Click yes to set authorized shares for equity
Step 3: After clicking “Edit”, a panel will appear, and you can choose to set authorized shares for equity by selecting “Yes”. By default, it is set to “No”.
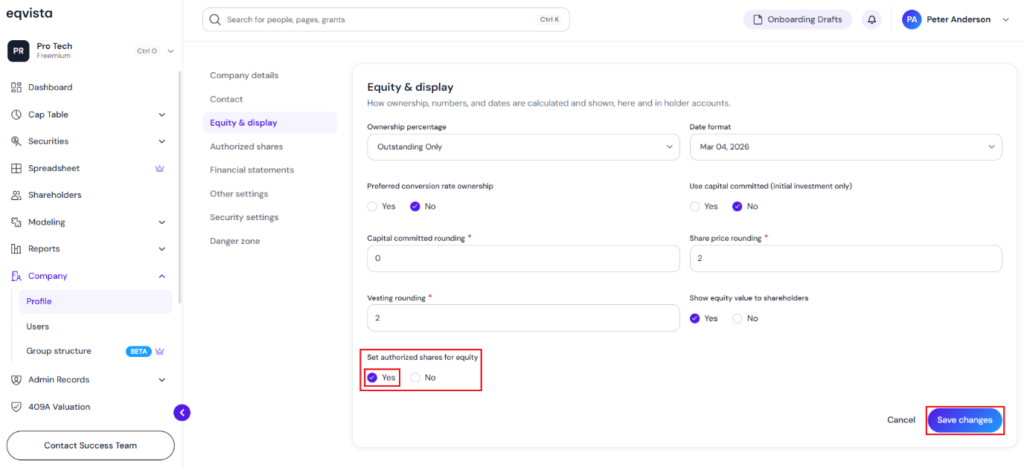
Once done, click on “Save Changes”.
Enter or edit authorized shares for equity class
Step 4: The authorized shares for equity setting has been enabled. Enter or edit authorized shares for each equity class.
Enter authorized shares
The authorized shares for an equity class can be set while creating it by clicking on “Create New Class”.
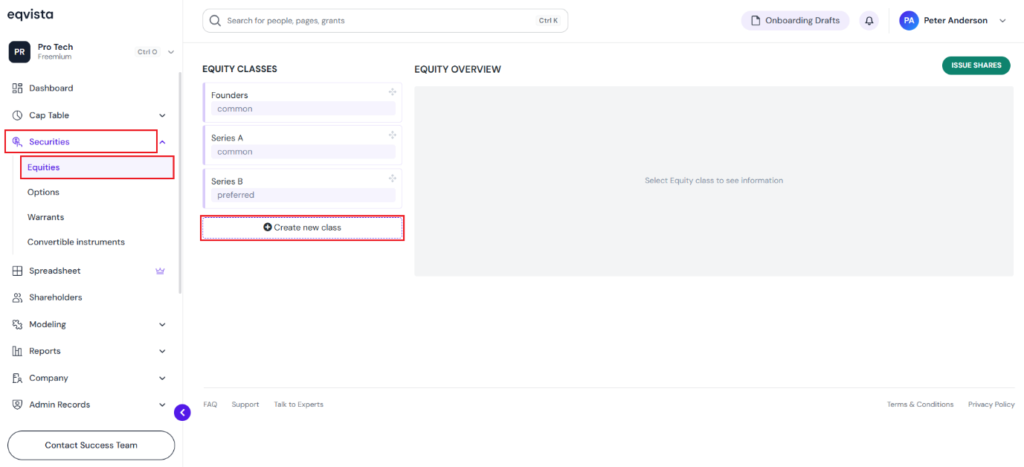
Once you click “Create New Class”, you will be redirected to select the equity type: common or preferred, and fill in the details such as Class Name and Authorized Shares. The combined total value must not exceed the company’s total authorized shares.
Note: If you want to add more authorized shares to your company, check out the support article to learn how to add those shares.
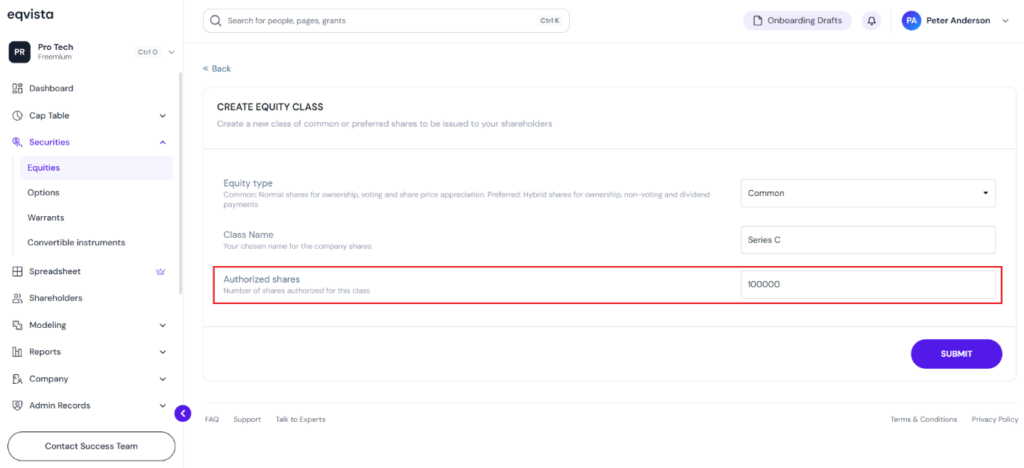
Edit authorized shares
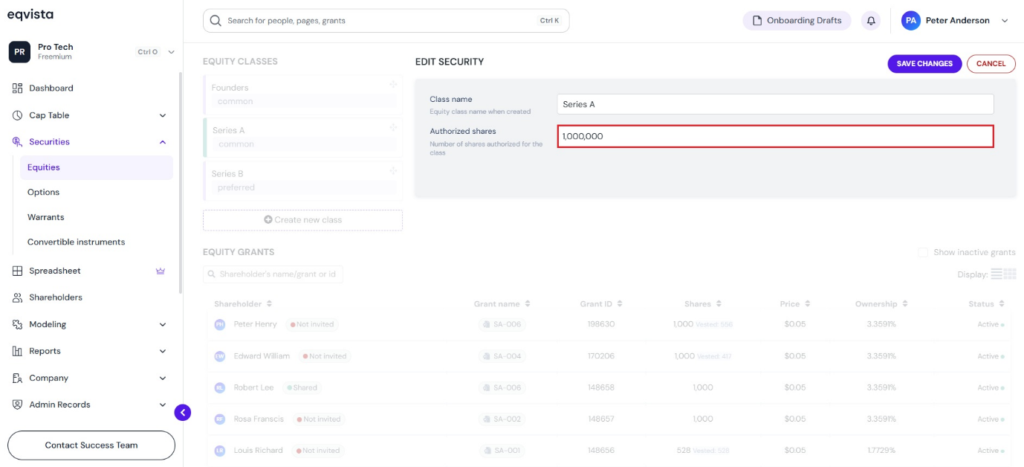
The authorized shares for an equity class can be edited by clicking on “Actions” to get a drop -down menu and select “Edit Equity Class”.
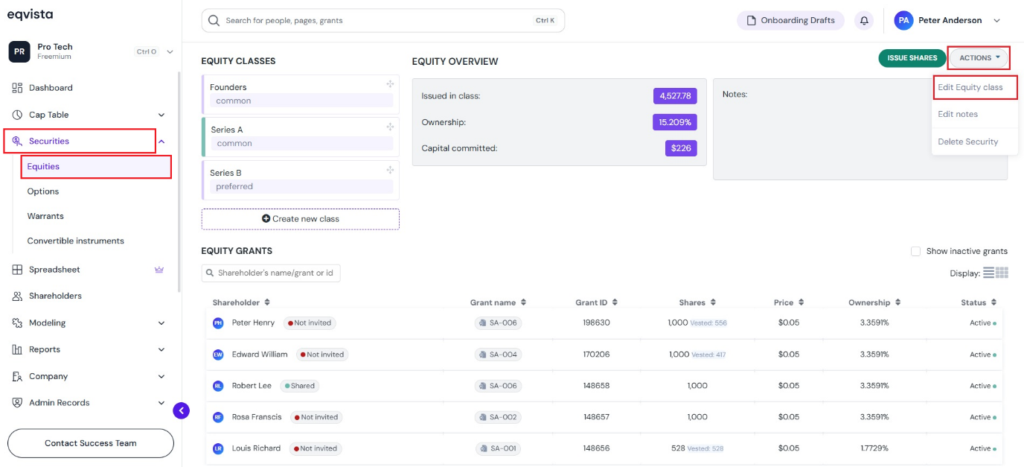
Then, a panel appears to edit the authorized shares set for the equity class. The combined total value must not exceed the company’s total authorized shares.
Note: If you want to add more authorized shares to your company, check out the support article to learn how to add those shares.
View authorized shares values
Step 5: The authorized share values set appear in the Cap Table Summary, the Equity Overview, and the Extended Cap Table Report.
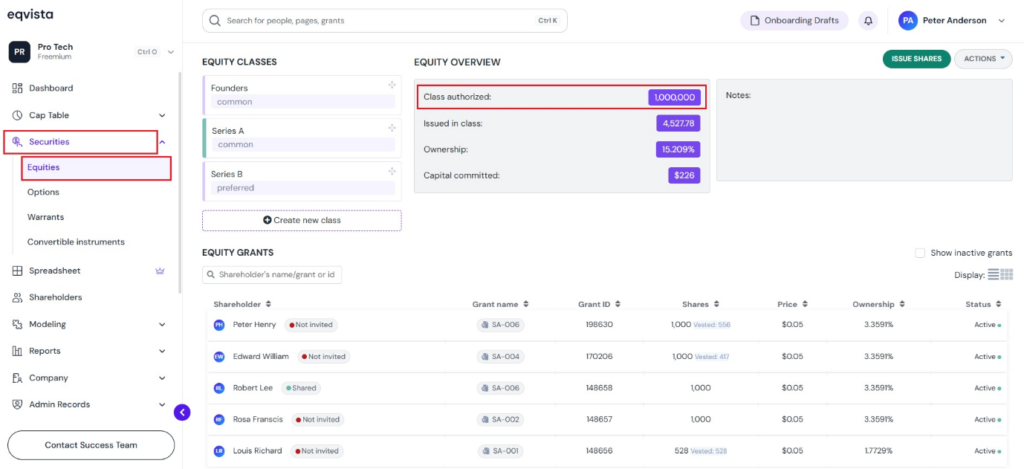
Equity overview
The authorized shares set for the equity class can be viewed in the “Equity Overview” as shown below.
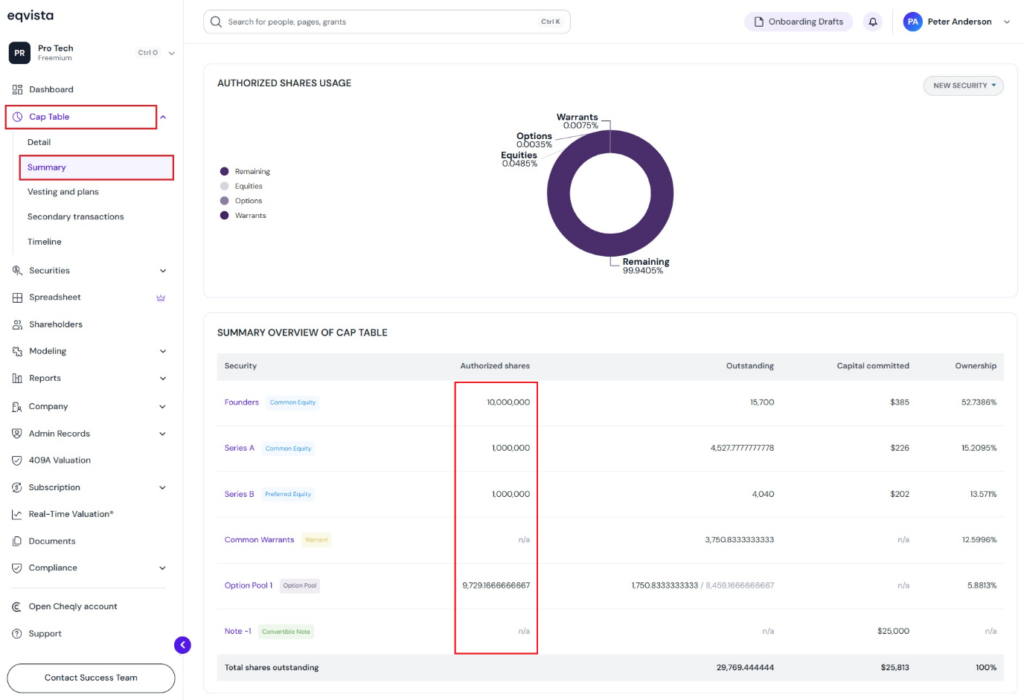
Cap table summary
The cap table summary displays the authorized shares set for the equity class under the column “Authorized Shares”. Options display their authorized options, while convertibles and warrants show “N/A”.
Extended cap table report
The extended cap table report can be downloaded by clicking on “Generate Report”.
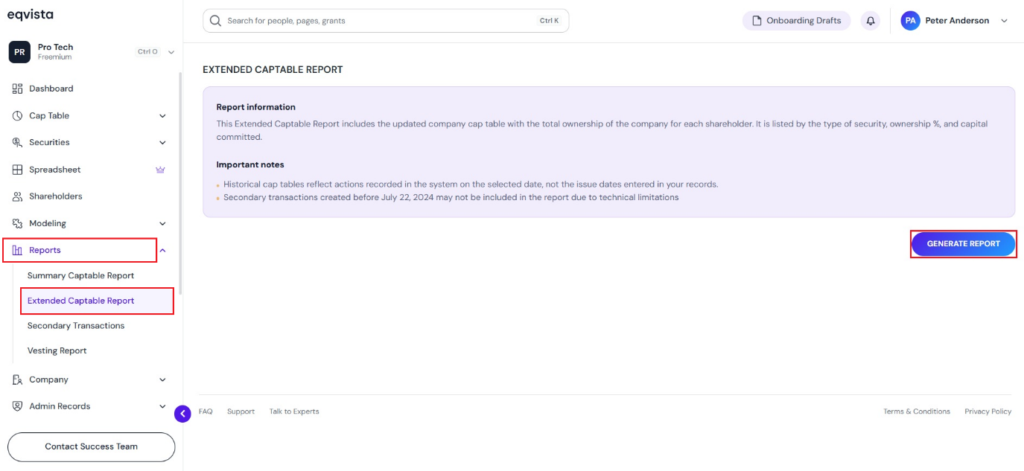
Then, click “Generate Report” on the right-hand side of the page to download the report. A pop-up panel appears to select the share class and generate a report containing only the related securities.
Note: Suppose you want to download past cap table reports, select the date using the calendar. If you want to include inactive grants, tick the option “Include inactive grants”. Check out the support article to know more about extended cap table reports.
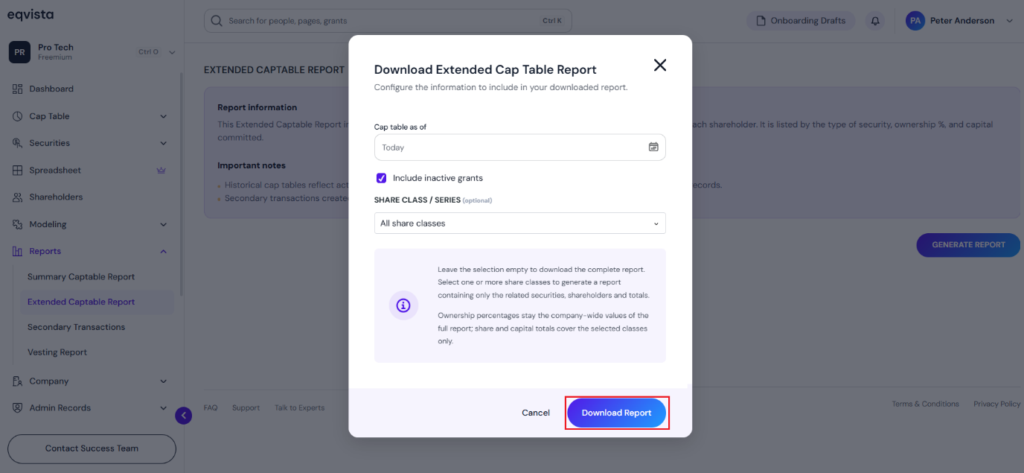
After selecting the options, click on “Download Report”.
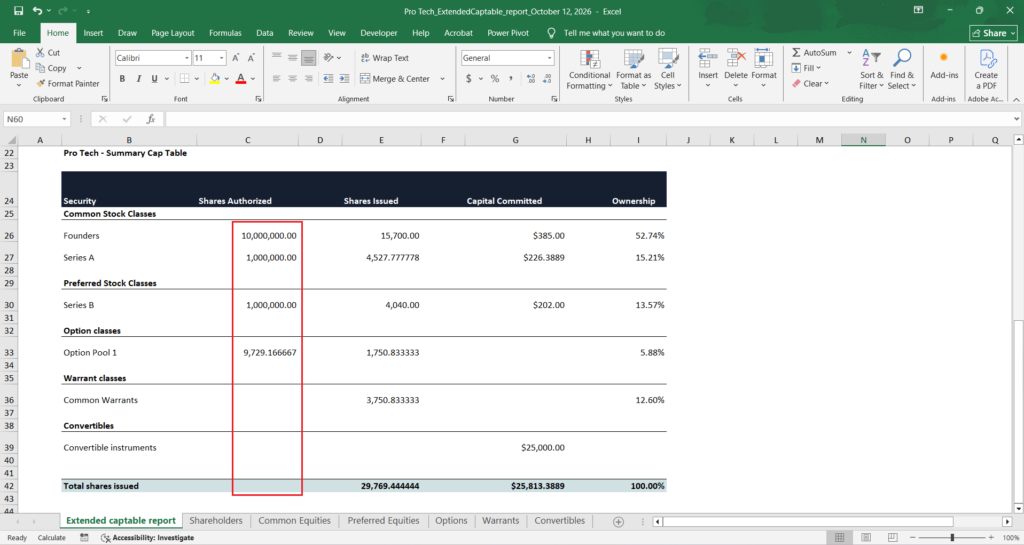
The downloaded extended cap table report displays the authorized shares set for the equity class under the column “Authorized Shares”. Options display their authorized options, while convertibles and warrants show “N/A”.
For more information on Eqvista, check out our support articles or get in touch with us today!