How to Choose the Date Format?
The date format feature allows you to choose how the date should be displayed in the application.
Here are the steps to follow:
Step 1: Log into Eqvista and select your company account.
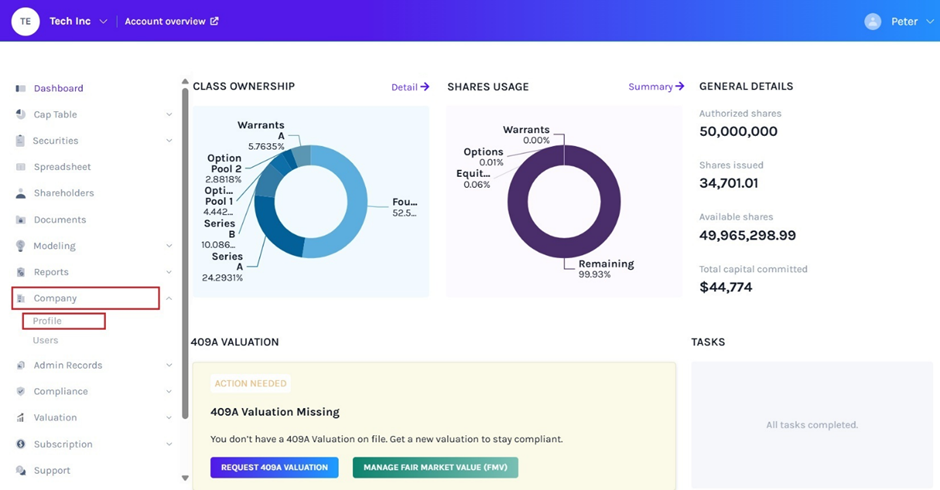
On the dashboard, click on “Company” on the left side to get a drop-down menu and select “Profile”.
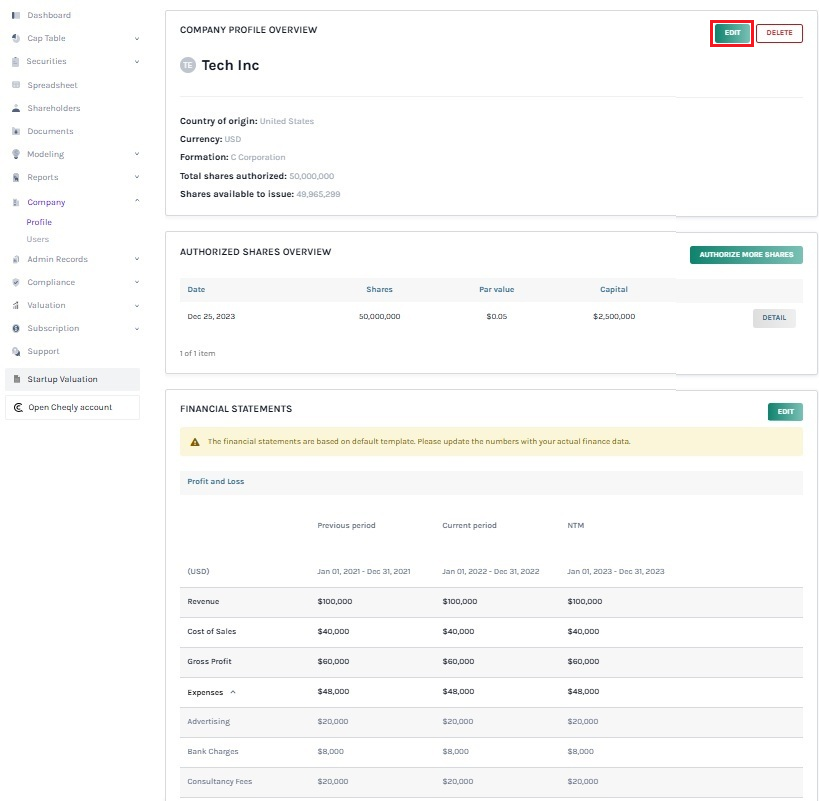
Step 2: By clicking, you will be directed to the page that shows the details of your company. On the top right of the page, click “Edit” to edit the details of the company.
Note: On this page, you can see three sections –Company Profile Overview, Authorized Shares Overview, and Financial Statements. To further understand the sections in detail, check out the support article here!
Step 3: There are two sections in the panel –Basic and Advanced. You must click on “Advanced” to change the advanced settings.
Under the company information section, select the data format from the two options – Jan 01, 2023 (“mm/dd/yyyy”) and 01 Jan, 2023 (“dd/mm/yyyy”).
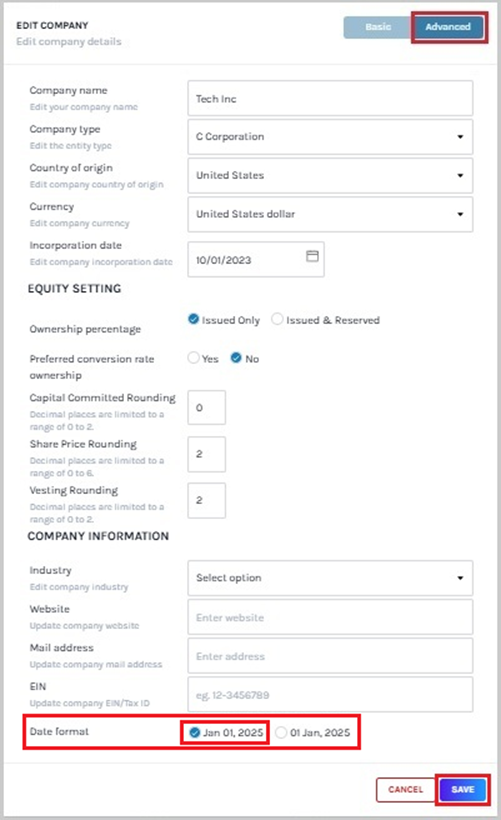
In this case, we will select the format Jan 01, 2025 (“mm/dd/yyyy”).
Once you have selected the date format, click on “Save”. The selected date format will be displayed in the application.
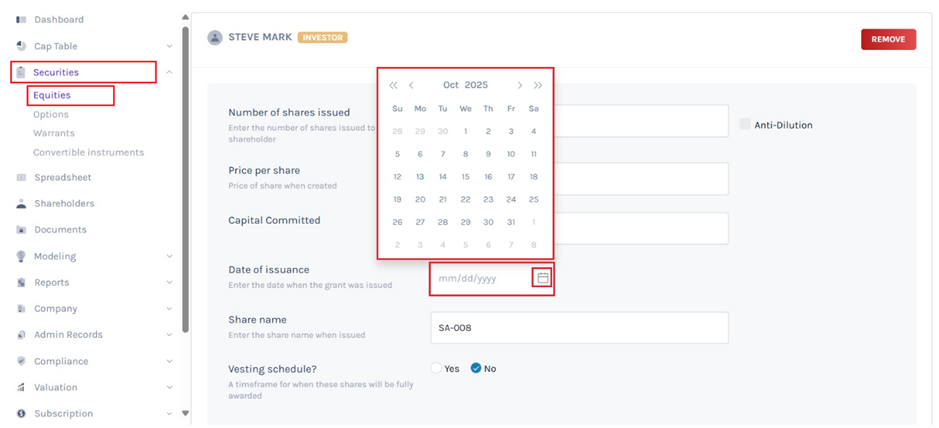
Issuing shares and securities
When issuing shares and securities, you must fill in the date of issuance using the calendar. It will display the date in the selected format (“mm/dd/yyyy”).
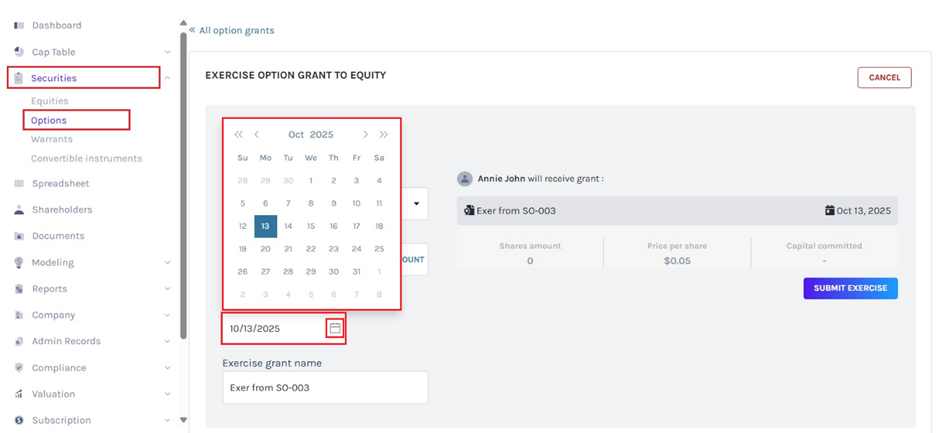
Secondary transactions
Once you have issued shares and securities, secondary transactions can be performed. In this case, the issued options are exercised, hence the date is automatically filled in the selected format (“mm/dd/yyyy”). If it is not today’s date, you can edit it using the calendar.
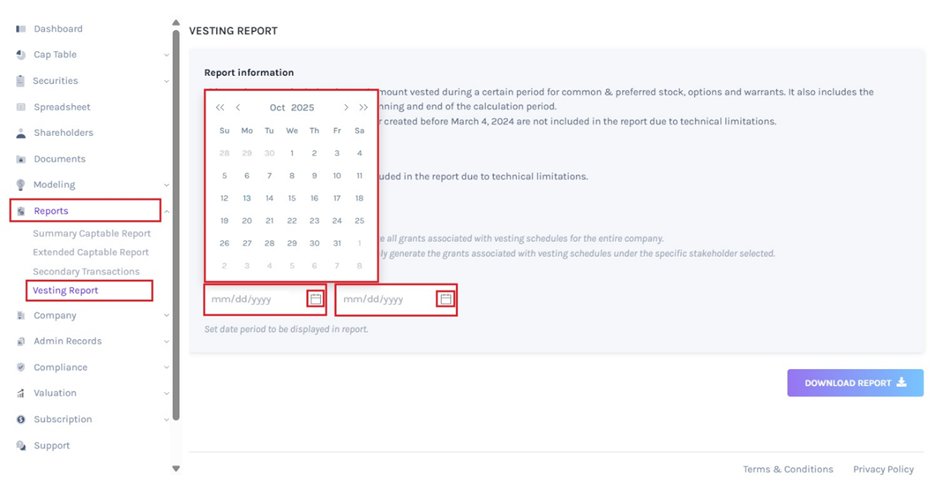
Vesting report
The vesting report holds all the information regarding shares vested during a certain period. To generate a vesting report, the calendar helps to enter the start and end date in the selected format (“mm/dd/yyyy”).
If you want to further understand how to use the Eqvista application, check out our support articles or contact us today!
