Create a Custom Role for an Executor Signing the Certificate
On Eqvista, creating a new custom role for an executor signing the certificate is a straightforward process that can be completed in just a few simple steps.
Note: The add custom role for executor is only available for premium account holders. To unlock this feature, kindly upgrade your account.
Add Custom Role for Executor
Company users can only be assigned as executors for signing certificates. The executor role refers to the role that the executor holds in the company. A few examples are director, secretary, president, chairman, and board member.
There are two methods or ways in which you can create a new executor role on Eqvista.
Here are the steps to follow:
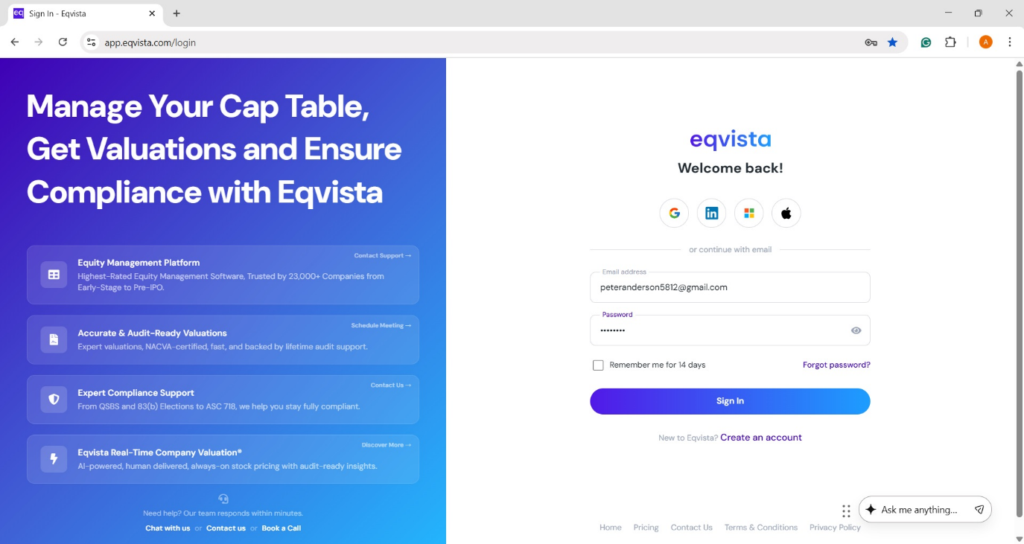
Step 1: Log into your Eqvista account and choose the company account.
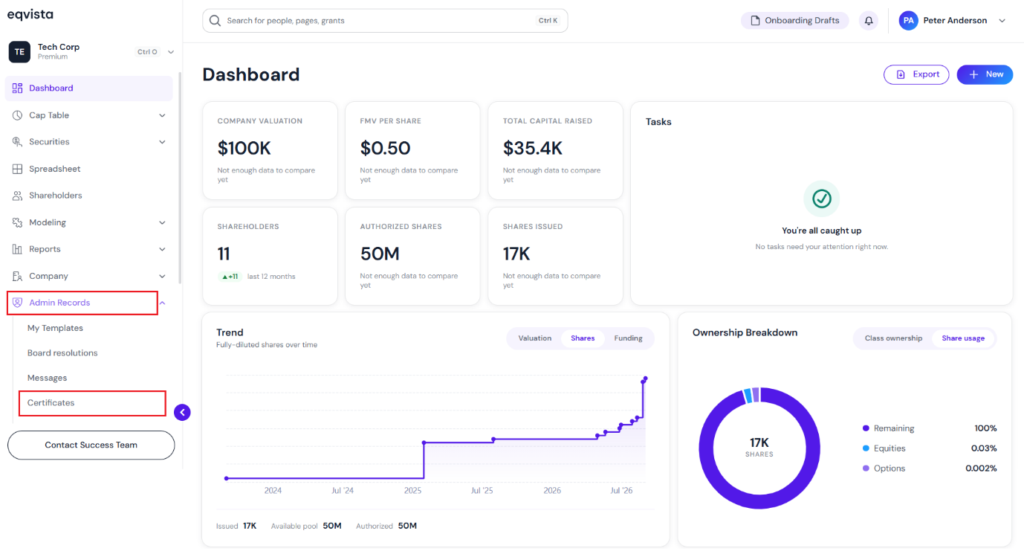
On the dashboard, click on “Admin Records” on the left side to get a drop-down menu and select “Certificates”.
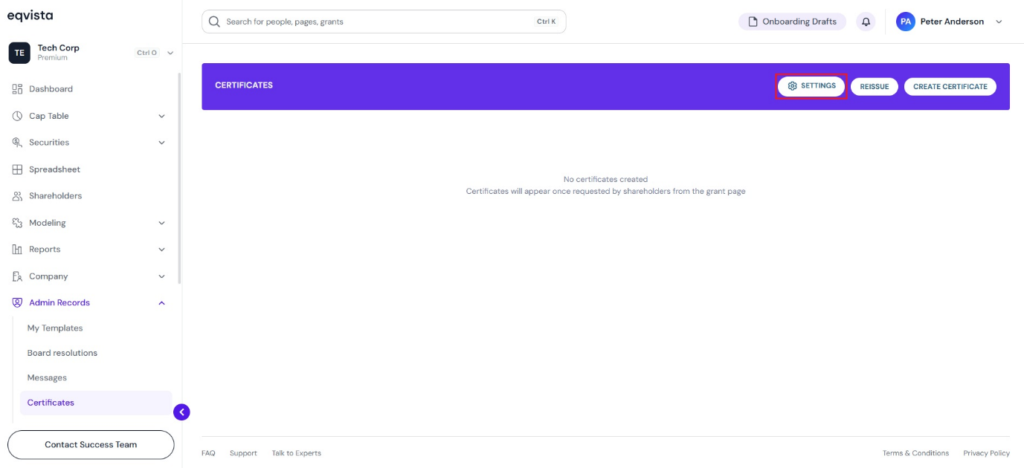
Step 2: Once you do this, you will be directed to the following page. Here, you will see any certificates that have been created. There are two methods or ways in which you can create a new executor role.
Method 1
A new role can be added for the executor to sign the certificate while enabling automatic certificate generation. You can enable automatic certificate generation by clicking “Settings” as shown below.
A pop-up panel appears as shown below. Enable automated certificate issuance by selecting “Yes”. Select the certificate template from the drop-down menu, tick the box if the shareholder’s signature is required, select the executors, and to add the role of the executor, click on “+ Add Custom Role”.
Note: Company users can only be assigned as executors. To learn how to add a company user, check out this support article.
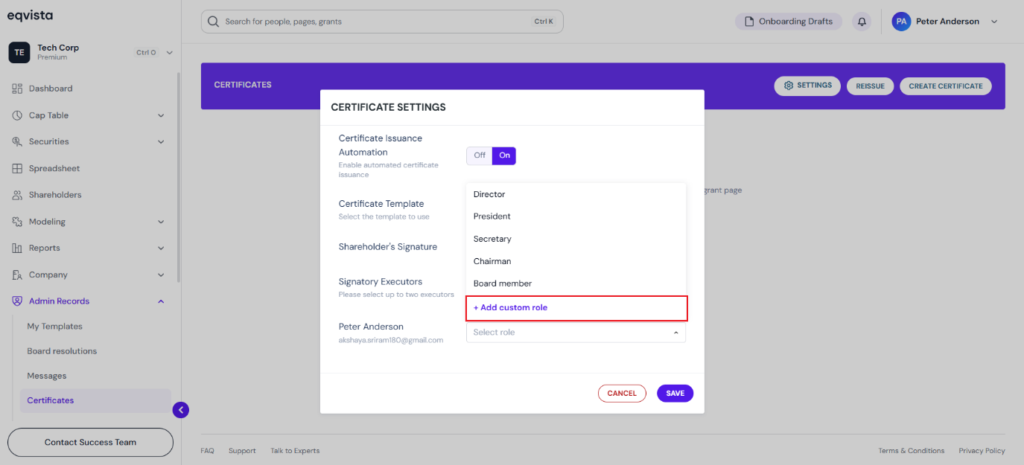
Here, type the name in the space provided and click on “tick” to create the new role as shown below. If you want to cancel the process, click on “x”.
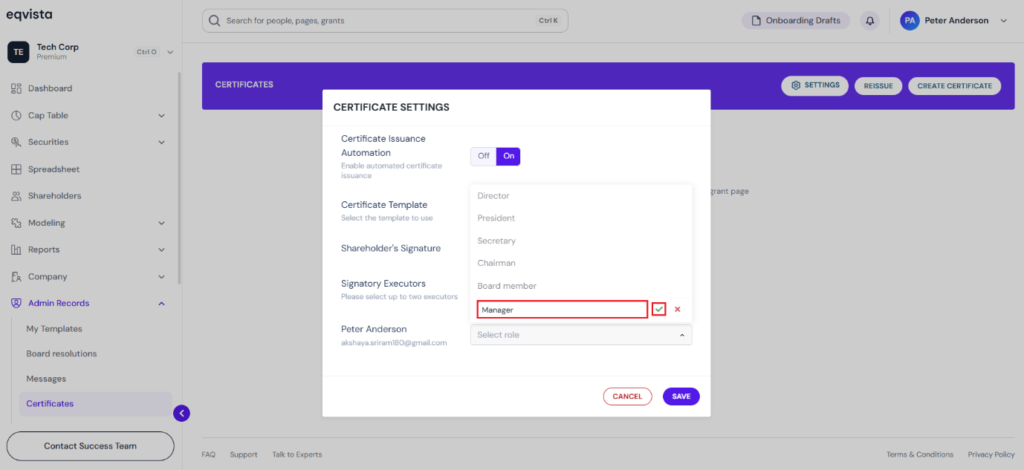
Then, add the executor and the newly added role of the executor who will be signing the certificate.
Note: Select up to two executors and the role of the executor from the drop-down menu.
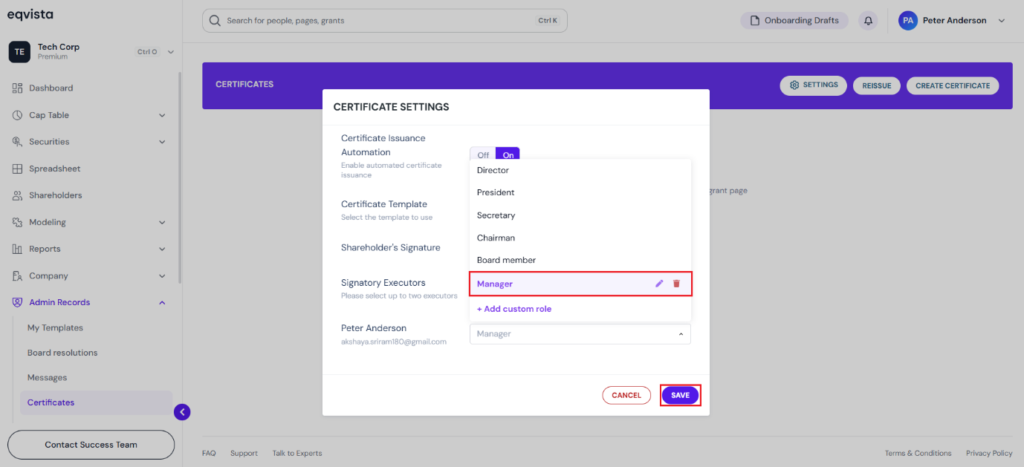
Once done, click on “Save”.
Method 2
There is another way of creating a new role for the executor while creating certificate. To create a new certificate, click on “Create Certificate”.
Note: You can enable automatic certificate generation by clicking on “Settings”. Check out the support article to learn more about it!
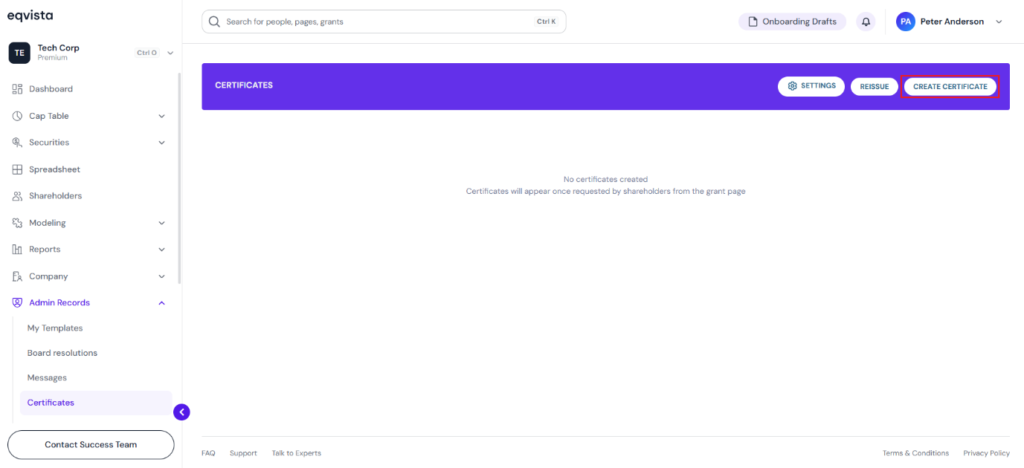
Step 3: A new panel will appear as shown below. Select the equity class and certificate template from the drop-down menu.
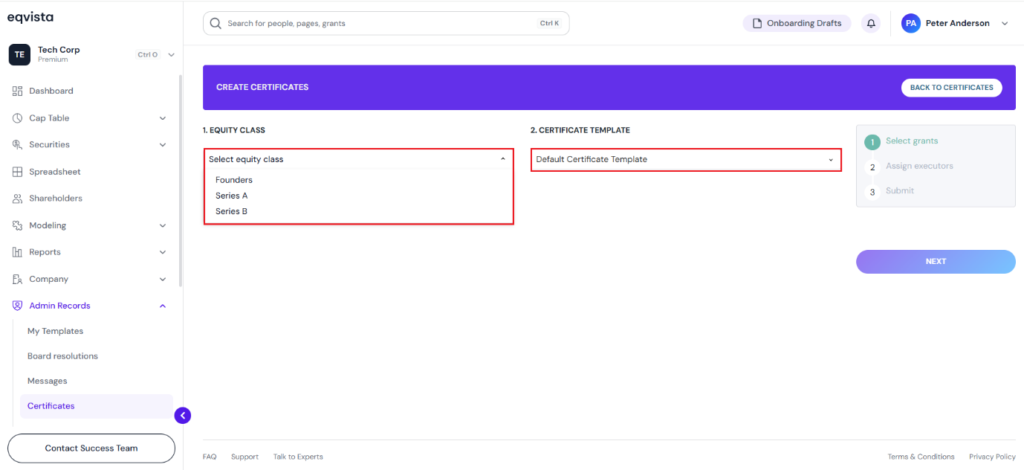
Step 4: Once you do this, a list of grants from the equity class will appear. Tick the box if the shareholder’s signature is required.
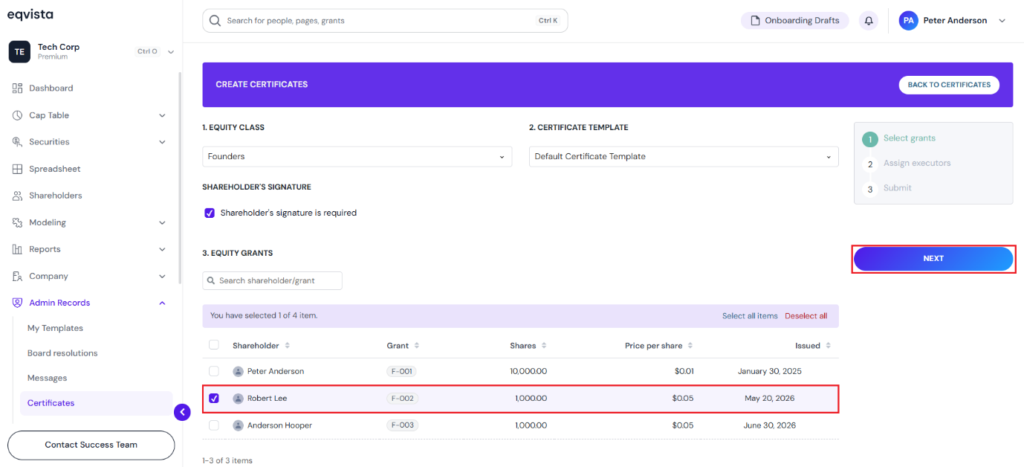
The moment you select the shareholder, you can see the number of shareholders selected. You can select more than one shareholder. In short, you can select all if you want to issue certificates for all of them at the same time.
Once done, click on “Next”.
Step 5: The next step takes you to add the executor and the role of the executor who will be signing the certificate. To add a role, click on “+ Add Custom Role”.
Note: Company users can only be assigned as executors. To learn how to add a company user, check out this support article.
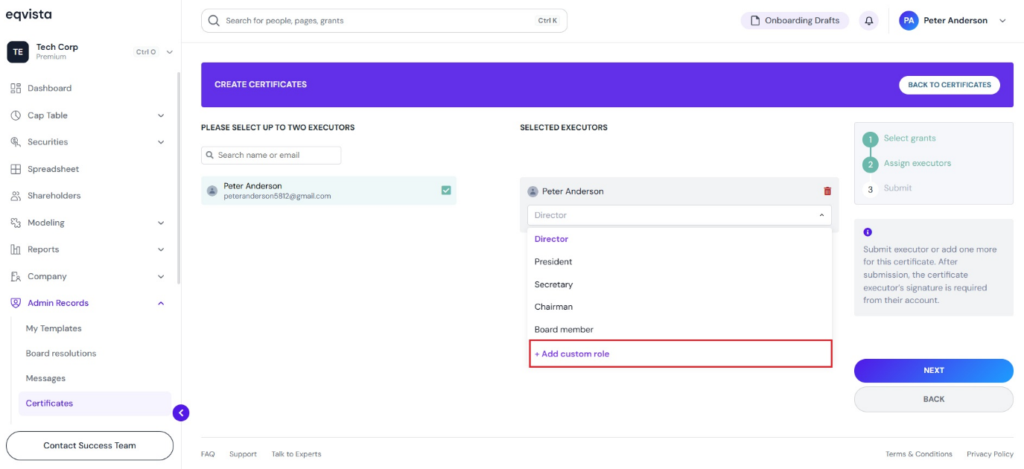
Here, type the name in the space provided and click on “tick” to create the new role as shown below. If you want to cancel the process, click on “x”.
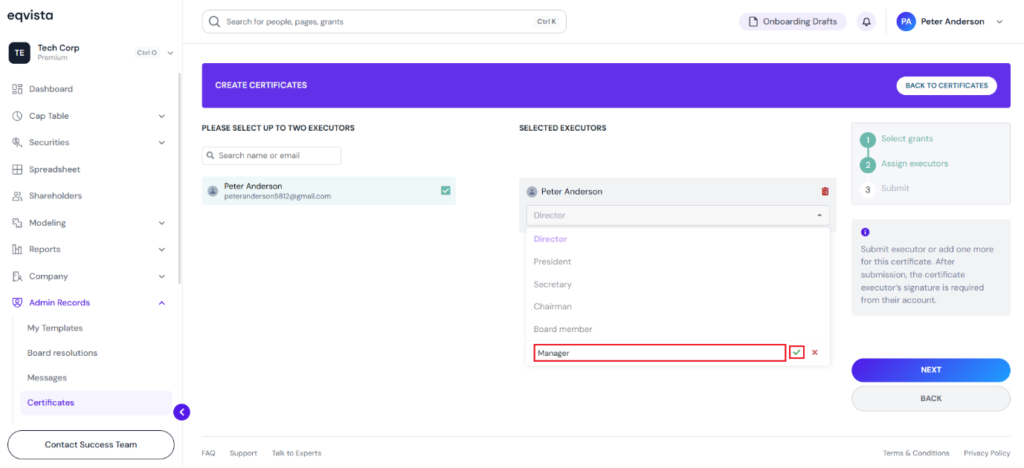
Then, add the executor and the newly added role of the executor who will be signing the certificate.
Note: Select up to two executors and the role of the executor from the drop-down menu.
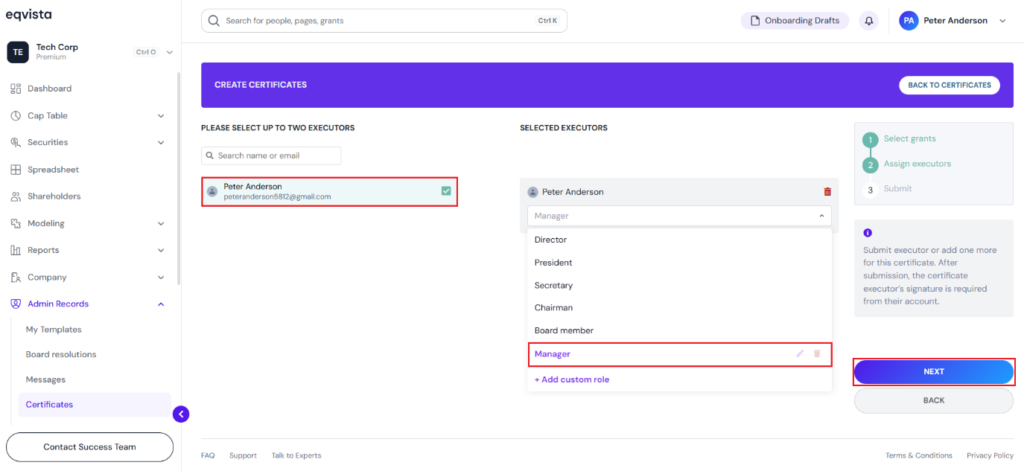
Once done, click on “Next”.
Step 6: The last step involves you checking the information, the executor, and the added role of the executor who will be signing the certificate.
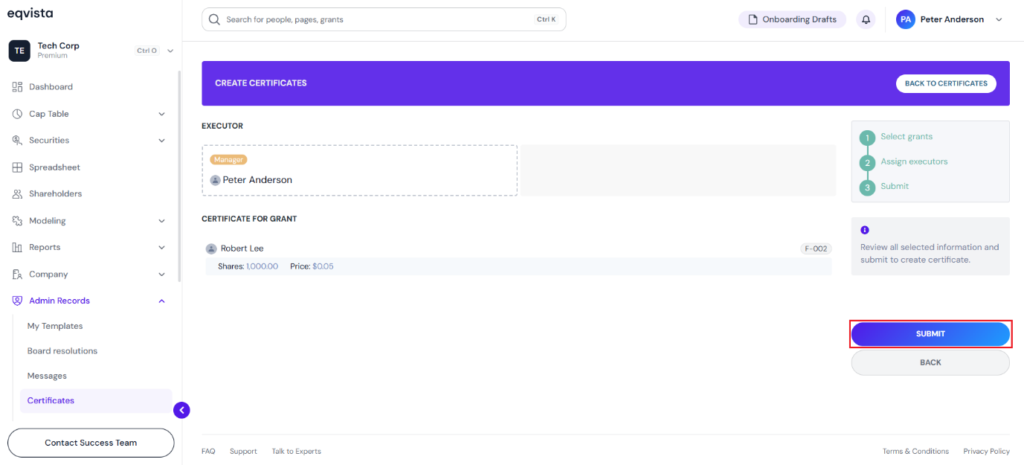
Once done, click on “Submit”.
Step 7: Then, you will be directed to the following page, where the new certificate will be created.
You can see the option “Your sign is required”, which appears for the executor. To sign the certificate, click on “Sign”.
Note: From here, you will be able to perform many functions. To know more about it, check out the support article!
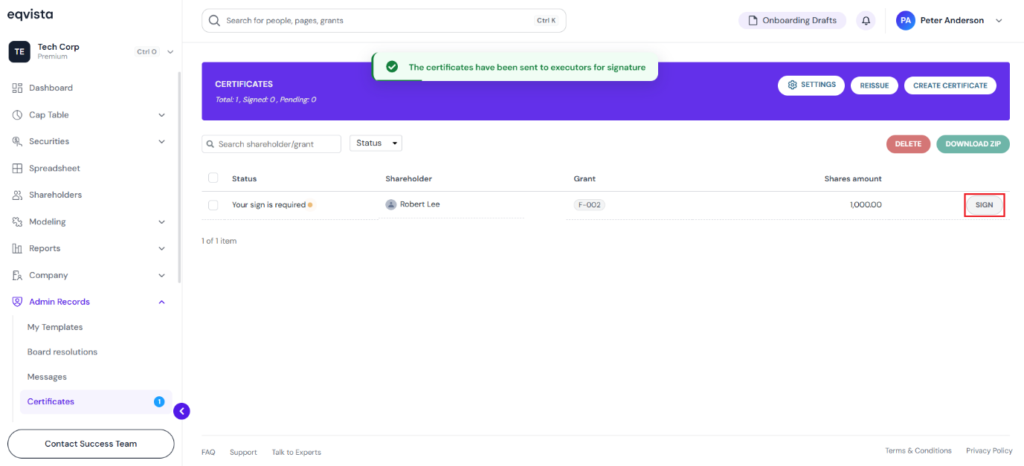
Note: You can reissue the certificate by clicking “Reissue” if the grant details have changed. Check out the support article to learn more about it!
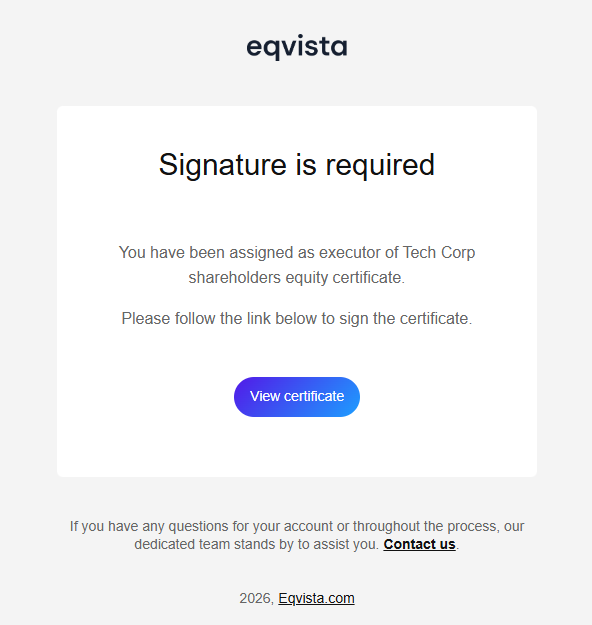
If you are the executor, you will also receive an email to sign the certificate and click on “View Certificate”.
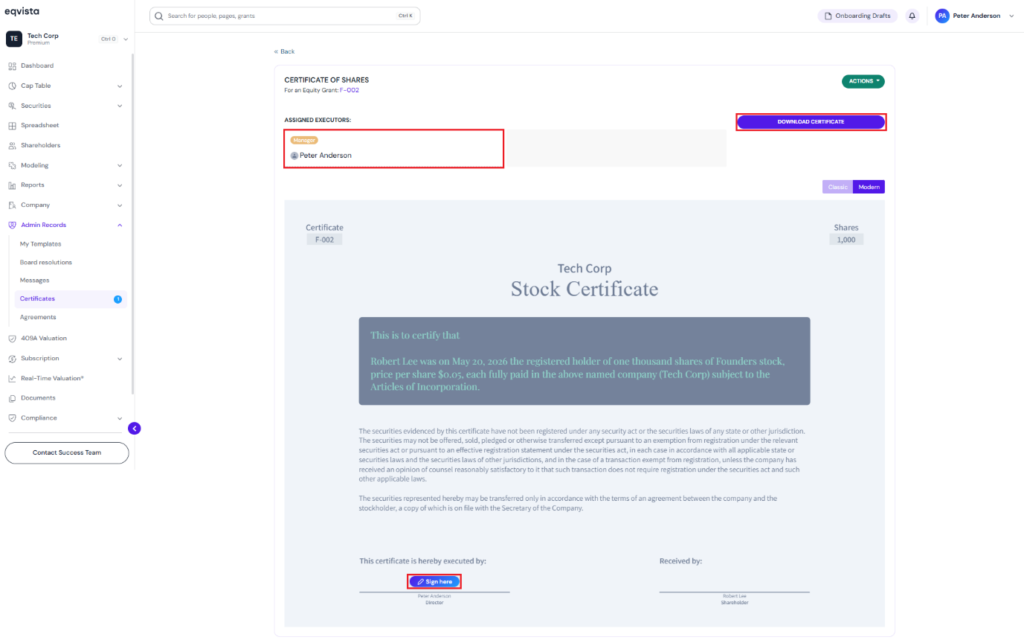
Step 7: Once you click, you can see the certificate displaying the executor’s name and role at the top left of the page. The certificate has two looks – Classic and Modern. In this case, we have selected “Modern”.
Note: The admin or superuser has the option to download the unsigned certificate by clicking on “Download Certificate”. The certificate can be signed by clicking on “Sign Here”. Check out the support article to understand how to sign a certificate.
To learn more about Eqvista, check out our support articles and knowledge base. For queries, get in touch with us!