Does Eqvista support certified (digital or paper) and uncertified (electronic) shares?
Yes, Eqvista supports both uncertified (electronic) shares and certified (digital or paper) shares. Both electronic certificates and paper certificates are similar, meaning the bylaws and charters are not affected. The main difference between them is that electronic certificates are stored electronically instead of on paper.
Note: The certificate feature is only available for premium account holders. Kindly upgrade your account to unlock the feature.
View your digital certificate
On Eqvista, you can easily generate share certificates for grants, just like preparing your cap table. Here are the steps for how you can view your digital certificate or print the paper certificate on Eqvista.
Step 1: Once you are logged into the Eqvista platform, select the company account.
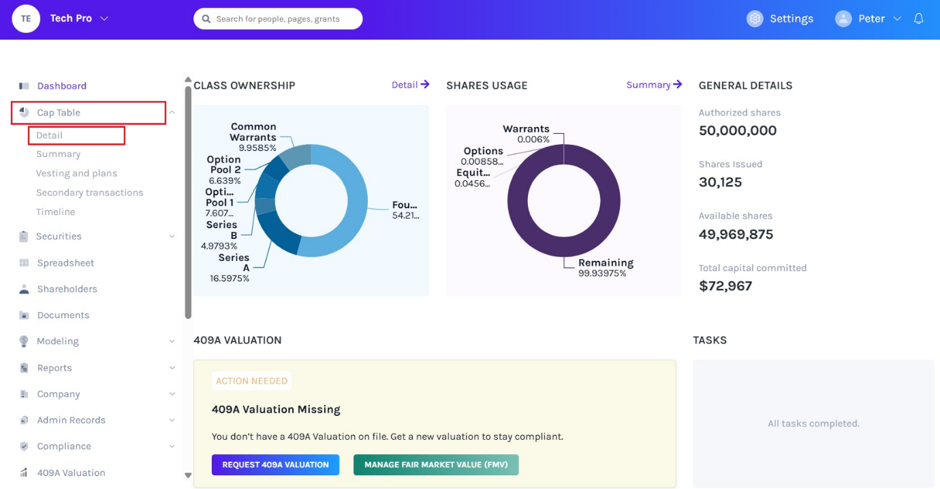
On the dashboard, click on the “Cap Table” option on the left side column. Then click on “Detail”.
Step 2: While on the page, click on your name or the shareholder’s name for whom you want to view the share certificate. For instance, we can click on Bella Micheal here as shown above to be directed to the page where we can see all shares owned by Dylan.
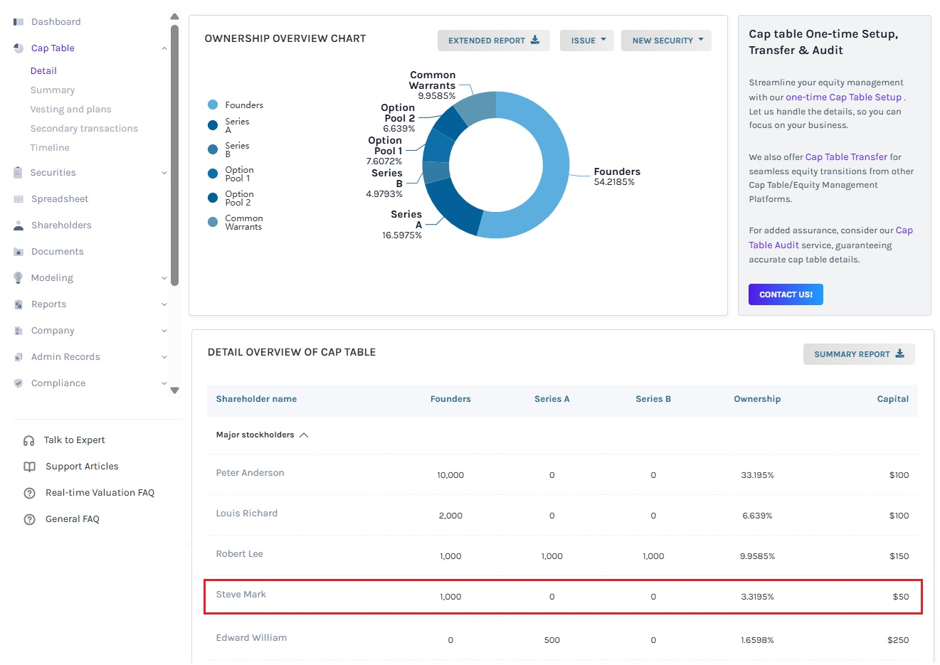
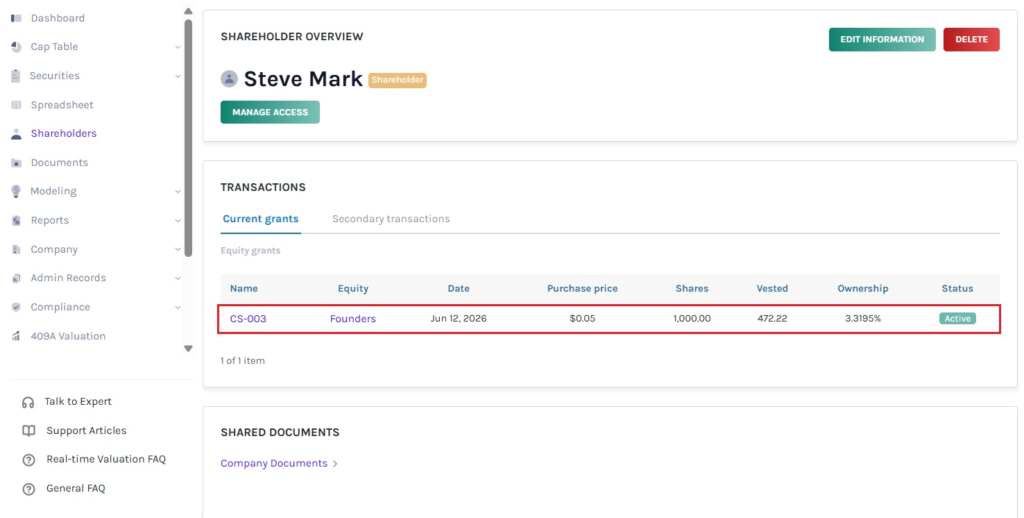
Step 3: By clicking on the name “Steve Mark”, you will be directed to the following page where you will be able to see all the details along with what and how many shares he holds in the company. Now to see the share certificate, you would have to click on the first row with the certificate number “CS-003”.
Step 4: By clicking on “CS-003”, you will be directed to the following page, showing you the grant details.
Note: You can add a document to the grant by clicking on “Add Document”. Check out the support article to know more about adding documents to grants.
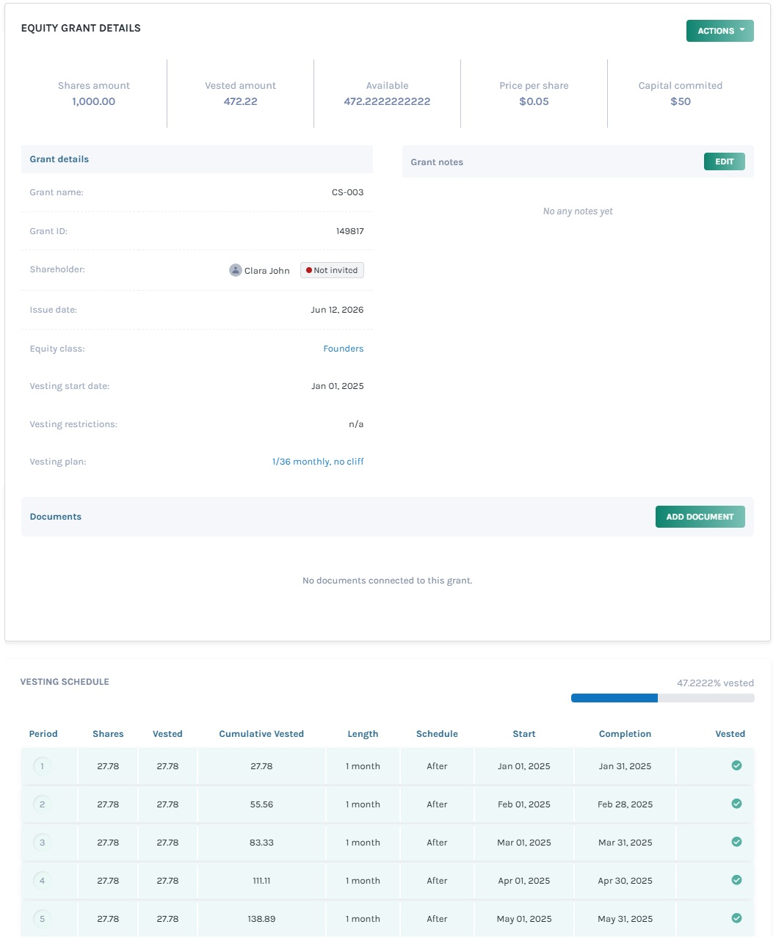
Here, you would be able to view details like the certificate number, the name of the holder, the date of issuance, the number of shares issued, price per share when it was issued, security name (the name of the equity class), and the capital (the total amount of all the shares).
You will also be able to see all the vesting details of the grant.
Note: These are just the grant details of the cap table and an uncertified share certificate. To obtain the certified or digital certificate, you will have to sign the certificate electronically and get the shareholder to do that too. After that, the shareholder will be able to download it or save it electronically.
In short, you will have to create the share certificate so that it can be saved electronically or downloaded. The next steps will help you in doing this.
Step 5: To get the official share certificate, you will have to go to “Admin Records” and then “Certificates” on the left-side menu to reach the following page.
Note: You can enable automatic certificate generation by clicking on “Settings”. Check out the support article to learn more about it!

Here, you will see any certificates that have been created. To create a new certificate, click on “Create Certificate”.
Step 6: Once you do this, you will be redirected to the following page.
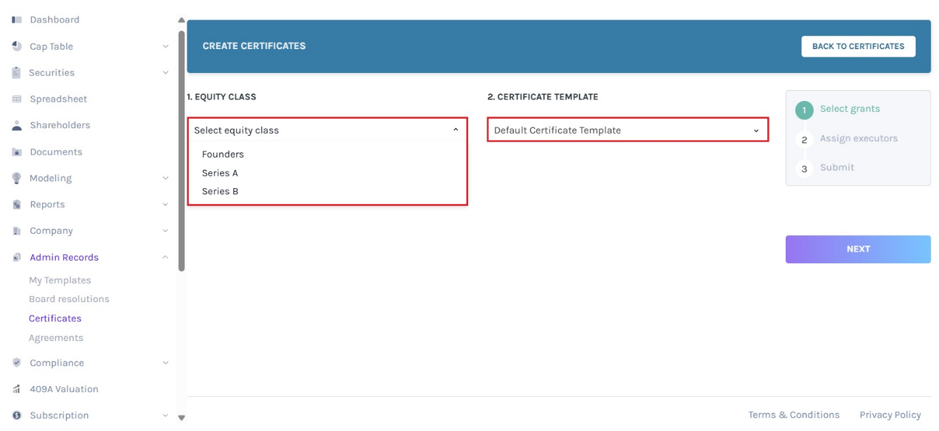
Here, you will need to select the equity class from where the shareholder received their shares. In this case, Steve has received the Founder’s class.
Click on the field below the Select Equity Class label. A list will appear of all the equity classes in the company. We select “founders” in this case. Then, tick the box if the shareholder’s signature is required.
The certificate template can be used when creating and selecting a template from the drop-down menu.
Step 7: As soon as you select the equity class, the shareholders who have received shares under this class will show up.
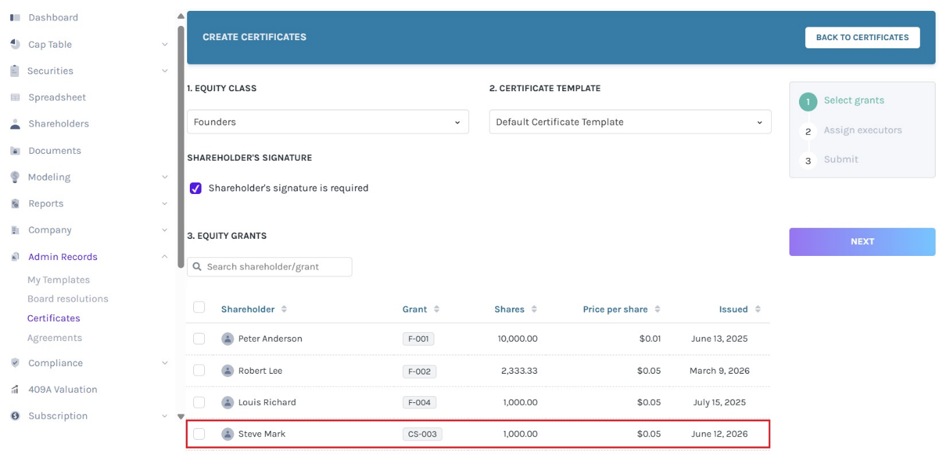
Now select the shareholder whose share certificate you want to create. Here, we selected “Steve”.
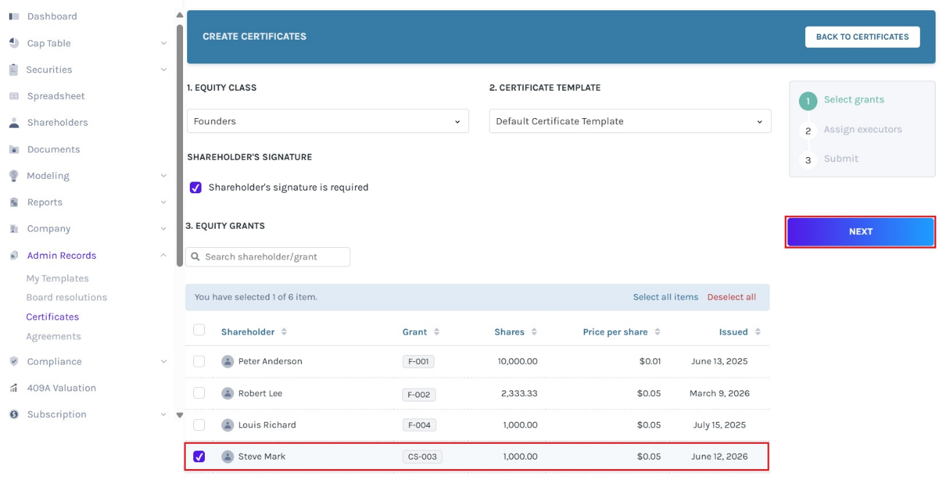
Step 8: The moment you select the shareholder, you can see the number of shareholders selected under the heading “Selected”.
Note: You can select more than one person here. In short, you can even select all if you want to create the certificate for all of them at the same time.
We are going to select Steve only. So, once done, click on “Next”.
Step 9: The next step includes assigning either the admin or the superuser of the company profile to sign the certificate, allowing the shareholder to download it.
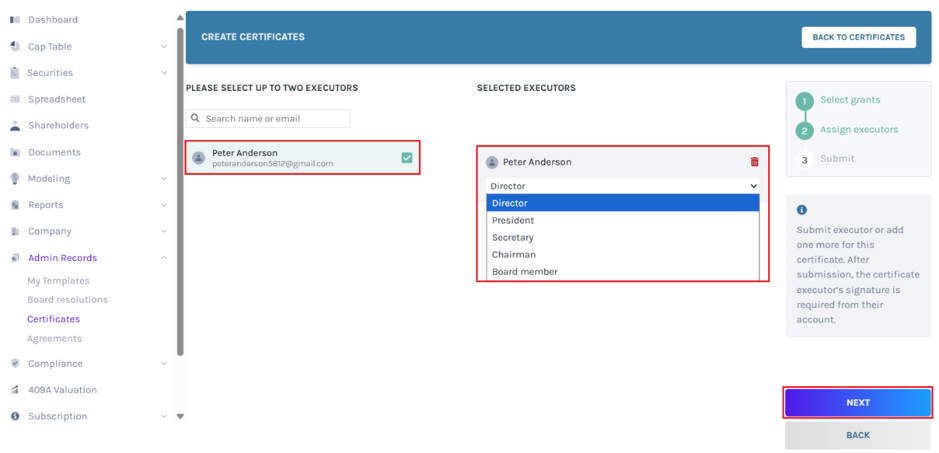
Select the person (from the company users) who would execute this process. The users that can be seen in this part are only the administrators and the superuser of the profile.
After that, you will also have to select the role of the executor, which can be the director, secretary, president, chairman, or board member.
In this case, we selected “Peter Anderson”.
Note: The person who is selected to execute and sign the certificate should be either the director, the secretary, president, the chairman, or the board member. Company users can only be assigned as executors. To know how to add a company user, read this support article.
As soon as you are done with this, click on “Next”.
Step 10: The next step is where you check if you have selected the right shareholder and the right executor.
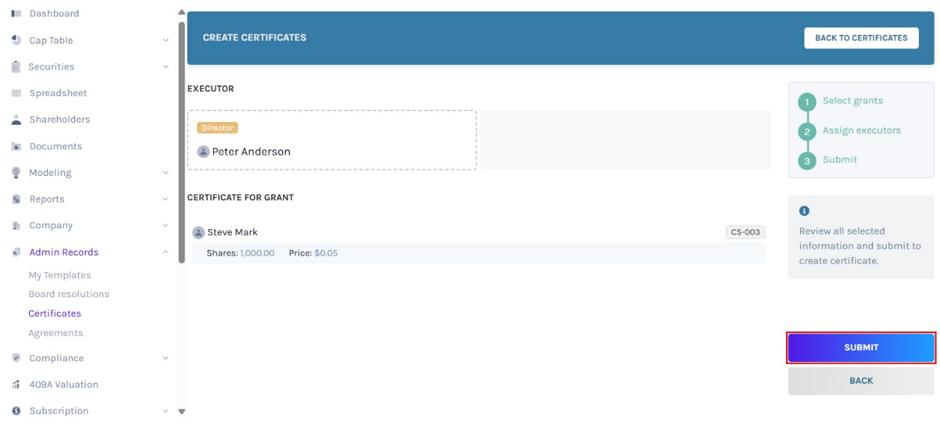
If there is any error, you can click on the option “Back” and edit everything where needed. If you are good to go, click on “Submit”.
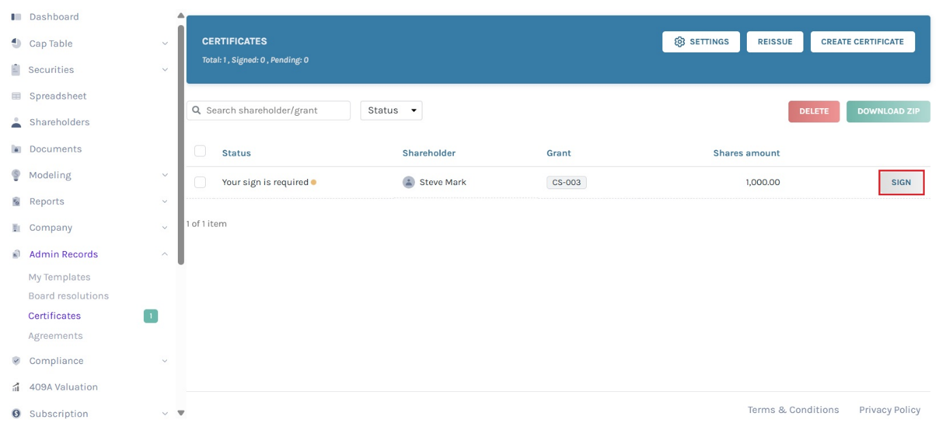
Step 11: When you click on “Submit”, the certificate is created and the executor gets a request to sign the certificate so that it can be downloaded.
Note: From here, you will be able to perform many functions. To know more about it, check out the support article!
Note: You can reissue the certificate by clicking “Reissue” if the grant details have changed. Check out the support article to learn more about it!
You can see the option that says, “Your sign is required” which only comes for the executor.
To sign the certificate and download it, click on “Sign”.
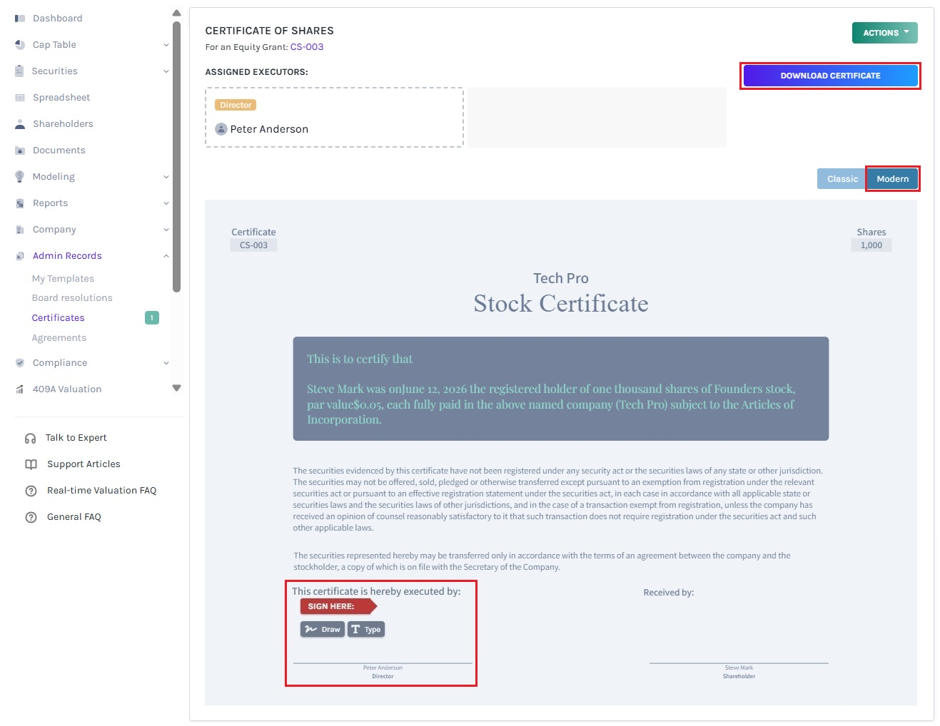
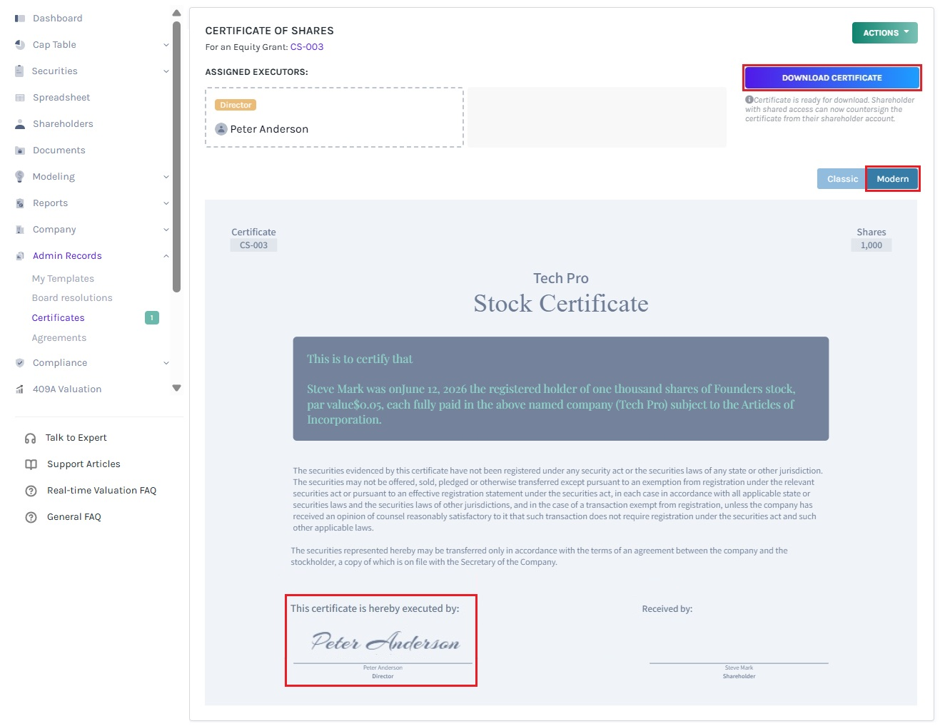
Step 12: You will be directed to the next page where you can now see the electronic share certificate. The certificate has two looks – Classic and Modern.
In this case, we have selected “Modern”. This certificate can be downloaded directly by the executor without signing it – as mentioned under the download certificate button.
Note: You can delete the certificate before signing by clicking on “Actions” on the top-right to get a drop-down menu and click “Delete”. A confirmation message appears, and click on “Yes” to delete.
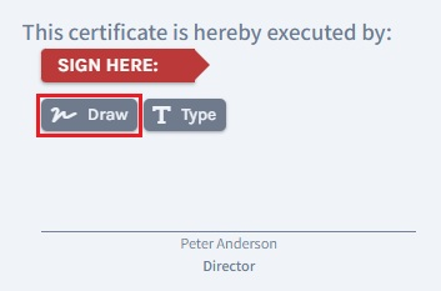
If you want to sign the certificate and then download it, you need to click on the box above your name and below the message – “This certificate is hereby executed by”.
To sign it, click on the box, and two options – Draw or Type your Signature. The space for the signature would also become available and choose your option.
Note: If the executor and shareholder have saved their signatures in Eqvista they don’t need to draw or type – the saved signature will be placed in every certificate assigned to them, and they only need to “tick” the box to confirm signing.
Method 1 – Signature
If you have chosen the “Draw Signature” option, using this plus sign and the mouse, draw your signature in the box.
To sign, click on the “Sign” above the box. If you want to redo the signature, you can click on the “Clear” button beside the “Sign” button above the signing space, as shown below. Click the “Close” to change the option to type signature.
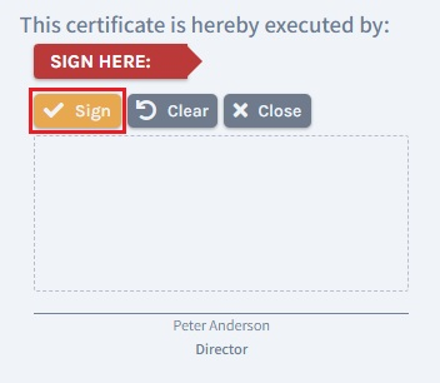
Once done, click on “Sign” above the box. A confirmation message appears, and click on “Yes” to sign. This is how the sign would look when you use your cursor to sign the certificate.

Method 2 – Signature
Suppose you have chosen the option “Type signature”, then type your signature in the space provided as shown below.

To sign, click on the “Sign” above the box. Click the “Close” to change the option to draw signature.
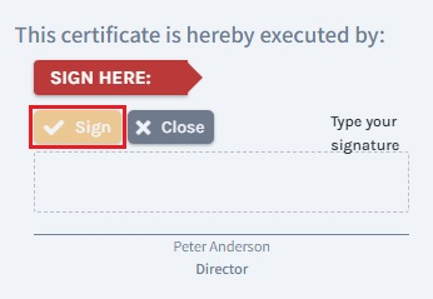
Once done, click on “Sign” above the box. A confirmation message appears, and click on “Yes” to sign. This is how the sign would look when you type it to sign the certificate.
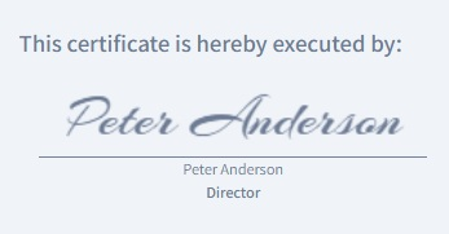
Step 13: Once you are done, click on the “Sign” and the certificate will be signed. This is how the certificate would look now:
Note: The user can’t make any edits once the certificate is created. If you want to delete the certificate, click on “Actions” on the top-right side of the page to get a drop-down menu and select “Delete”. To delete the certificate after the shareholder has signed, you need to delete the grant and re-issue it to create a new certificate.
This is what the digital certificate and the paper certificate look like.
You can see that the “Download Certificate” button is now available. This means that you can download the certificate after the shareholder has signed the certificate.
Note: Make sure you share access to the shareholder to view transactions and sign the certificate. To know how to share access to the shareholder, check our support article.
Apart from signing the certificate, the admin or superuser can perform various functions – Filter, Delete, and Download ZIP. To help you further understand, check out the support article!
Just like this, you can easily get the uncertified and certified share certificate on Eqvista. If you have any doubts or want to know more, check out the other support articles here.
