Eqvista entered the market and has made lives easier for many entrepreneurs, founders and investors. It helps them not only track their shares but also manage their securities online and issue them electronically. To make things better, Eqvista has come out with another update to help shareholders request, sign, and download their share certificates online. This article would explain all about this update and how you can use it on the app.

Share Certificate
Owning shares in a company means that you as a shareholder have purchased a certain number of shares from the company. The reason why shareholders buy shares in a company is so that they can have their investment grow. This happens when the business grows and increases its overall share price. Since shareholding is subject to time, documentation about this is important. That is where the share certificate comes in.
What is a share certificate?
Also referred to as a stock certificate, a share certificate is a written document signed on behalf of the company that acts as legal proof of ownership on the number of shares a shareholder has in the company. This share certificate acts as a receipt for the purchase and ownership of shares. The document certifies registered ownership of shares from a particular date.
Here are the key details that are added in the share certificate:
- Company name
- Company’s registration number
- Certificate number
- Shareholder’s name
- Shareholder’s address
- Number of shares owned
- Class of shares
- Issue date of shares
- Amount paid (or treated as paid) on the shares
It is important for every company to issue a share certificate as soon as the shares are allotted. The latest the company can issue a share certificate is within two months of the issuance of the shares. Companies can issue just one certificate per class of share for all the shares issued at one time, except if the shareholder requests for separate certificates.
Why is a share certificate important?
The main role of a share certificate is documentation. Every shareholder detail has to be always updated to keep track of the stock ownership in the company. For instance, if an investor purchases 2,000 shares in a company today, and a week later, they sell 1,000 of these shares to another investor. And a month later, they purchase another 500 shares from the company. This changes a lot of details. And all these details and the shift in the ownership has to be tracked for auditing purposes.
Moreover, a share certificate is also legal proof of the stock purchase and the shareholder’s entitlement to dividends. To protect the interests of shareholders, all companies need to keep proper records of all the share certificates issued over the years. This share certificate is used for knowing the owner of the shares, transferring shares, and obtaining a new certificate for a damaged or lost one.
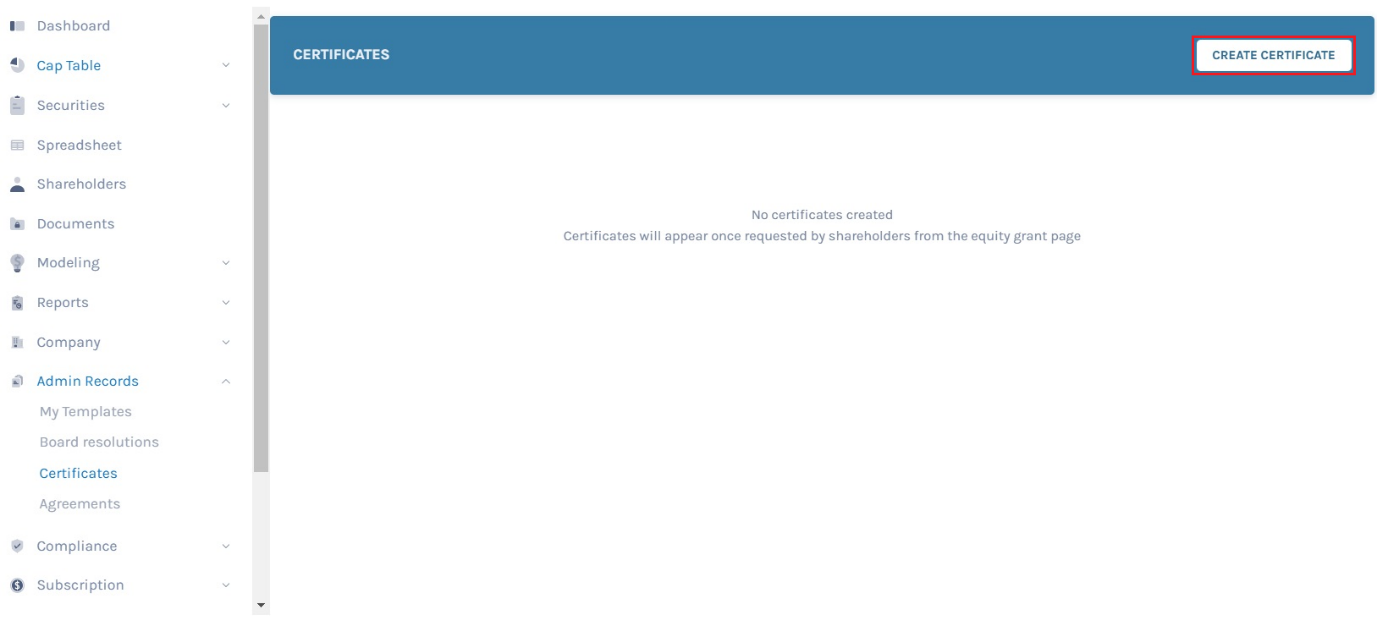
Create Share Certificate by Admin/Superuser
Now that we are clear about what share certificates are and why they are important, let us talk about how to create a share certificate on Eqvista with the new update. To begin, a share certificate can only be created by the admin/superuser, who is usually the company account holder. They have the rights to sign the certificate, and later for the shareholder to download it.
There are actually two ways the certificate is created. One is when the superuser creates it on their own, and the second is when the shareholder requests for it.
Let’s start where the superuser creates the share certificate on their own
The steps to do this are quite simple. All the superuser has to do is log into the account, go to “Admin Records”, and then the certificates tab. Here, you will see the option to Create a Certificate.
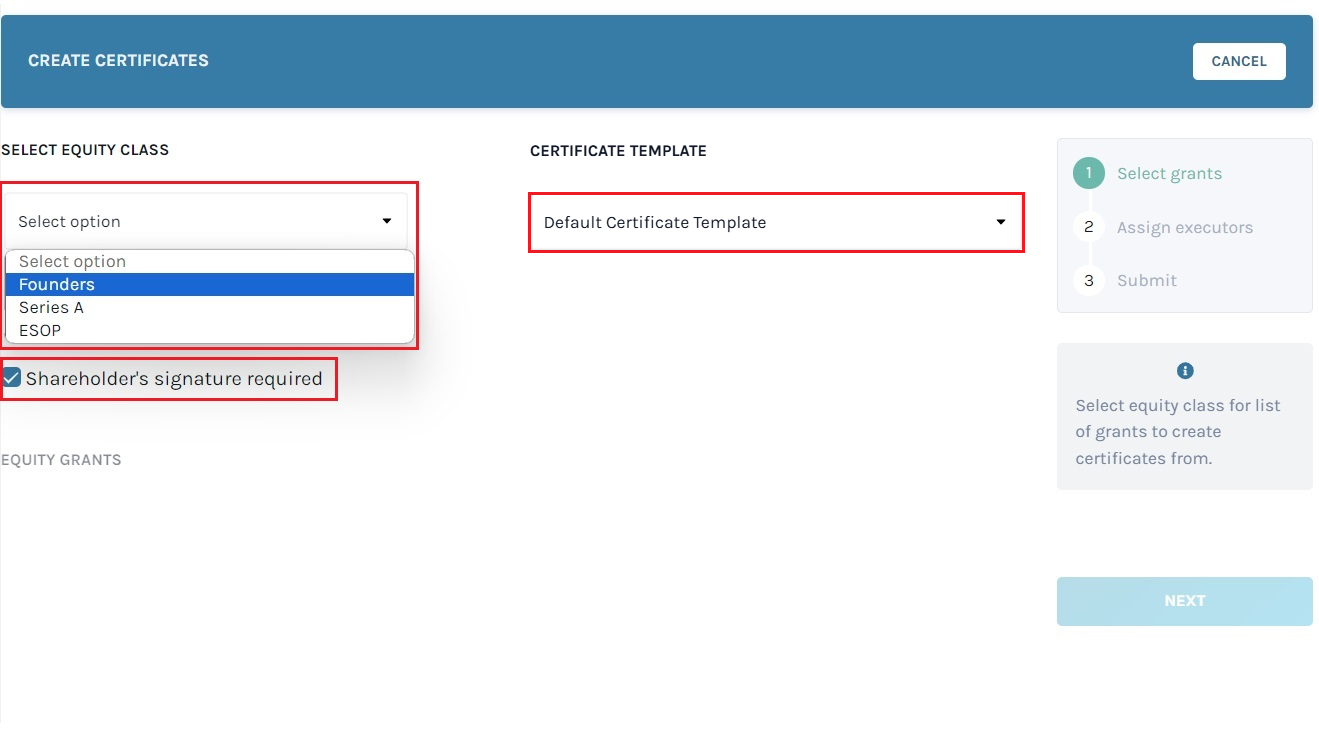
The next step includes selecting the shareholder for whom you want the share certificate to be created. Then, tick the box if the shareholder’s signature is required. The certificate template can be used when creating and selecting a template from the drop-down menu.
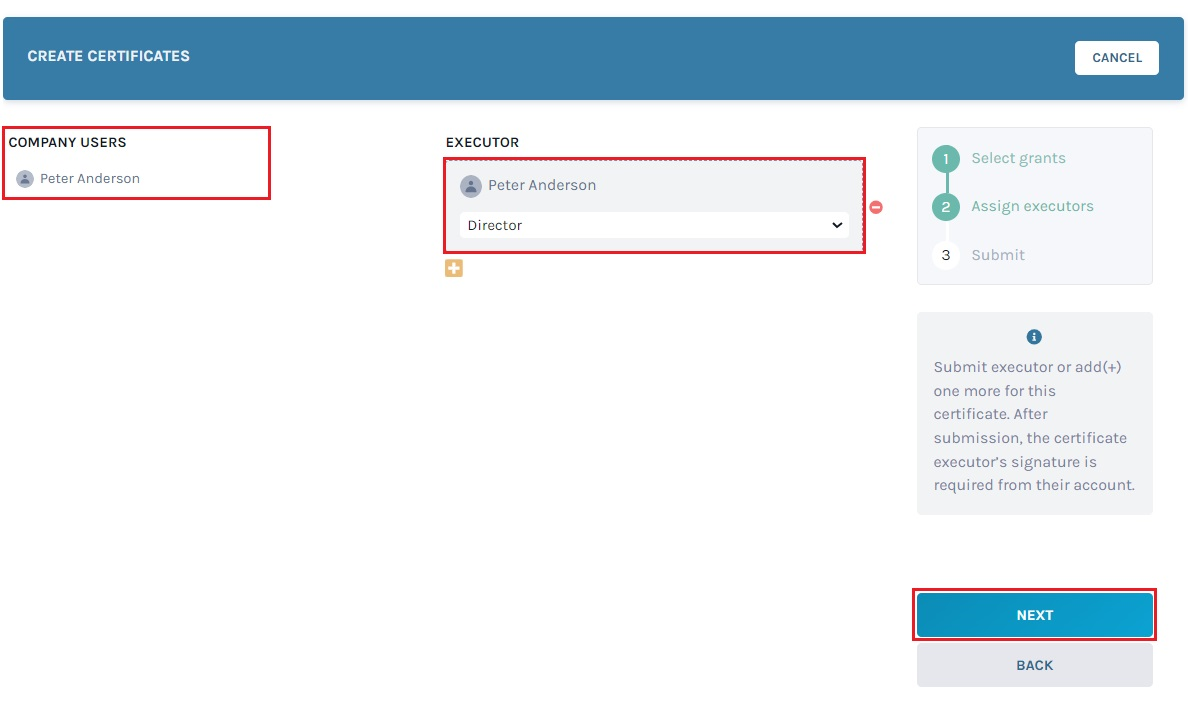
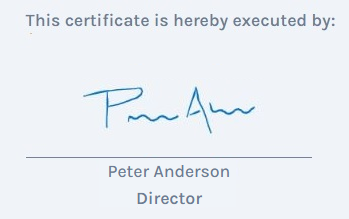
One important part of creating a share certificate is getting an executor to sign it. The executor is usually the superuser who has to sign the certificate. So, assign the executor, check the information, and then create the share certificate.
Note: The person who is selected to execute and sign the certificate should be either the director, the secretary, or the President. Company users can only be assigned as executors. To know how to add a company user read this support article.
Once done, you will have a notification to sign the certificate (in case the super user is also the executor). The certificate has two looks – Classic and Modern. In this case, we have selected “Modern”.
Note: You, being the superuser, can download the share certificate without signing it as well. However, the shareholder cannot download it without a signature.
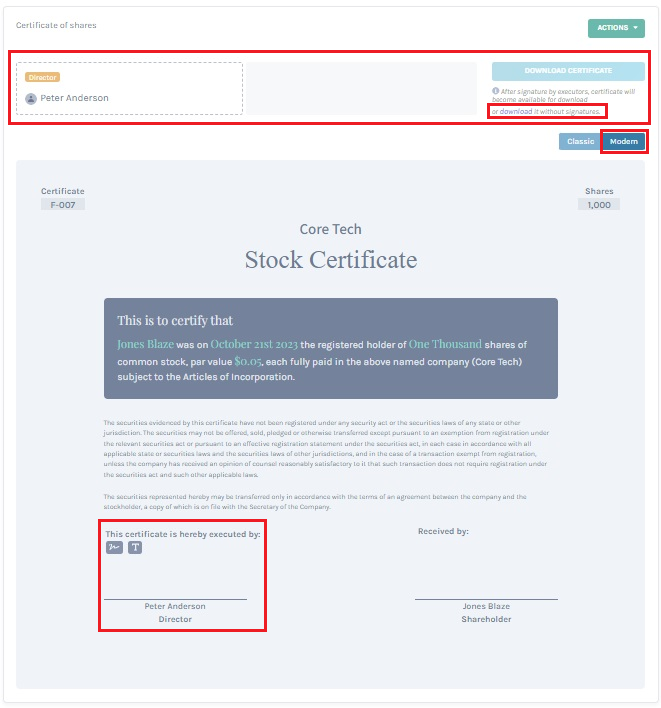
Sign it and the shareholder would be able to download it. To understand how to go about the steps properly on Eqvista, check out the support article here!
REQUEST SHARE CERTIFICATES BY SHAREHOLDER
As mentioned above, the second way to create the share certificate on Eqvista is when the shareholder requests for the certificate.
For this, the shareholder needs to log into their account, and they would be able to see the grant details and notification.
As per the shareholder acceptance, the shareholder will have to add their signature to accept the grant. To add the signature, the shareholder needs to add their User Name in the field available as shared above (If you add a different name you can’t approve the grant).
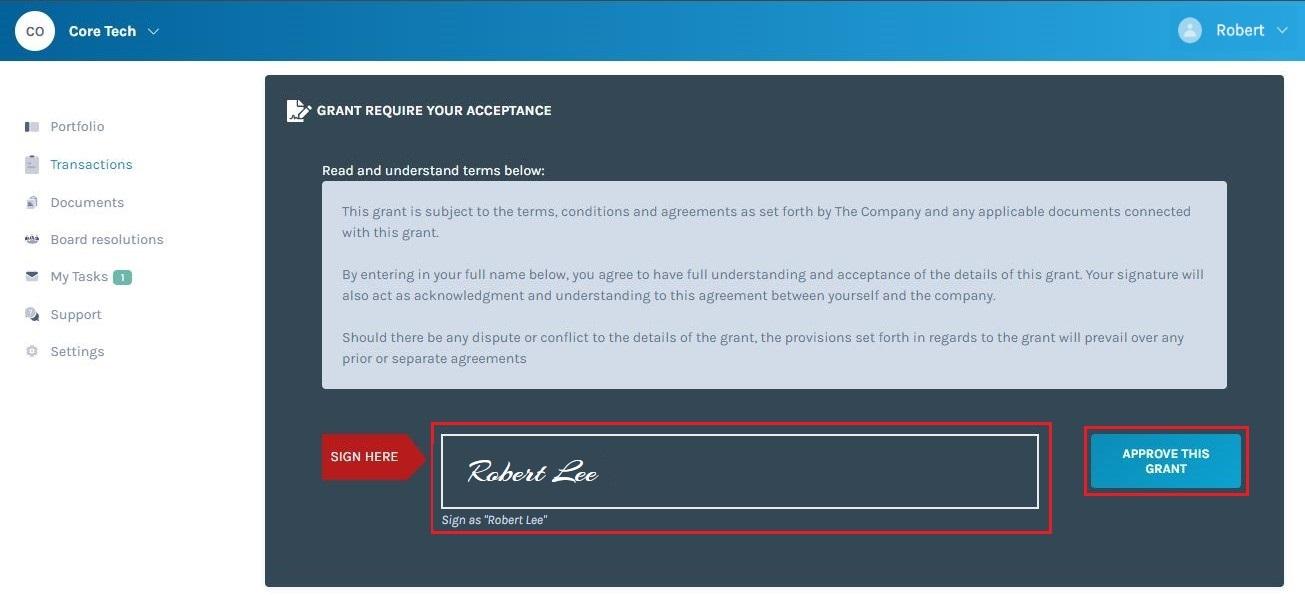
The shareholder should click on the option to view it and they would be redirected to the share certificate page.
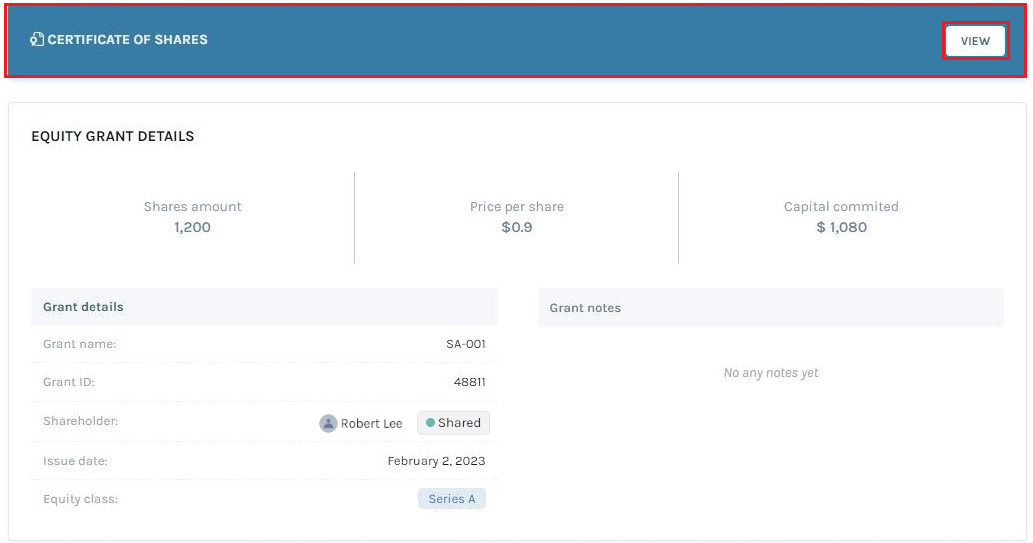
Since the shareholder is the one requesting the share certificate, the admin/superuser wouldn’t have signed the share certificate yet. This means that the shareholder cannot download the certificate until it is signed (which is also why they need to request for the sign to get the certificate).
Once you sign it, you will see on the top of the share certificate, there is a button that says “Request Certificate”. The certificate has two looks – Classic and Modern. In this case, we have selected “Modern”.
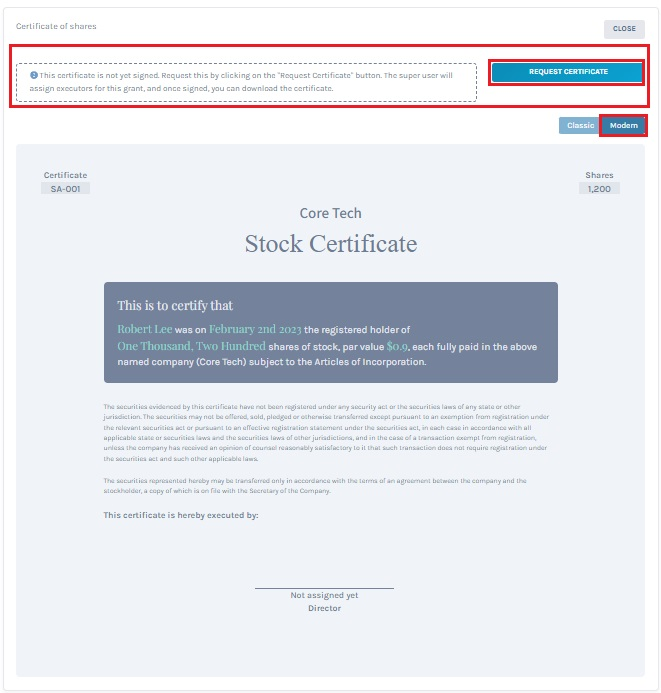
By clicking on this, the shareholder can then request the certificate. Here is the support article to help you in requesting a share certificate properly.
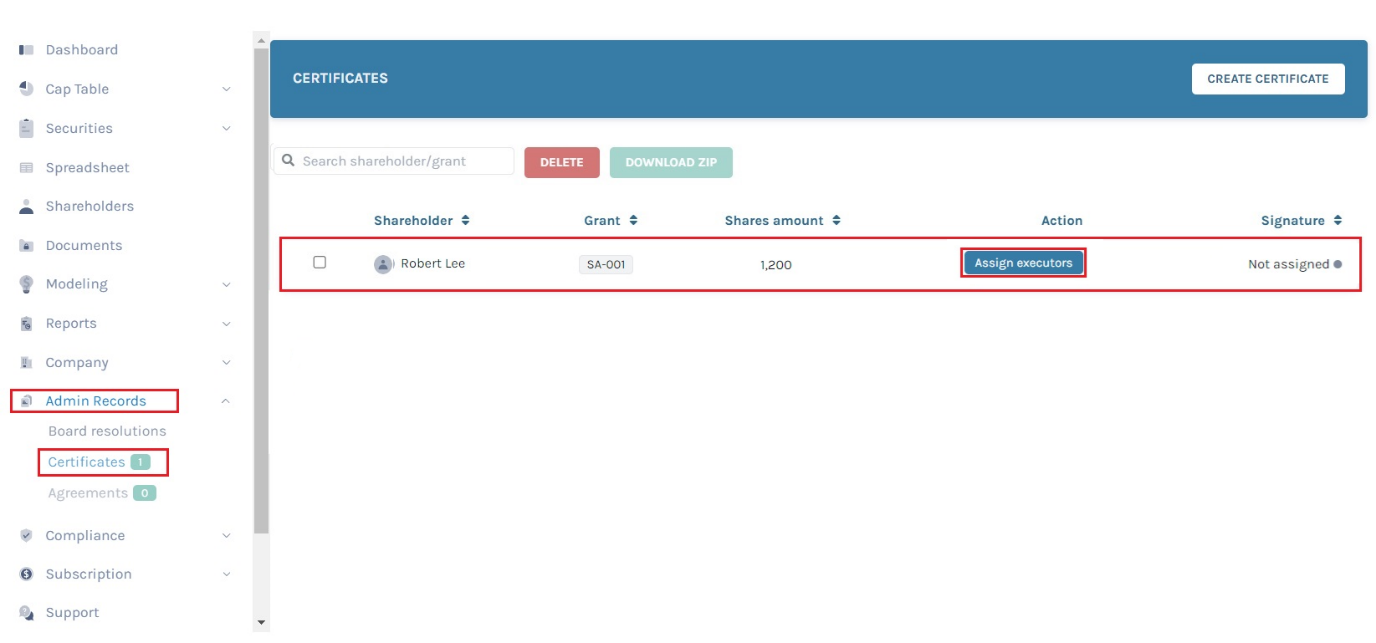
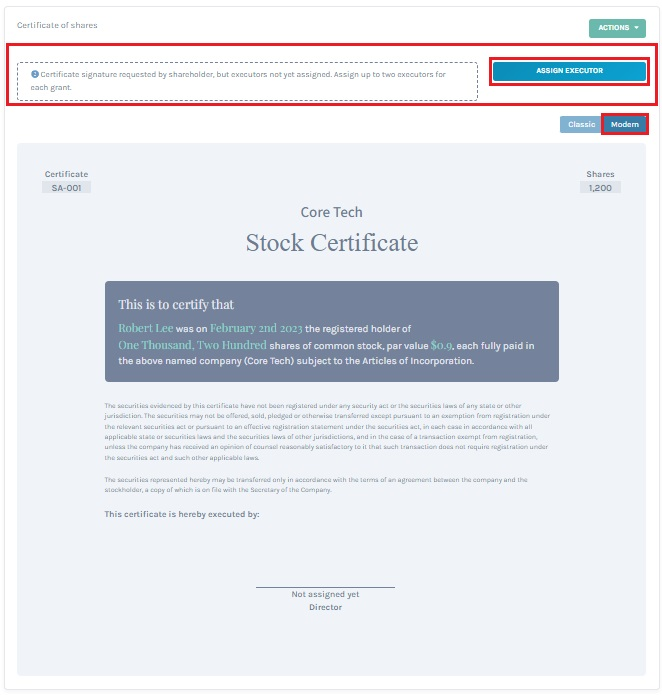
ASSIGNING EXECUTOR FOR SHARE CERTIFICATE
Once the shareholder requests the share certificate, the next step is for the admin to assign the executor to sign it and then approve the certificate. For this, the admin would have to go to certificates and click on the “assign executor” button that shows up.
You will be taken to the certificate page where you can then assign the executor. The certificate has two looks – Classic and Modern. In this case, we have selected “Modern”.
Select the person (which can be you, the superuser) and their designation in the company and assign the task of signing the certificate.
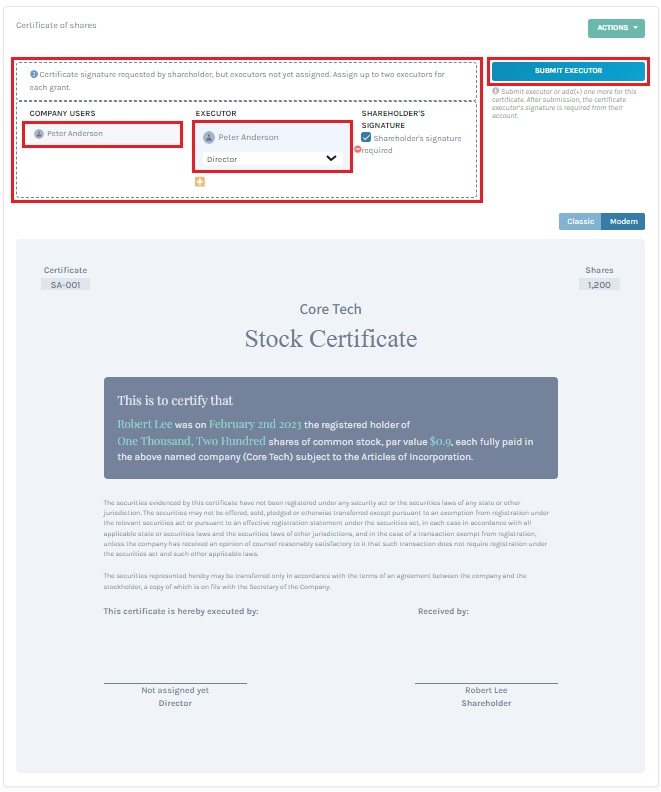
Once done, sign the certificate (since you are the superuser, who is also usually allowed to be the executor). To understand in detail how to assign an executor, check out the support article here!
DOWNLOADING SHARE CERTIFICATE
Now, as soon as the admin signs the share certificate, the shareholder would get an email about it. And this means that they can now download it. All they need to do is go back to the certificate and sign the certificate in the box available using the cursor as a pen (if you have not signed it yet). Once the signature has been made, the shareholder can now download the certificate.
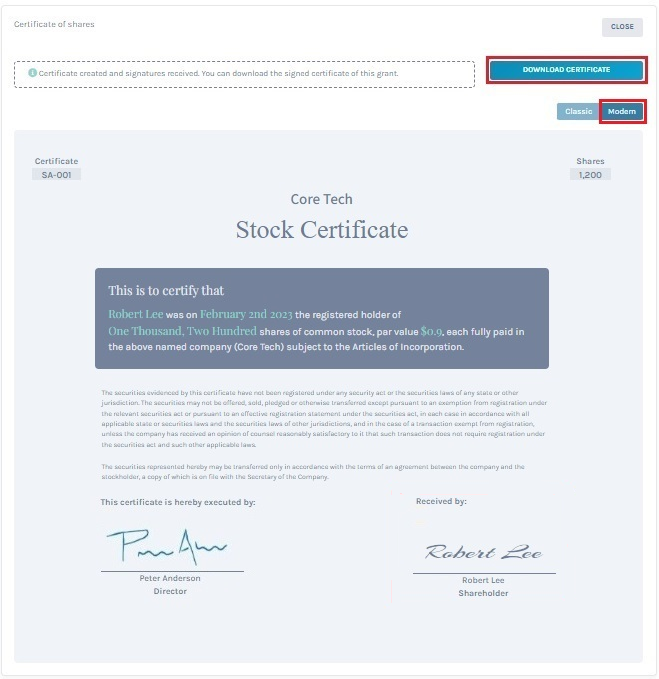
Here is a detailed support article on how to download the share certificate on Eqvista.
Easily Create and Sign Share Certificates on Eqvista
And just like this, you can easily use Eqvista to now create share certificates and give them to your shareholder right from the app online. If you have not yet started using Eqvista, now is the time! Eqvista has a lot of other great features that would help you manage your cap table for your company. Check out the application here and learn more about it here!


