Create a Vesting Schedule for RSAs
Creating a vesting schedule for RSAs is easy when you are doing it through Eqvista. To make things easier for those who need some help, here is a step-by-step guide on how to create a vesting schedule using RSAs.
How to create a vesting schedule for RSAs?
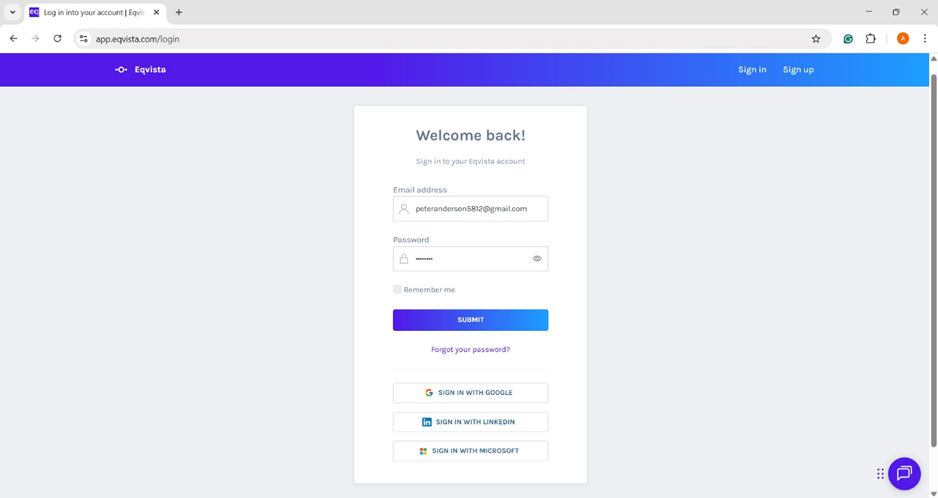
Step 1: Begin by logging into your Eqvista account and selecting the company account.
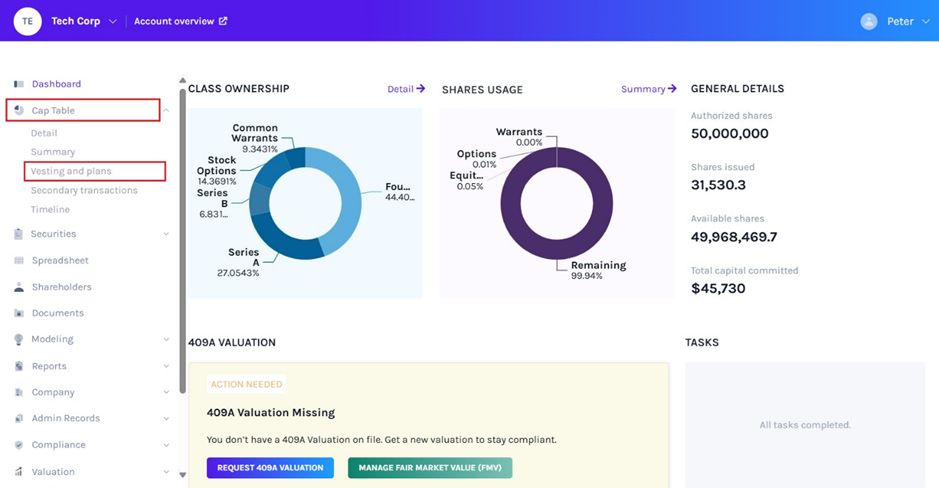
Once you get to the dashboard of the company, click on “Cap table” from the left-hand side panel for the drop-down menu to appear. Here, select the option “Vesting and plans”. Once you do this, you will be directed to the next page, as below.
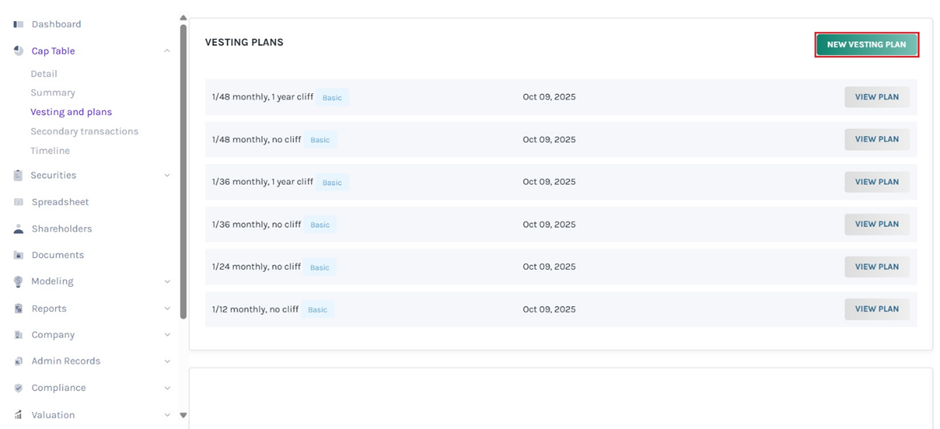
Step 2: On this page, you will find all the vesting schedules that have been created in your company along with the use of any schedule for the issuance of shares to any shareholder. In case your company doesn’t have any vesting plan, you will see the message saying “There are no vesting plans created” and an option “Create Vesting Plan” below it.
Note: You can create your vesting plan or choose from six default plans. To know more about vesting plans, check out the support article here!
But in case you want to use a new vesting plan, you can create a new vesting plan by clicking on the “New Vesting Plan”.
Note: Just to be clear, you do not need to create a new vesting schedule for RSAs if you already have vesting schedules prepared as per your plan. You will select the restriction as RSA when you are issuing shares to the shareholder.
Step 3: Once you have the vesting plan ready, you need to begin the process of issuing shares to the shareholder from where you can choose the vesting plan. For this, you need to click on “Securities” and then on “Equities” to reach the following page where you can see all the equity classes.
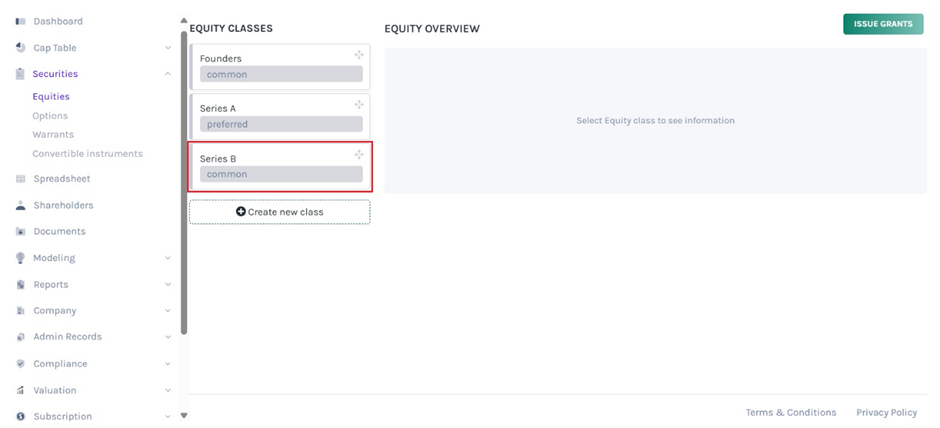
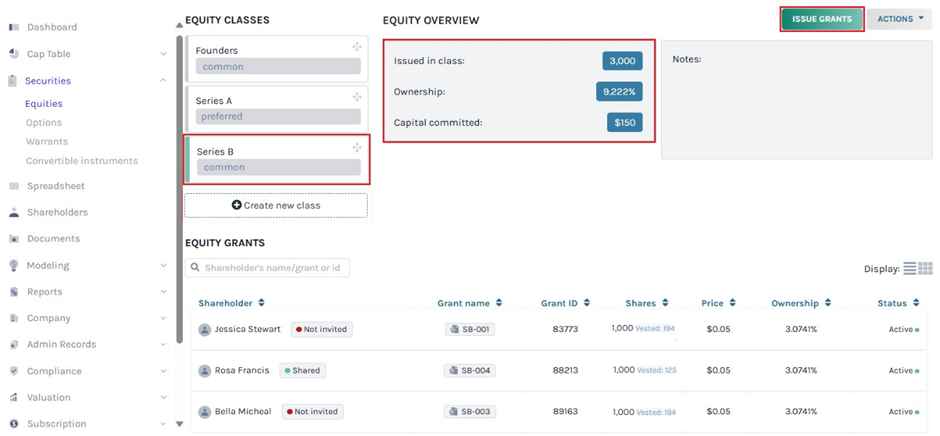
Here, select the equity class from where you want to issue the shares and add the vesting schedule. In this case, we selected “Series B”.
Note: On this page, click on “Create New Class” to create an equity class and if you have created one, you can issue shares and implement a vesting schedule.
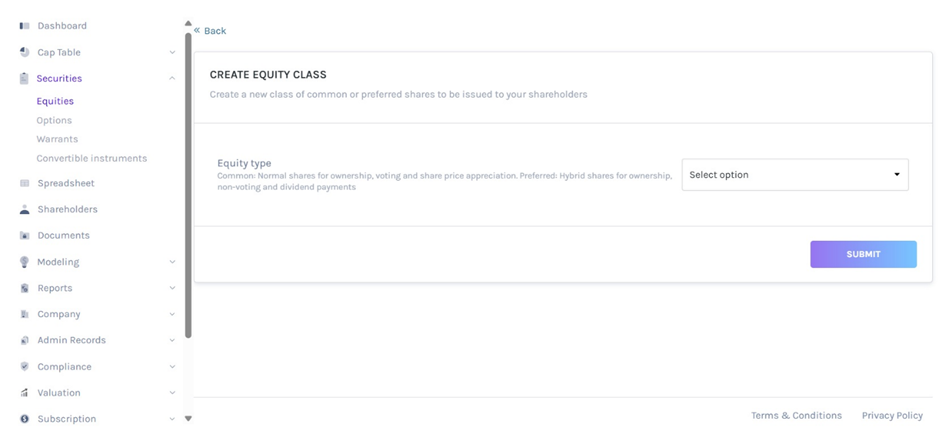
Step 4: Once you do this, the details for this equity class will show up. Here, click on “Issue shares” from the top right-hand side of the page.
Step 5: You will be redirected to the next page to select the equity class again from the list available.
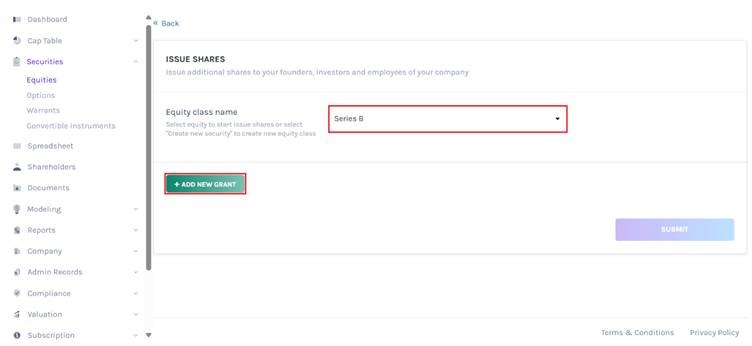
Once you select the equity class, a button will appear that says “Add New Grant” and click on this.
Step 6: You will reach the page where you can begin the process of issuing shares using a vesting schedule and placing the RSA restriction on the vesting plan.
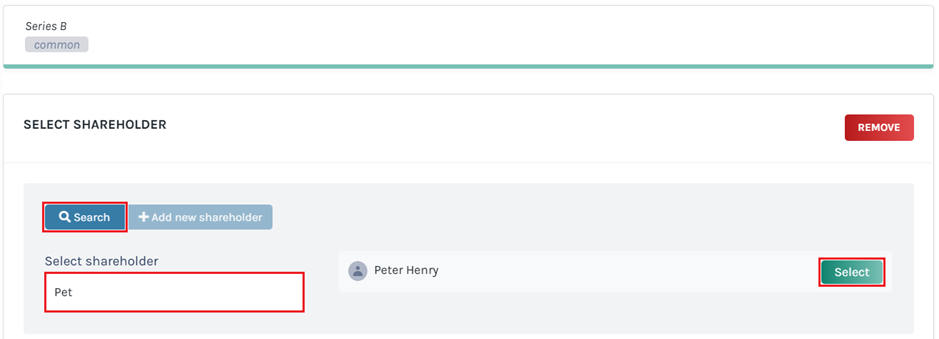
Here, you have the option to search for a shareholder or to add a shareholder from here directly.
Note: You need to have the shareholder profile already created. Check out the support article to add a shareholder. If you do not have it created, you can choose the option “Add New Shareholder” here too.
In this case, the shareholder’s profile is already there, so we type in the name of the shareholder in the field to get the name on the right side. From here, click on “Select” beside the shareholder’s name.
Step 7: As soon as you do this, a new panel will appear where you need to add the details for the issuance. This includes the number of shares, the price at the time of issuance, the date of issuance, and the share name (share certificate number).
Once all these parts have been filled, there is a last option where you need to choose the “Vesting Schedule”. Select “yes” and another option will appear where you can then choose the vesting plan name from the list.
Note: You can add a vesting schedule while issuing shares, options, and warrants. Check out the respective support articles to learn about this.
In this case, we selected the “1/48 Monthly, No Cliff”. Once you do this, two additional options show up – the vesting start date and the vesting restrictions as shown below.
Note: When filling the restrictions part, you will get a list of three options – No restrictions, Restricted Stock Units, Restricted Stock Awards, and Phantom Stock. Check out the respective support articles to learn about this.
Here, you need to choose the option “RSA”. The shares would have been issued using the vesting schedule you choose and placing the RSA restriction on it.
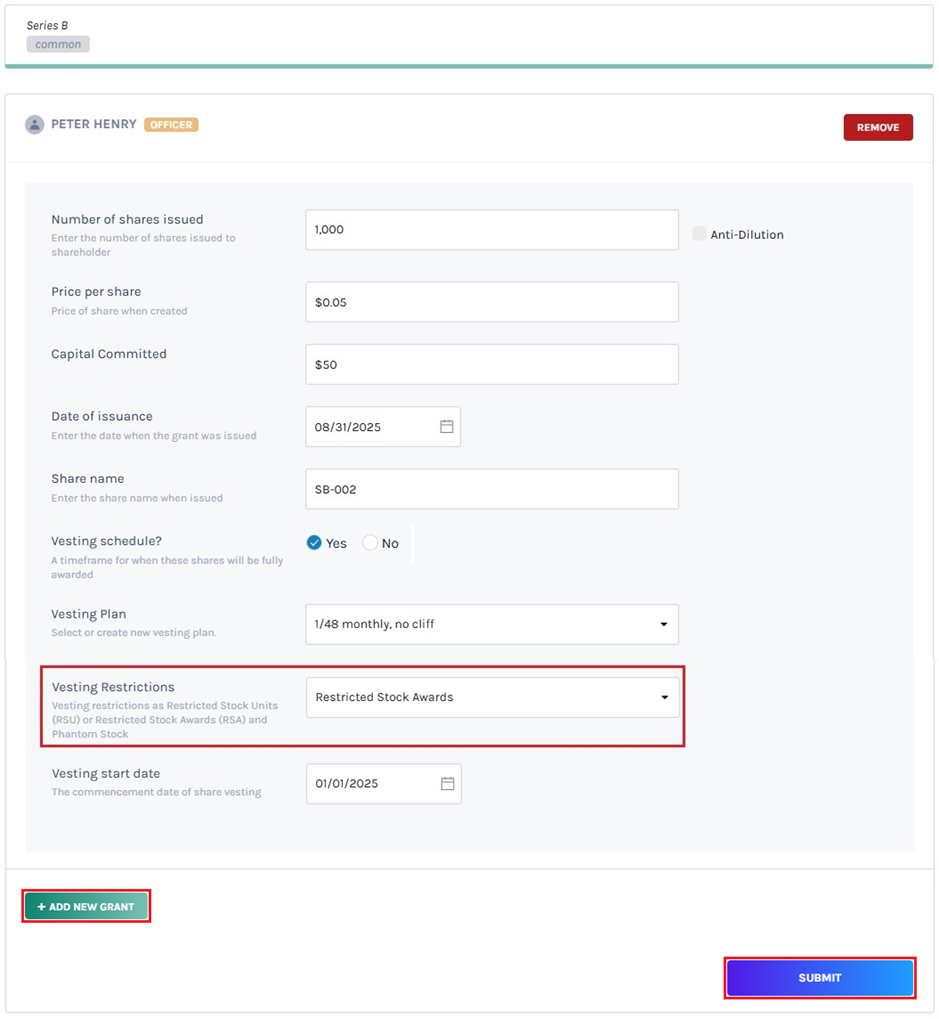
Note: If you want to issue shares from the same class to more than one shareholder, click “Add New grant”. Then select the shareholder profile or add one and fill in the details.
Once you have done this, click on “Submit”.
Step 8: You will be taken to the page where you can see the issuance made from the equity class. Here, click on the grant name “SB-002”.
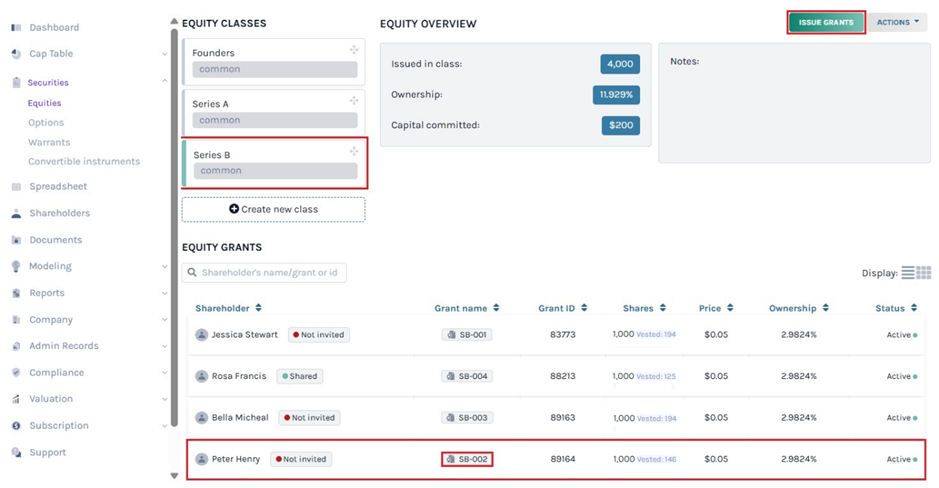
Note: Suppose you want to issue another equity from the class you issued. Then, click on “Issue grants”. Just ensure that you have selected the equity class from which you want to issue equities.
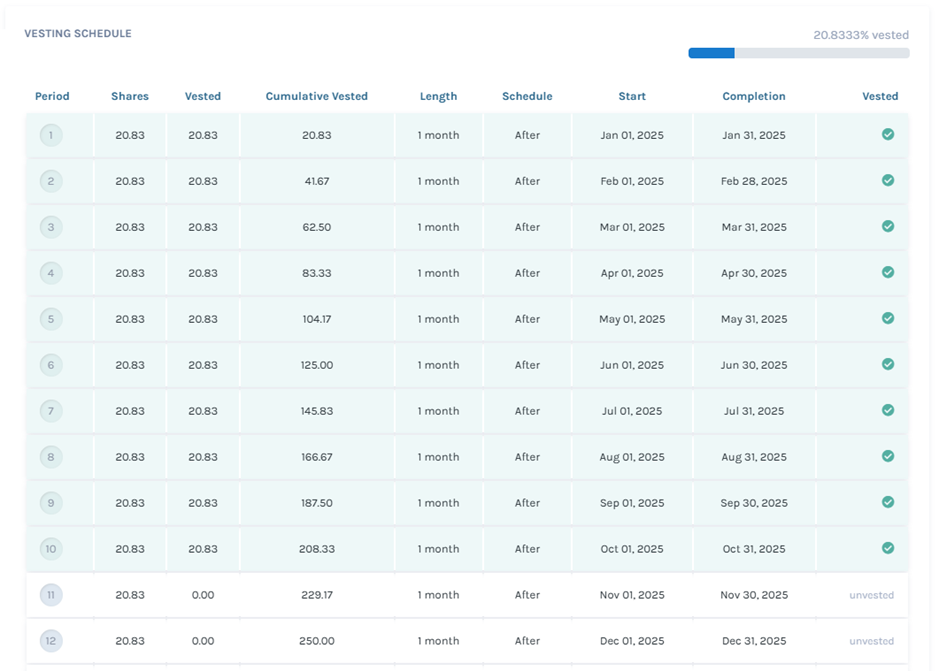
Step 9: Once you do this, you will be directed to the following page where you can see all the details of the plan including the restriction type placed on it.
Note: You can add document to the grant by clicking on “Add Document”. Check out the support article to know more about adding documents to grants.

If you want to know more or understand any other process, check out the other support articles here or contact us today!
