Warrant – Setup and Modify
Issuing warrants on Eqvista is just as easy as issuing shares. But if you need some help in knowing the exact steps, here is a step-by-step guide on how to set up, issue, and modify a warrant on Eqvista.
Issue Warrants
There are two situations or ways in which you can issue warrants in Eqvista.
Step 1: You need to first log into your Eqvista account and select the company account for setting up warrant and issuance.
Situation 1
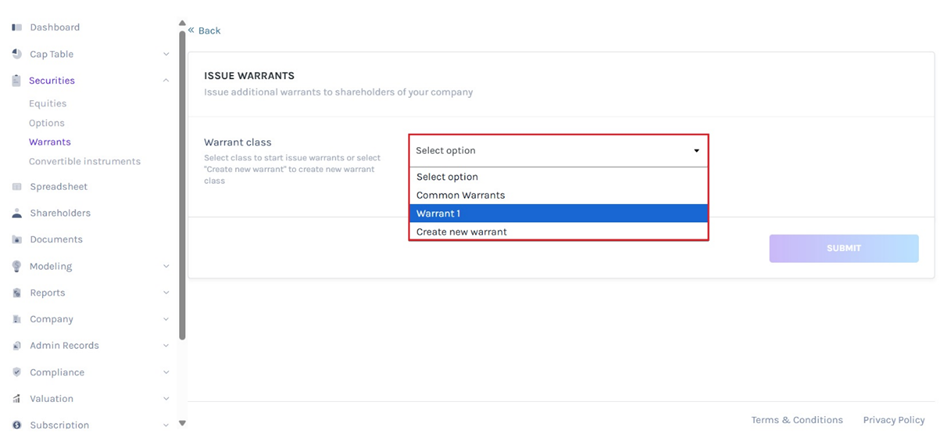
Here, click on “Securities” from the left-hand side panel for a drop-down menu to appear. Select the option “Warrants” and you will be directed to the following page.
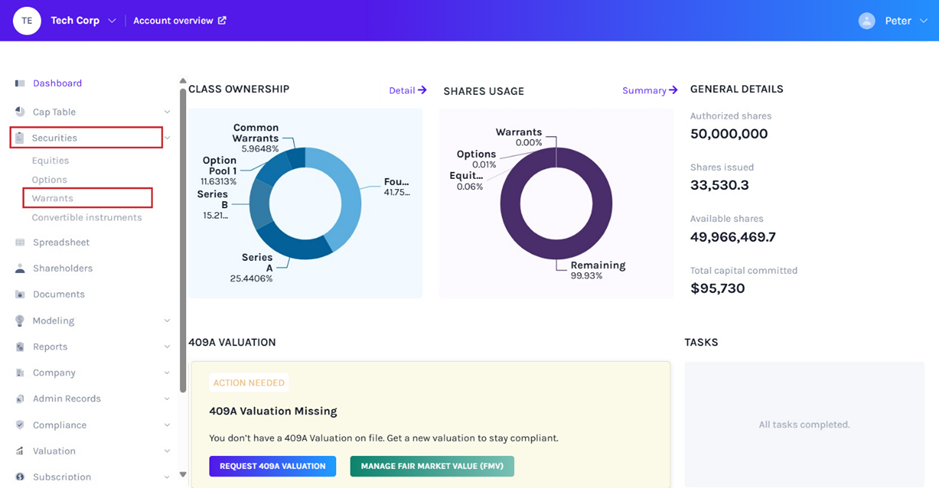
Step 2: On this page, you will find the details of all the warrants that are there in your company. In case you haven’t yet issued any warrant, you will find the message saying, “Create Warrant class to start issue grants”.
Note: If you already have a warrant class, you can just click on it and then click on “Issue grant” to issue the warrants to the shareholder from the class you already have. You can jump to step 5 from here where you need to search for a shareholder.
In this example, there are already warrants created. Anyways, click on the button, “Create new class”.
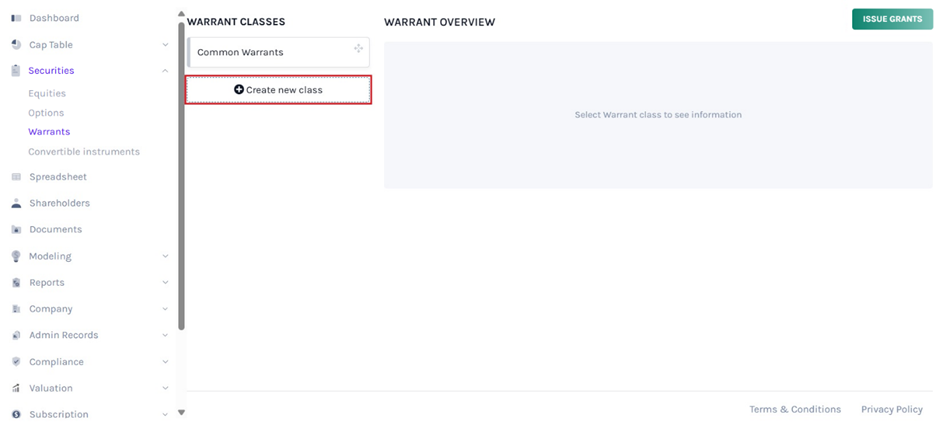
Step 3: By clicking on this, you will be directed to the following page.
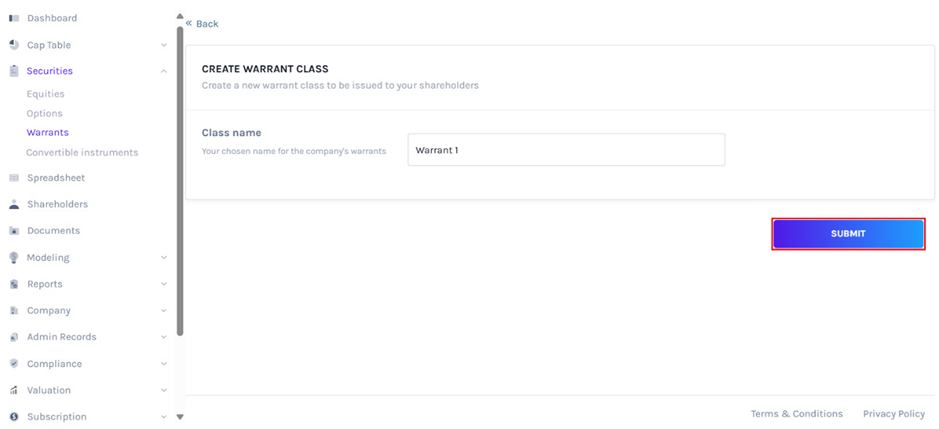
Here, you need to just add the name of the warrant that you are creating. Once done, click on “Submit”.
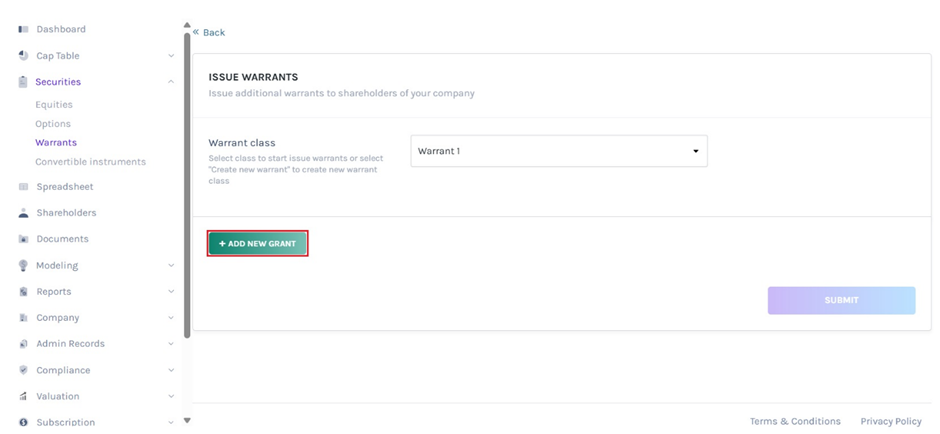
Step 4: With this, the class is created and you are taken to the next page where you can now begin the process of issuing a warrant.
As soon as you select the options class name, a button shows up below it that says, “Add new grant”.
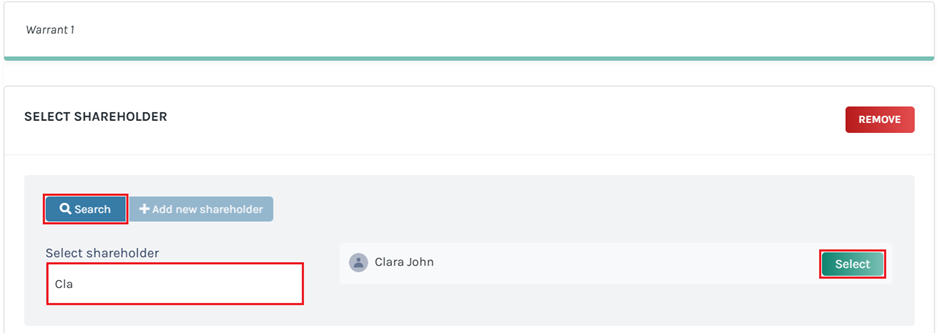
Step 5: On Submitting it, you will be directed back to the page where you can now issue the warrant to the shareholder.
Here, you have the option to search for a shareholder or to add a shareholder from here directly.
Note: You need to have the shareholder profile already created. Check out the support article to add a shareholder. If you do not have it created, you can choose the option “Add New Shareholder” here too.
Method 1
If you have already added the shareholder profile in the cap table, you can just type in the name in the search box and the name will appear on the side of it. Click on “Select” and begin the process of issuing options.
Method 2
The second way is by adding a new shareholder profile while issuing shares. This is when you have not already added the shareholder profile in the cap table. In this case, we have not added the shareholder. So, we will click on the option that says, “Add New Shareholder”.
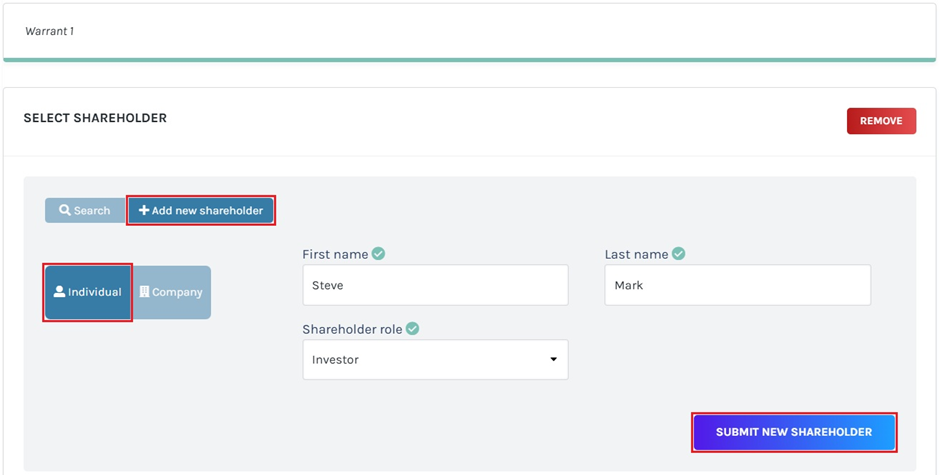
When you do this, you will get a new panel where you can now add the details of the shareholder. First, select if the shareholder you are adding is an individual or a company. For a company, you will need to add their name and their role. For an individual, it is the same with two fields for the first name and the last name, and the person’s role.
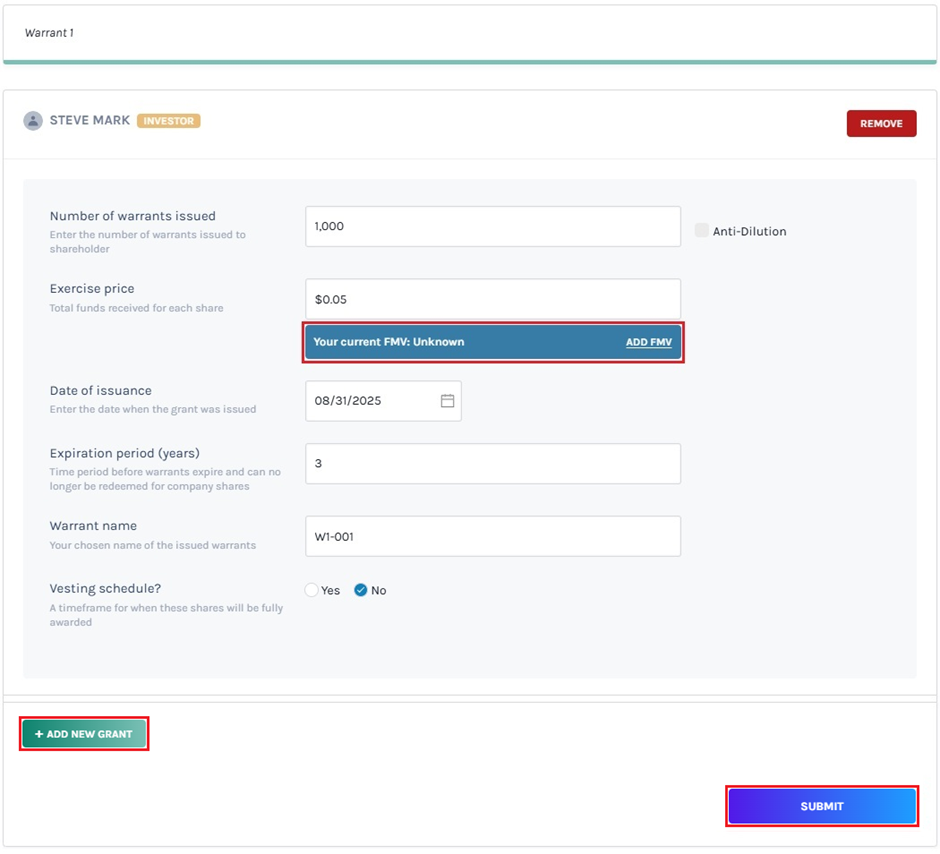
Step 6: As soon as you do this, a new panel will appear.
Add in the details including the number of warrants issued or select the option anti-dilution, the exercise price, date of issuance, expiration period (after this time the warrant can no longer be redeemed as shares in the company), warrant certificate name, and select if there is a vesting schedule or not as well.
Note: You will see a notification below the space given to enter the Exercise Price and an option to “Add FMV” if you have not performed 409A valuation.
If you have performed 409A valuation, you will see a notification displaying your current FMV from 409A valuation and an option to “Edit FMV”.
To request, add, edit, and share the FMV, check out our support article here!
In this case, we selected “No” for the vesting schedule and for obtaining shareholder acceptance.
Note: You can add a vesting schedule while issuing shares, options, and warrants. In addition to this, you can create your vesting plan or choose from six default plans. To know more about vesting plans, check out the support article here!
Note: You can add another grant using the “Add new grant” button. This is if you want to issue options from the same option class to more than one shareholder. All you need to do is click on “Add new grant” and then select the shareholder profile or add a new shareholder and fill in the details.
Most importantly, all this can be done without losing any of the first grant details.
Once done, click on “Submit”.
Step 7: You will be directed back to the page where you can see all the warrants. The warrant you just created can be seen and the issuance you made from this warrant can also be seen here.
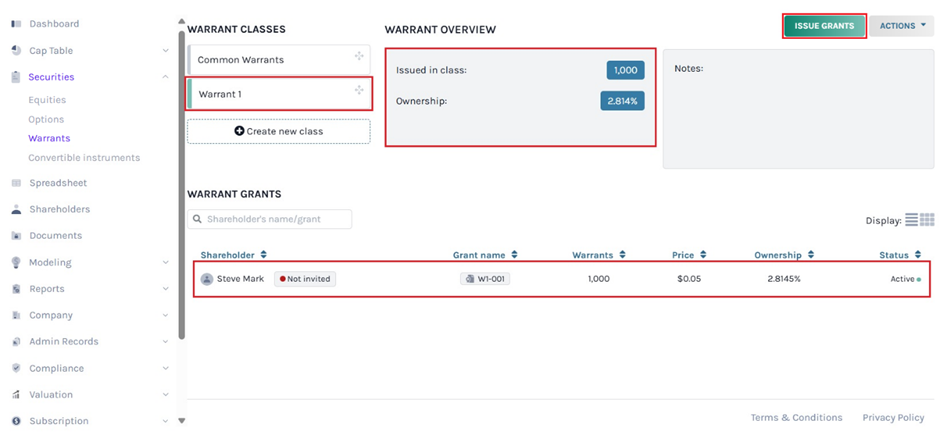
Note: Suppose you want to issue another warrant from the class you just created. Then, click on “Issue grants”. Just ensure that you have already selected the warrant name from which you want to issue the warrants.
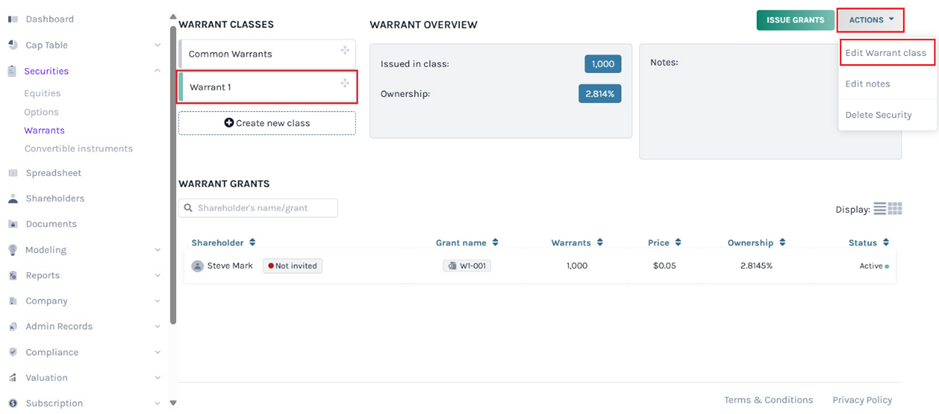
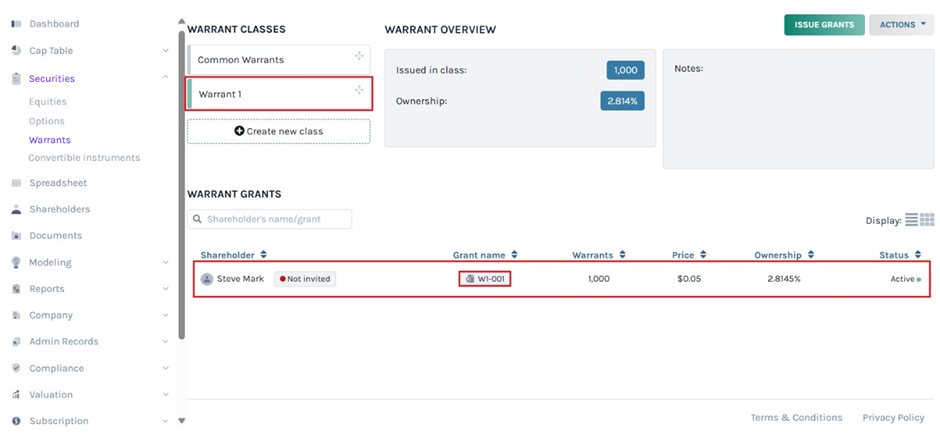
Step 8: If you want to modify anything in the warrant, click on the warrant name. In this case, we have already clicked on “Warrant 1”. From here click on the button “Actions” on the right side of the page.
Here, you will see three options – edit warrant class, edit notes and delete security. Edit notes means to edit the notes of this warrant class. The delete option would delete the security. Since we want to edit the warrant class, click on “Edit warrant class” from here.
When you click on the edit option, a new panel will appear as shown below.
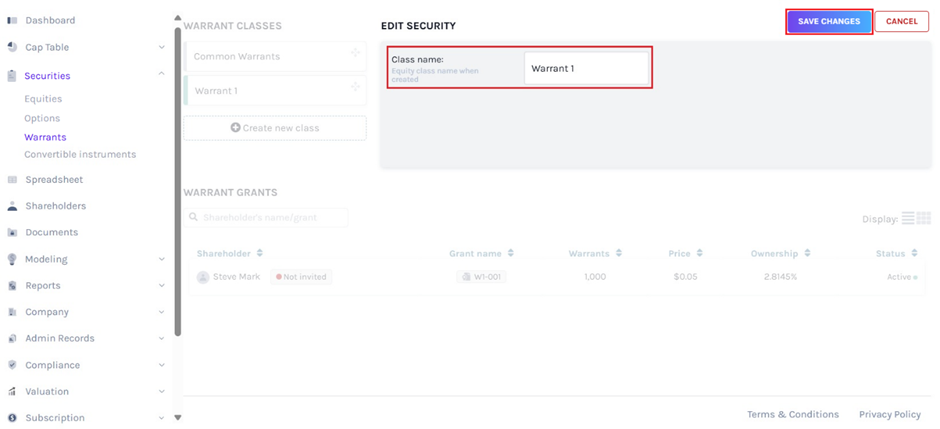
Once done, click on “Save Changes”.
Step 9: When you like to edit the warrant, select the grant name click on “Actions” and then “Edit Grant”.
In this case, click the grant name “W1-001”
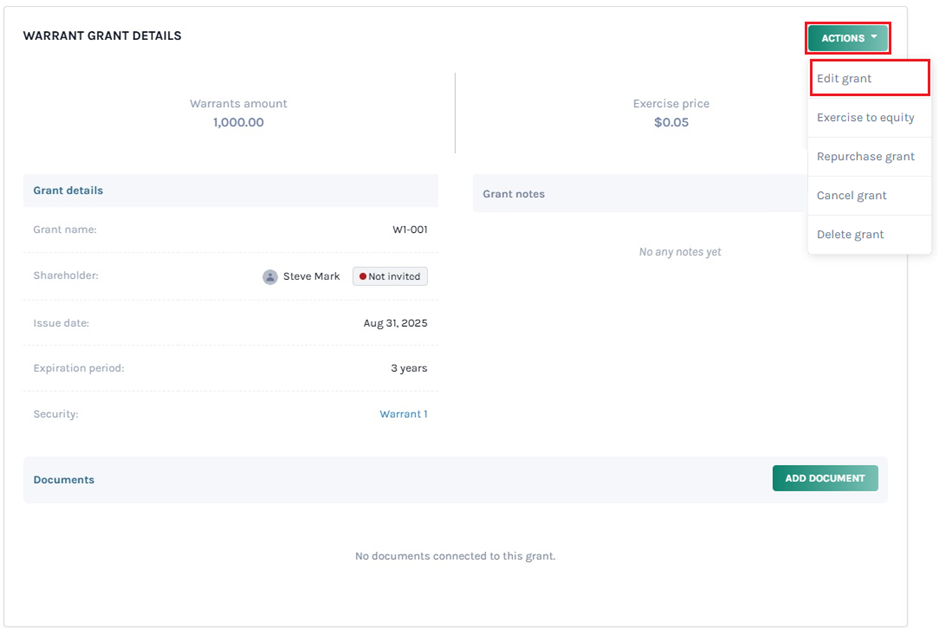
Now you can edit the warrant grant details such as warrant amount, exercise price, grant name, option type, issue date, expiration period, and vesting schedule if applied.
Note: You can add document to the grant by clicking on “Add Document”. Check out the support article to know more about adding documents to grants.
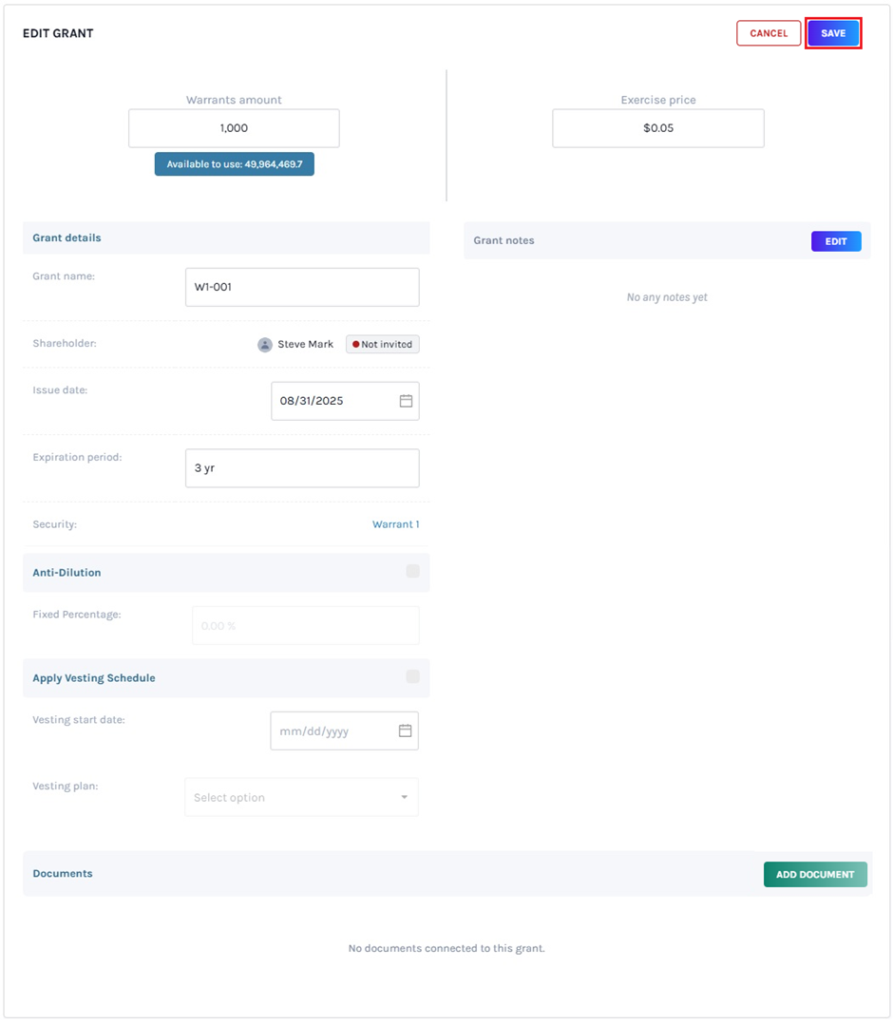
Once you are done click “Save”.
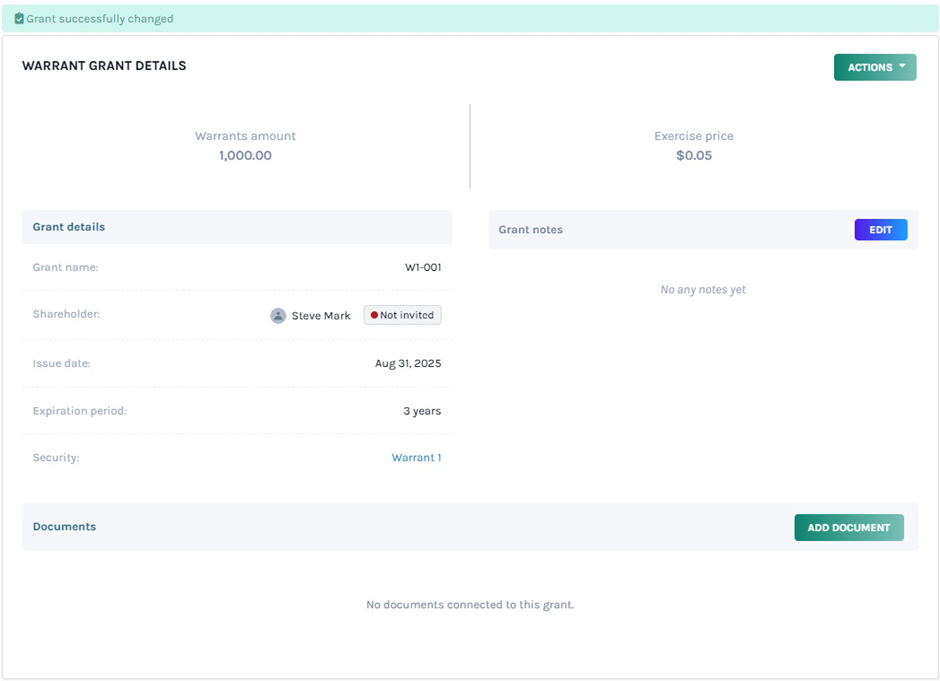
Step 10: Once you do this, you will be directed to the updated page of the security as below.
Situation 2
There is another way you can issue warrants.
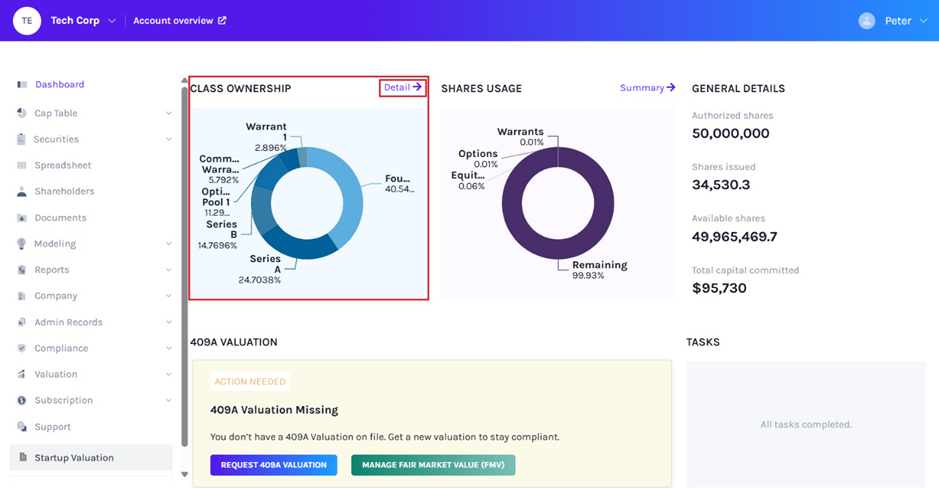
Go to the dashboard of the company account. Under the Ownership panel, click on “Detail”
A new window with the ownership overview chart will open then click on “Issue” to get a mini drop-down menu and select “from Warrant Class”.
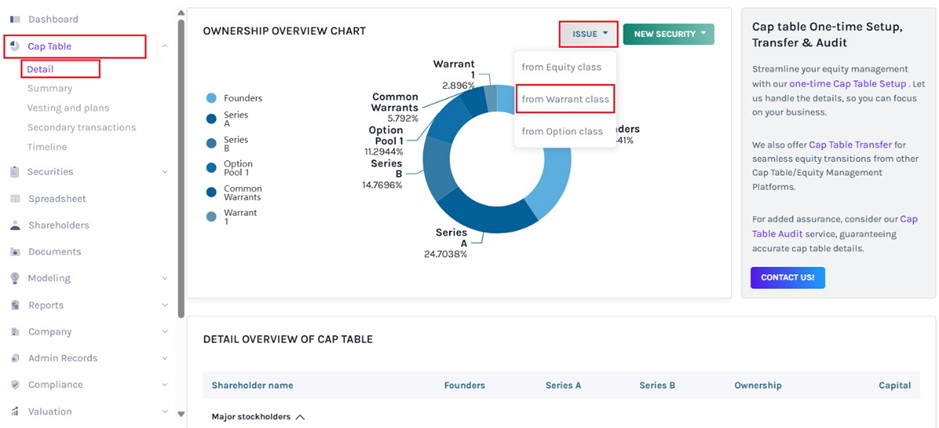
When you do this, you will reach the page where you now have to select the warrant class from which you want to issue warrants and follow the steps from Step 4 in SITUATION 1.
Just like this, you can create warrants, issue them, and also modify them.
If you want to know more or understand any other process on Eqvista, check out the other support articles here or contact us today!
