Create a Vesting Plan
Eqvista allows you to create a vesting plan very easily. Here is a step-by-step guide that will help you understand how to create a vesting plan on Eqvista.
How to create a vesting plan on Eqvista?
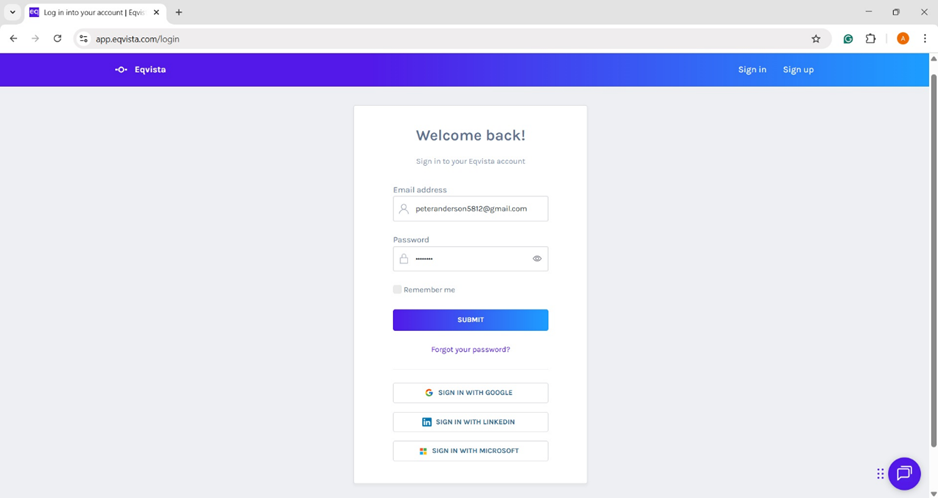
Step 1: Log into your account on Eqvista, select the company account, and go to the company’s dashboard.
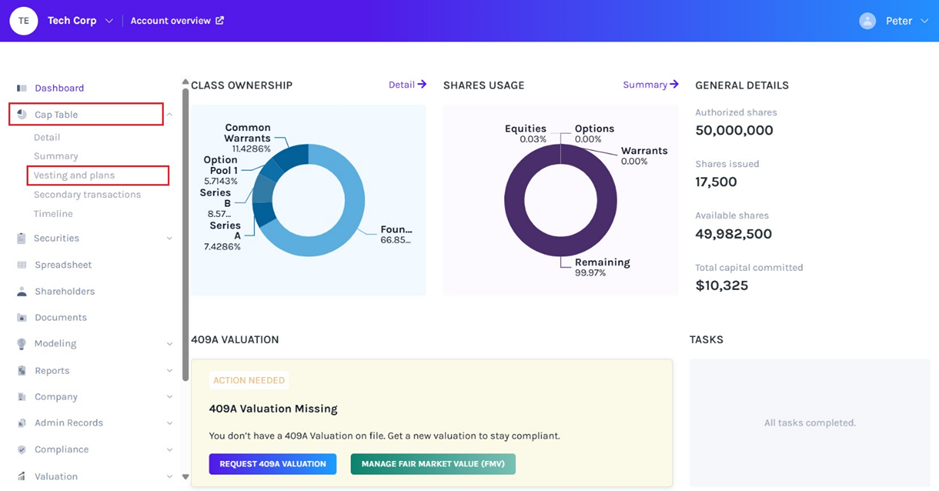
On the dashboard, click on “Cap table” on the left-hand side panel to get a drop-down menu. Select the option “Vesting and plans” from the drop-down menu. Once you do this, you will be directed to the next page as shared below.
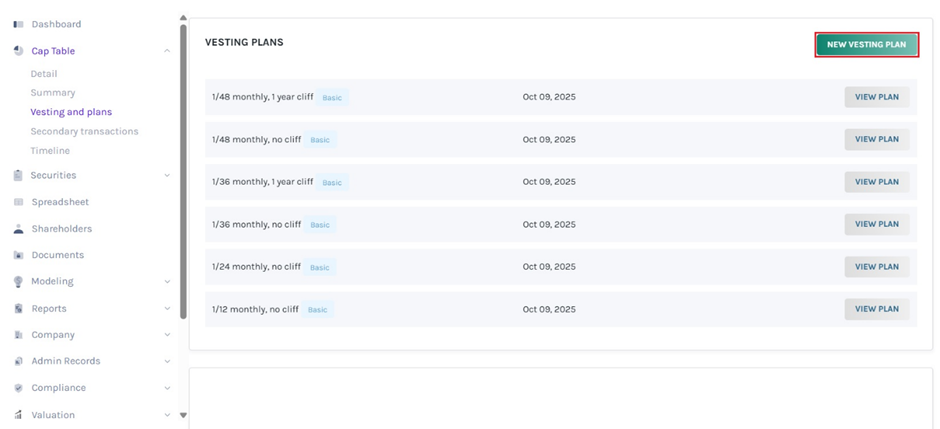
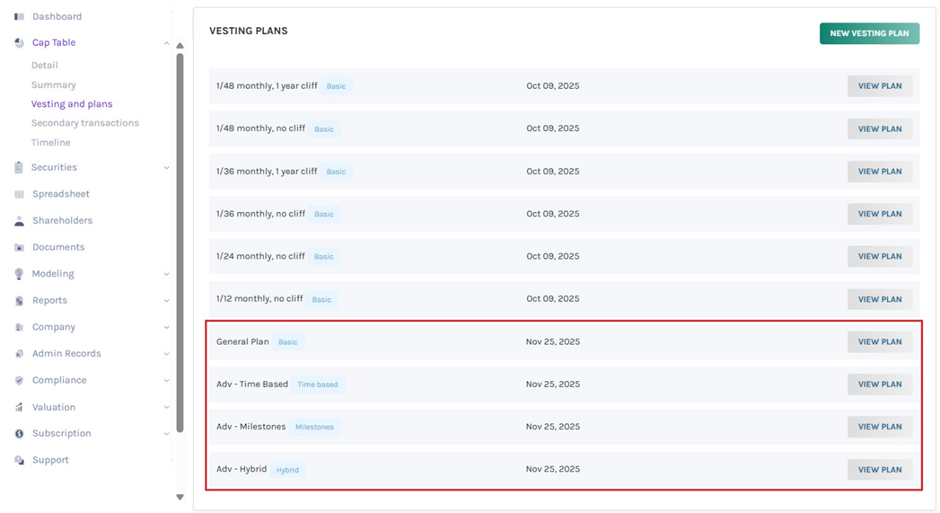
Step 2: On this page, you will see all the vesting plans available in your company. In case your company doesn’t have any vesting plan, you will see the message saying “There are no vesting plans created” and an option “Create Vesting Plan” below it.
There are already many vesting plans in this example, so you can click on the button that says, “New Vesting Plan”.
Note: In addition to creating your vesting plan, you can choose from six default plans. To know more about vesting plans, check out the support article here!
Step 3: The button will take you to the next page, as below.
You will have to first select the kind of vesting plan you want to create. Once you select the plan, the rest of the fields for creating the plan will appear.
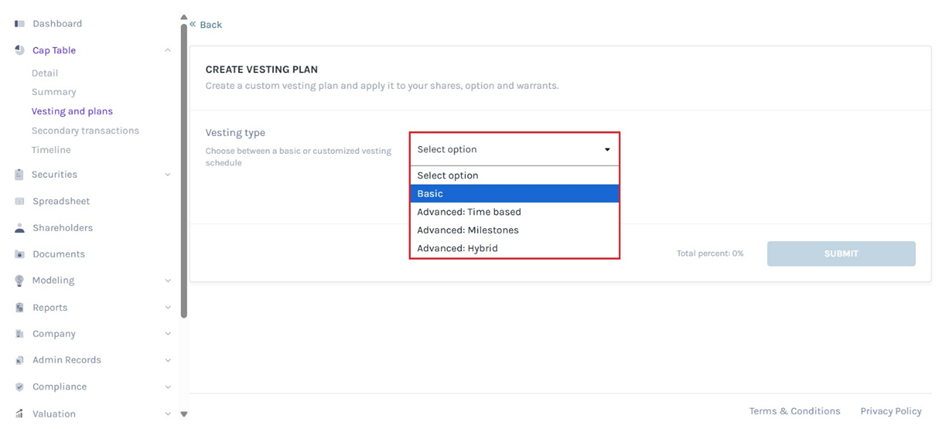
There are four options to choose from:
#1 Basic
This plan includes the time it would take for the shares to vest and there are no additional restrictions. Just that every year a few shares would vest based on the plan. It is the simplest plan you can find.
If you select this plan, here is what you will have to add:
Here, you will only need to give the plan a name, add the vesting period which is normally in months, a cliff period in months, and the after cliff vesting process (which is the time intervals of when the next percentage of shares are awarded to the shareholder).
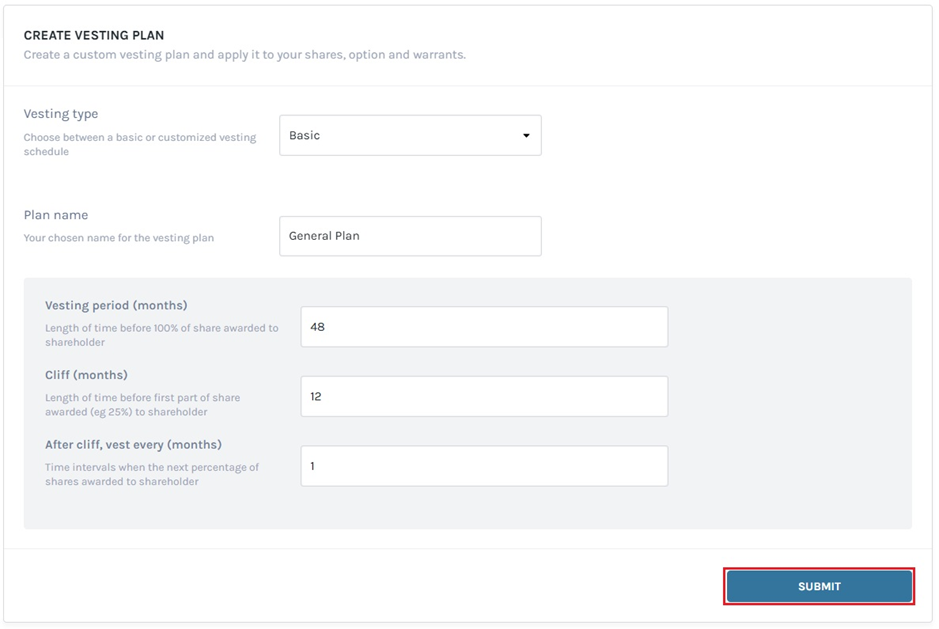
When you are done with adding the details, click on “Submit”.
#2 Advanced: Time-Based
This plan comes under the advanced plan and you will have to add the following details when you select this.
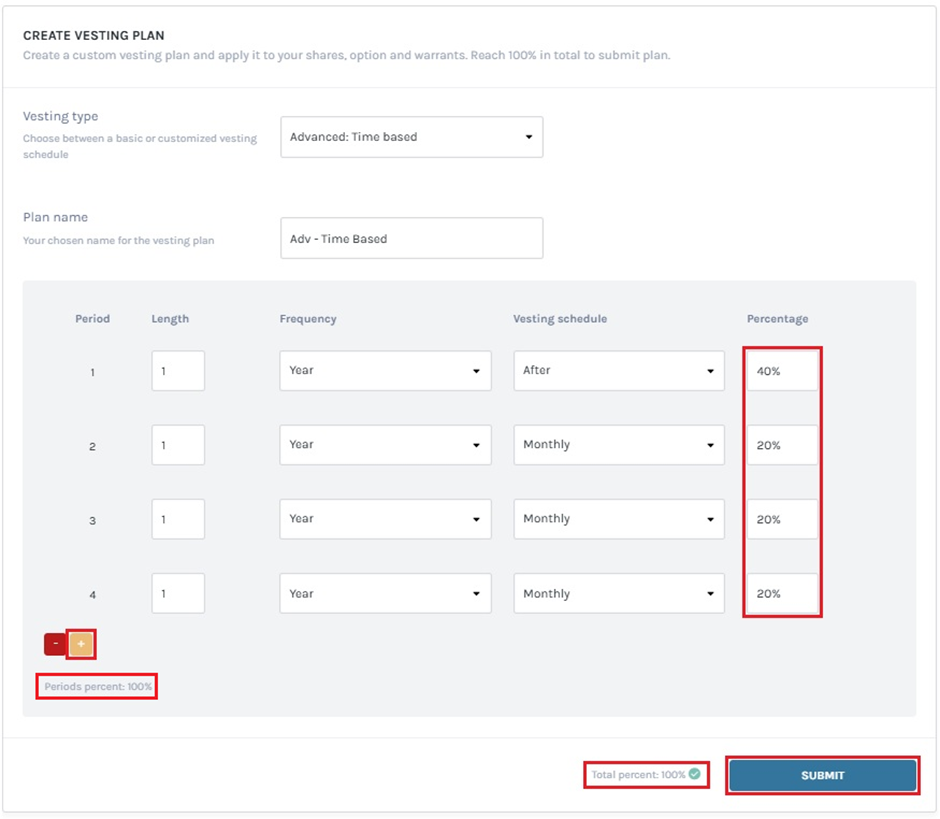
In this plan, you will also have to add the name of the plan. In addition to this, you get the option to add the number of years along with the percentage of shares that would be vested. Add the length, frequency, vesting schedule, and percentage. Each of the parts that you need to add has been explained below:
- Length: This is the length of the first period – You need to just add the number and the unit of the number will be added in the next column.
- Frequency: This is the unit for the number that was added in the first column. It defines the length of the period.
- Vesting Schedule – This is the one that directs how the shares would be given in that period. So, the shares can be given after the period is over, monthly, or even daily.
- Percentage – Here, you need to add the percentage out of the total shares that the shareholder will get as per the plan in that period.
With this, your plan would be created. You can add as many periods as you want and each can have different rules. To add more periods, click on the plus sign (+) and another row will be added.
Note: Just ensure that the total of all the percentages reaches 100% as it cannot be more than that, as it defines the number of shares that will be given. You will also see the total come up below.
Once all have been filled, click on “Submit”.
Check out the support article to understand the time-based vesting plan in detail.
#3 Advanced: Milestones
This is the advanced milestone plan where the vesting plan is based on milestones reached. When you select this option, the following fields show up:
Add the milestone title and the percentage of the shares that would be vested when a milestone is done. You can add as many milestones as you want, but again, ensure that the total percentage of shares that can be vested is 100%.
Note: Once the milestone has been completed by the shareholder, it can be marked complete. To know more about completing milestones, check out our support article here!
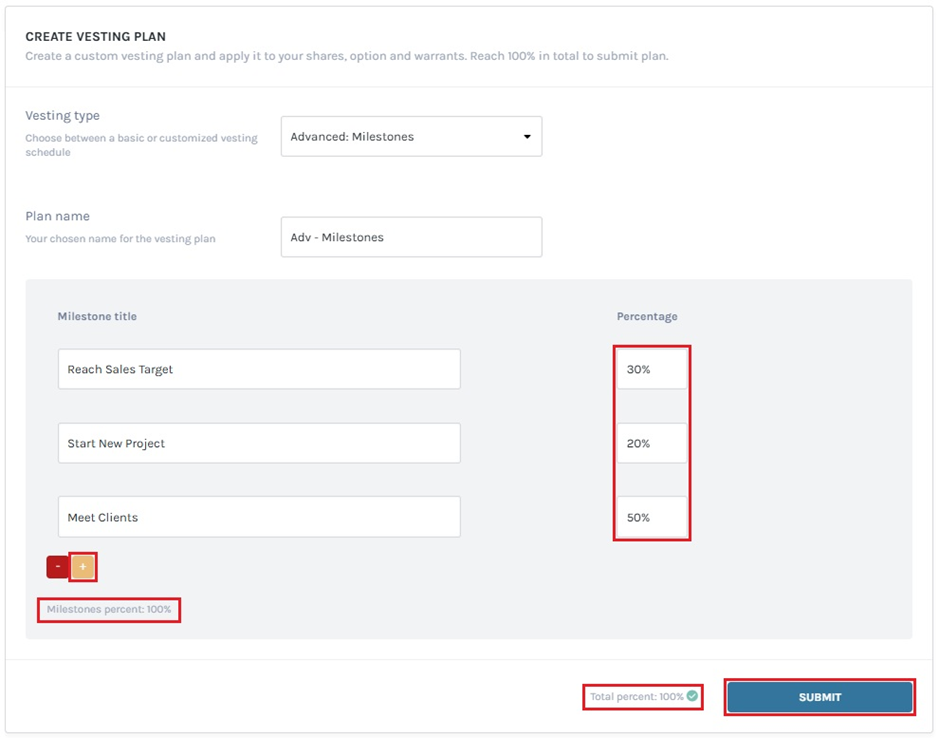
Once done, click on “Submit”.
To know more about milestone-based vesting plans, check out our support article.
#4 Advanced: Hybrid
This plan is a combination of the last two advanced plans. When you select this option, the following fields come up:
Add in the details as required. It would include both milestones and time-based requirements.
Note: Once the milestone has been completed by the shareholder, it can be marked complete. To know more about completing milestones, check out our support article here!
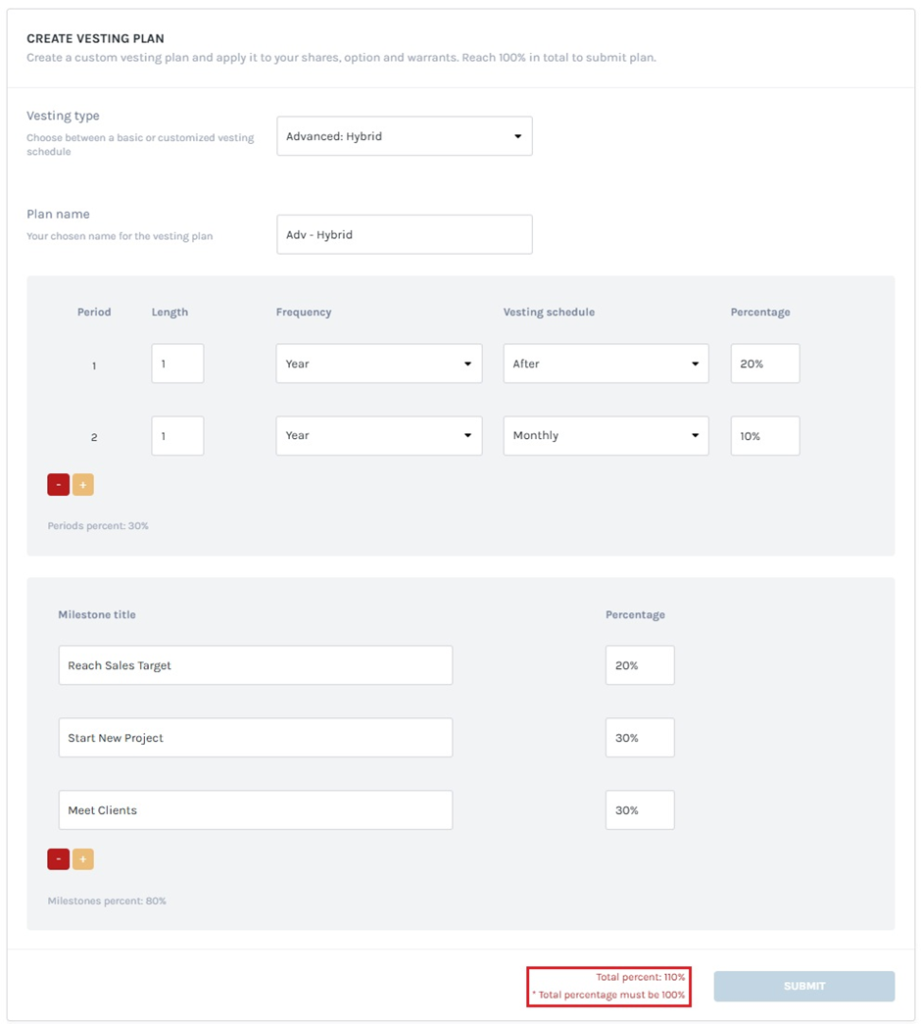
Note: In the example above, we added the percentage of the total shares that will be vested as more than 100%. So, ensure that the percentage is 100% before you can click submit.
For a detailed understanding of the hybrid vesting plan, refer to our support article.
Step 4: Regardless of which plan you choose, the plan will be created and added to the vesting plans. You will then be directed back to the page of the vesting plans, as below.
That is, your vesting plan has been created. You can now choose the vesting plan when you are about to issue shares.
Additionally, once you issue shares and implement the vesting schedule using the plan, the second panel on this page will show the details of shareholders under the vesting plan and the progress of the plan.
Note: You can add a vesting schedule while issuing shares, options, and warrants. Check out the respective support articles to learn about this.
Now, you can use the vesting plan in your issuance process.
If you want to know more or understand any other process, check out the other support articles here or contact us today!
