Create a Hybrid Vesting Plan
If you have started using Eqvista, you would have realized that it is a very user-friendly platform. With this said, it is simple to create a hybrid vesting plan on Eqvista in no time. To help you through the steps, each has been explained below in detail.
How to create a hybrid vesting plan?
Step 1: The first thing that you need to do is log into your Eqvista account and choose the company account you want to issue the shares using the hybrid vesting.
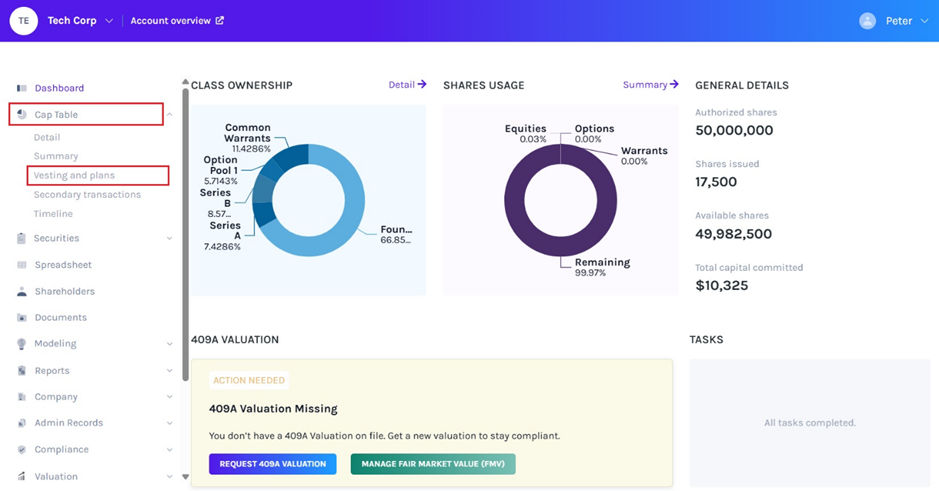
To do this, click on “Cap table” from the left-hand side of the dashboard and a drop-down menu will appear. Here, click on the option that says “Vesting and plans” to be directed to the following page.
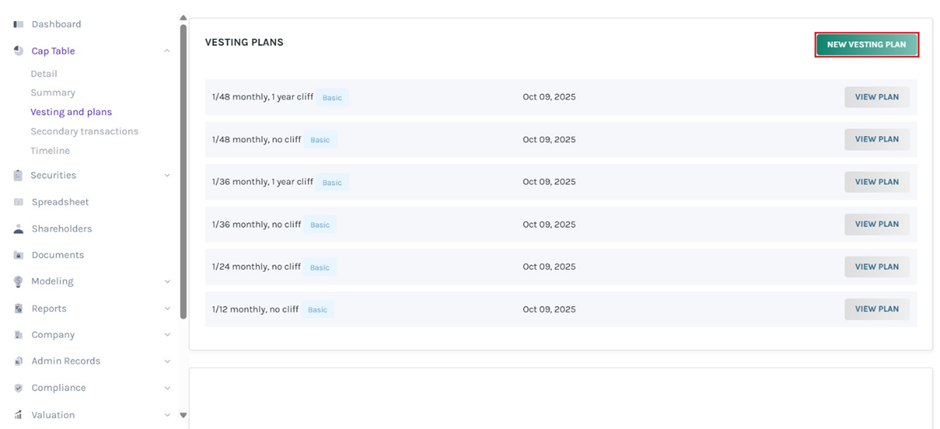
Step 2: When you reach this page, you can see all the vesting plans that have been created.
In case your company doesn’t have any vesting plan, you will see the message saying “There are no vesting plans created” and an option “Create Vesting Plan” below it.
Note: You can create your vesting plan or choose from six default plans. To know more about vesting plans, check out the support article here!
There are already many vesting plans in this example, so click on the “New Vesting Plan” button to begin the process of creating a hybrid vesting plan.
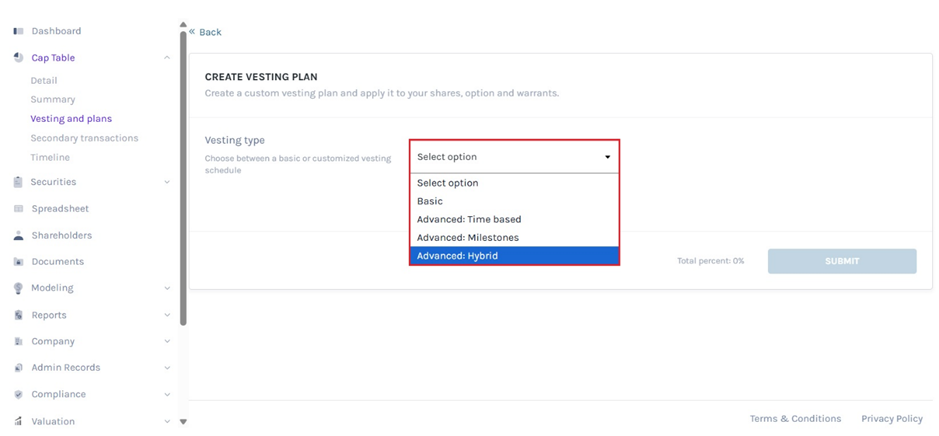
Step 3: As soon as you click on this button, you will be directed to the next page as shared below.
From here, you will have to select the vesting plan type. To do this, click on the field available to add the option and a drop-down list will appear. From this list, select the option “Advanced: Hybrid”.
Note: The hybrid vesting plan is a combination of the time-based plan and the milestone plan. In this plan, the person would be able to earn the options or shares over a period of time. But they would also have to reach certain milestones before all the shares are vested.
Step 4: The moment you select this option, a drop-down window will appear where you will have to fill in the details of the plan, as below.

The first thing that you will have to add is the name of the plan, which in this case is “Hybrid Plan 1”. Once done, you will then have to create the plan by filling in the details for each period. In this case, we added 2-year periods where the first 20% of shares will be vested after the first year and then 10% of shares would be vested monthly for each year after that.
But since this is a hybrid plan, we also added two milestones that have to be achieved by the shareholder. Here, they will need to reach the sales goal to get 20% of the shares, start a new project to get 30% and meet clients to get the other 20% of the shares.
You can easily add more periods or milestones in the plan by clicking on the “+” sign or remove the period or milestone by clicking on the “-” sign. The percentage here is the percentage of the shares that will be vested once the milestone has been fulfilled.
Just ensure that the total percentage of the shares that would be given out equals 100%. You will see a message that says “Total percent: 100%” at the bottom of the page.
Note: Ensure that the total of all the percentages reaches 100% as it cannot be more than that, as it defines the number of shares that will be given.
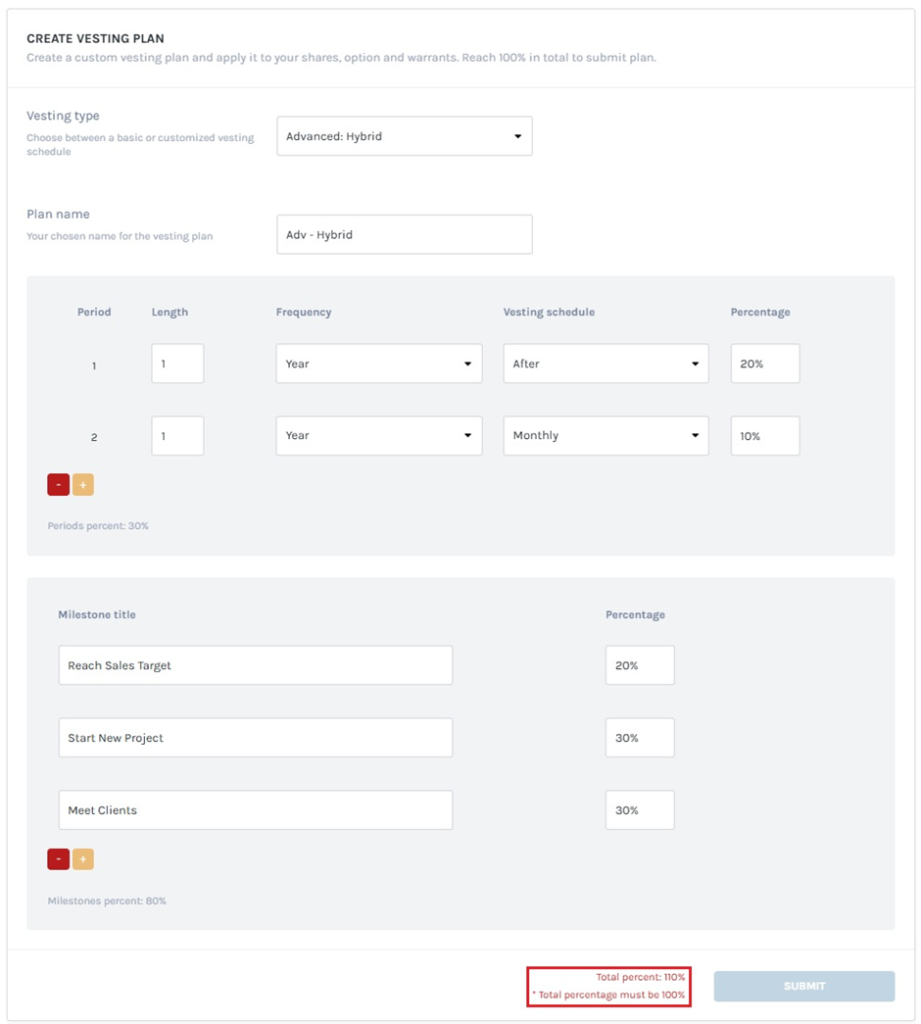
This means that you will have to adjust the percentage here to make it equal to 100%. Once you have reached 100% for the plan, you will also notice that the “Submit” button can now be clicked.
Click on “Submit” once your plan is in place.
Step 5: After this, you will be redirected to the page where you can see all the vesting plans you have along with the plan that you just created as shown below.
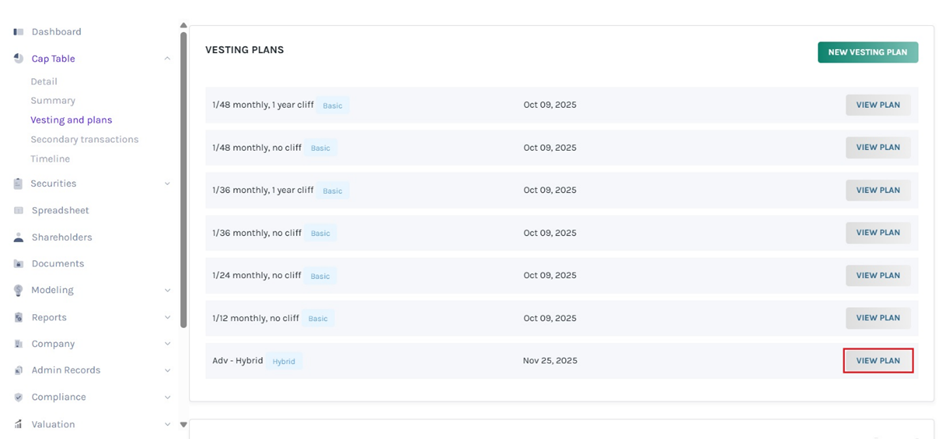
You can also view the plan and its details by clicking on the option that says “View plan” on the right side of the plan name and the date when it was created.
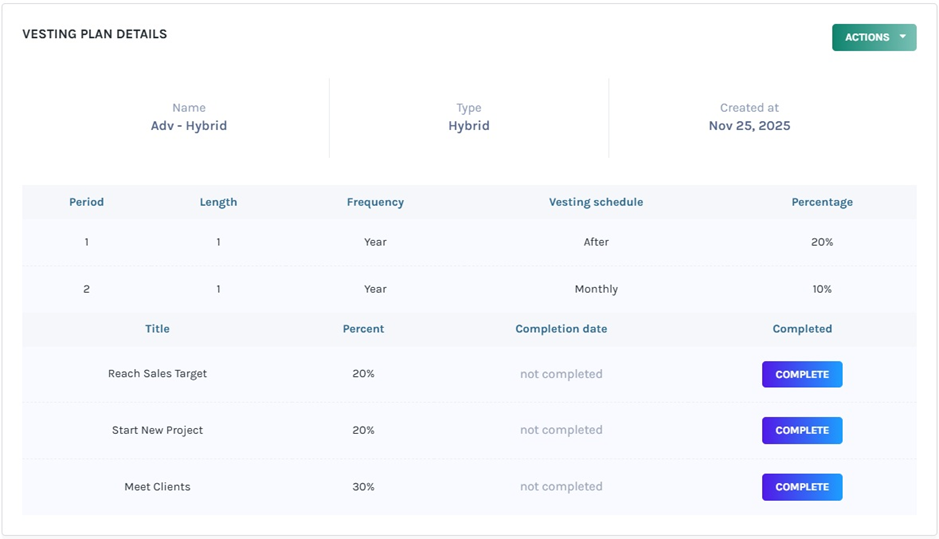
Note: Once the milestone has been completed by the shareholder, it can be marked complete. To know more about completing milestones, check out our support article here!
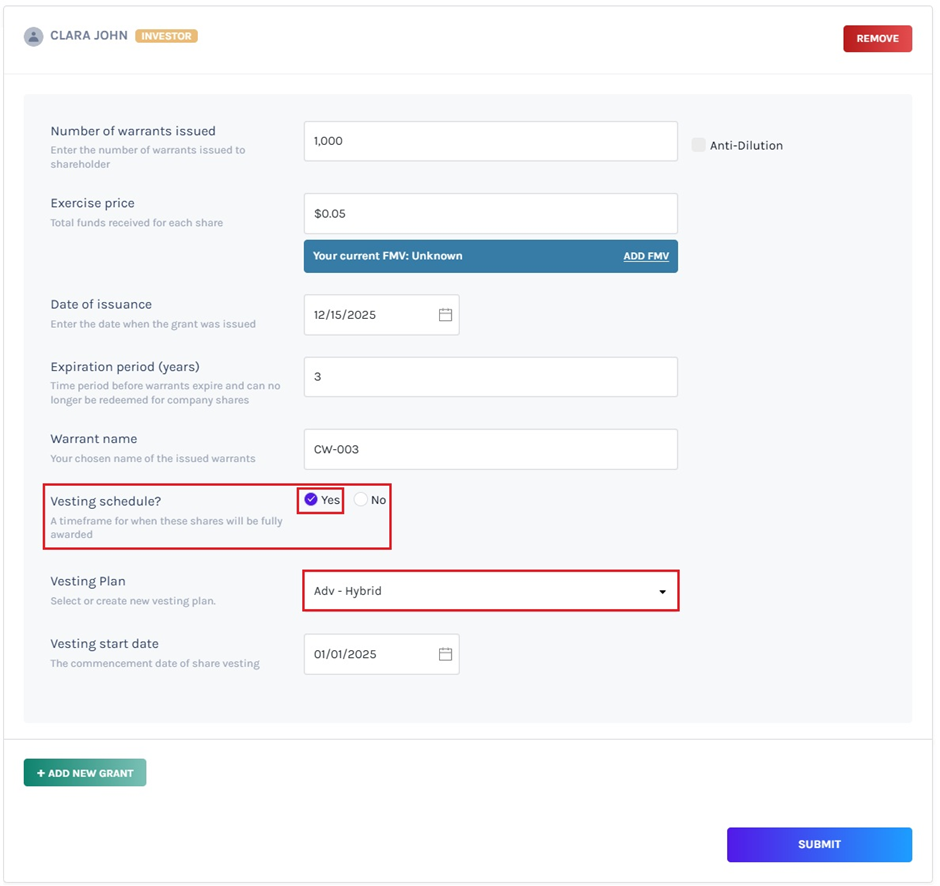
Step 6: Now, you can use this plan to issue shares, options, and warrants to your employees or shareholders by clicking “Yes” if you need a vesting schedule and selecting this plan.
Note: You can add a vesting schedule while issuing shares, options, and warrants. Check out the respective support articles to learn about this.
Note: If you have issued equities, you need to choose Restrictions – No restrictions, Restricted Stock Units, Restricted Stock Awards, and Phantom Stock. In case of options, you can enable the Early Exercise option. Check out the respective support articles to learn about this.
Step 7: When you click “View Plan” on the Vesting and plans page under Cap Table, you will see all the grants that are vested under the plan based on the type of security – Equity Grants, Warrant Grants, and Option Grants. Then, click on “Option Grants” to see the details of the grant vested under this plan.
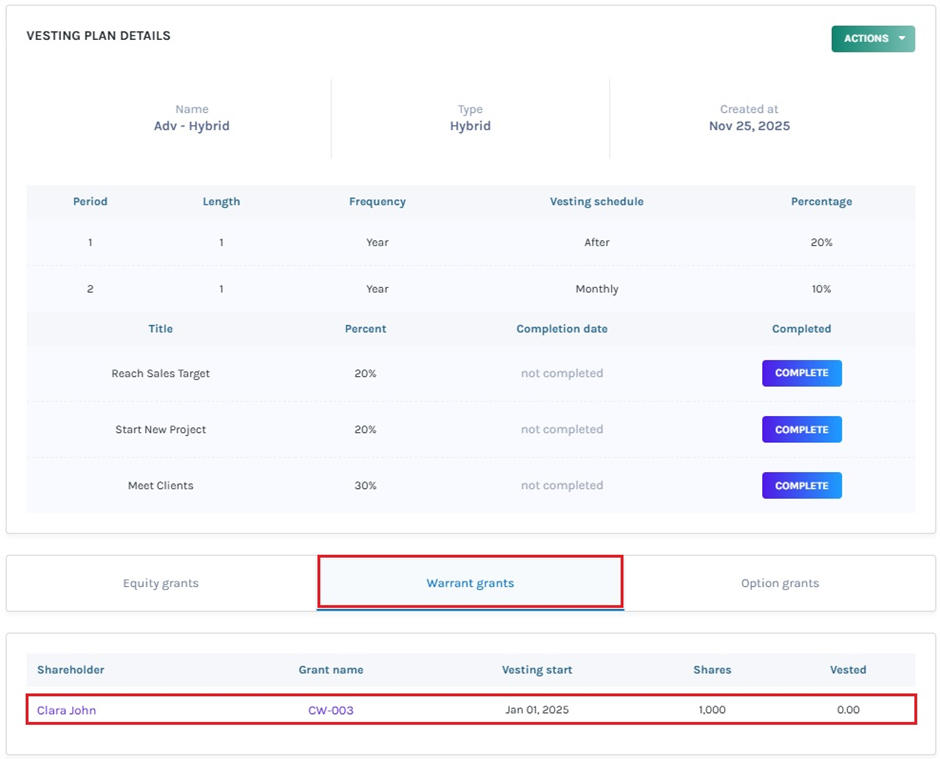
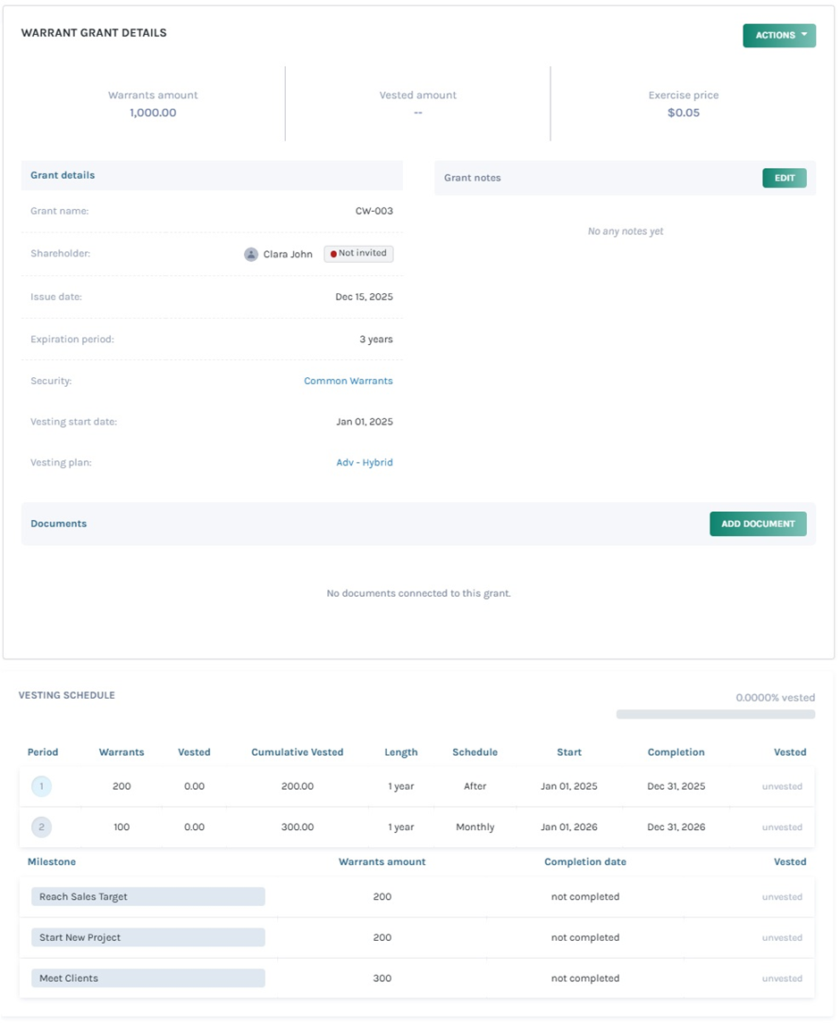
Step 8: To see the vesting schedule of the plan, click on the grant name “CW-003” and you will be redirected to the grant details page with the vesting schedule.
Note: You can add document to the grant by clicking on “Add Document”. Check out the support article to know more about adding documents to grants.
Just like this, you can easily create a hybrid vesting plan. To know more about how to use Eqvista, check out the various support articles here!
