What Is Vesting Plan For 1/24 Monthly, No Cliff?
There are six different pre-set vesting plans to choose from or create your vesting plan in Eqvista.
Vesting plan for 1/24 monthly, no cliff
Here is one such basic vesting plan:
Step 1: Log into your Eqvista account and select the company account to view the vesting plan.
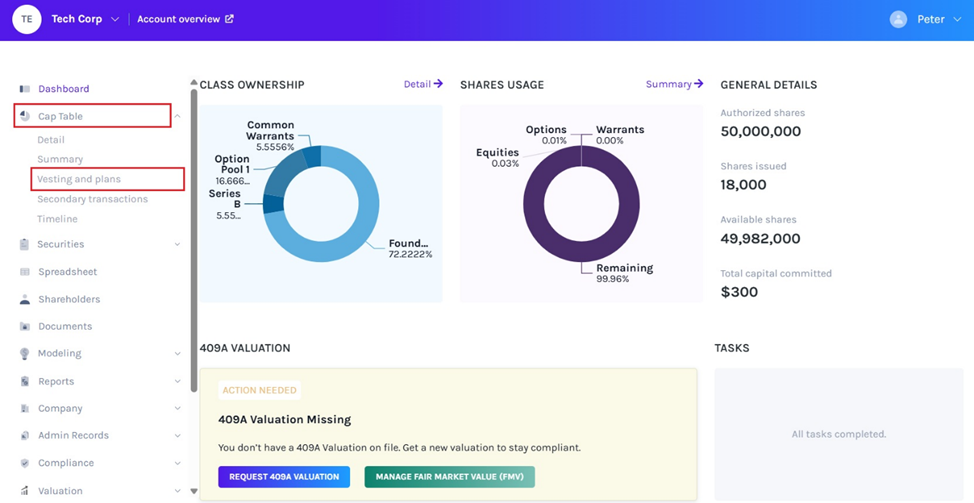
On the dashboard, click on “Cap Table” on the left-hand side to get a drop-down menu. Then click on “Vesting and plans” to view already pre-set plans available that would save time.
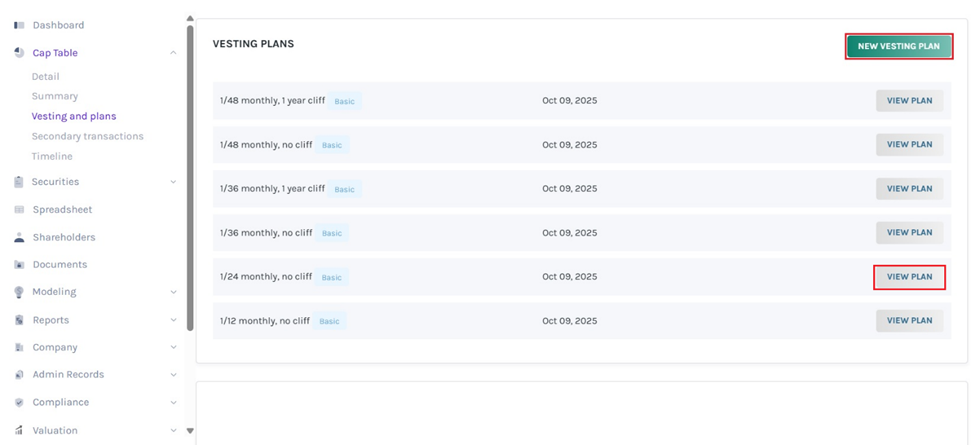
Step 2: Apart from viewing existing pre-set plans, click on “New Vesting Plan” to create a new plan and if you have created one, you will see them there. Check out our support guide to learn how to create a new vesting plan on Eqvista.
Step 3: Once you click “View Plan”, you can get the overview of the plan along with details such as name, type, created at, and description.
Note: If you want to edit the plan, you can modify the plan by clicking “Actions”. Check out our support article on how to modify the vesting plan on Eqvista.
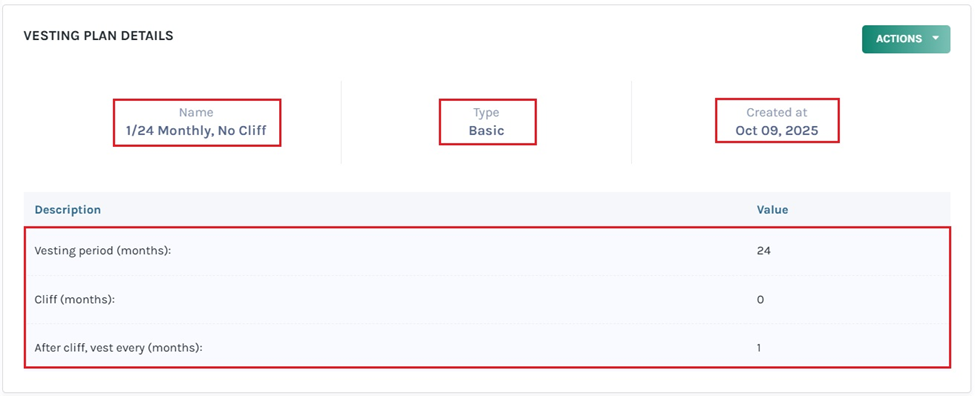
The description includes details for the vesting plan 1/24 monthly, no cliff as an example:
- Vesting Period (months): After a period of 24 months, the shareholder gets complete ownership of the asset.
- Cliff (months): There is no cliff period for the shareholder to get the first portion of the share.
- After Cliff, vest every (months): After 1 month, the next portion of the asset will be given to the shareholder.
Step 4: The vesting schedule can be implemented while issuing equities, options and warrants by clicking “Yes” for if you need a vesting schedule and selecting the plan.
Note: You can add a vesting schedule while issuing shares, options and warrants. Check out the respective support articles to learn about this.
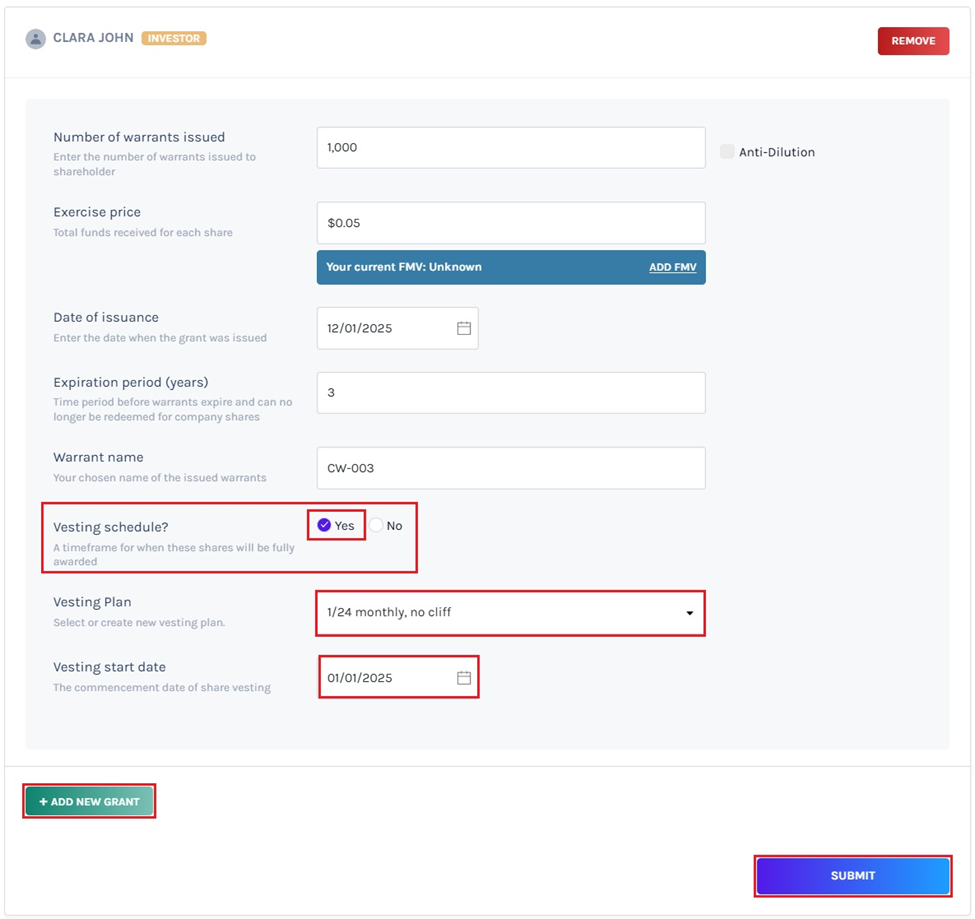
After selecting the plan, choose the vesting start date and any restrictions for issued equities.
Note: If you have issued equities, you need to choose Restrictions – No restrictions, Restricted Stock Units, Restricted Stock Awards and Phantom Stock. Check out the respective support articles to learn about this.
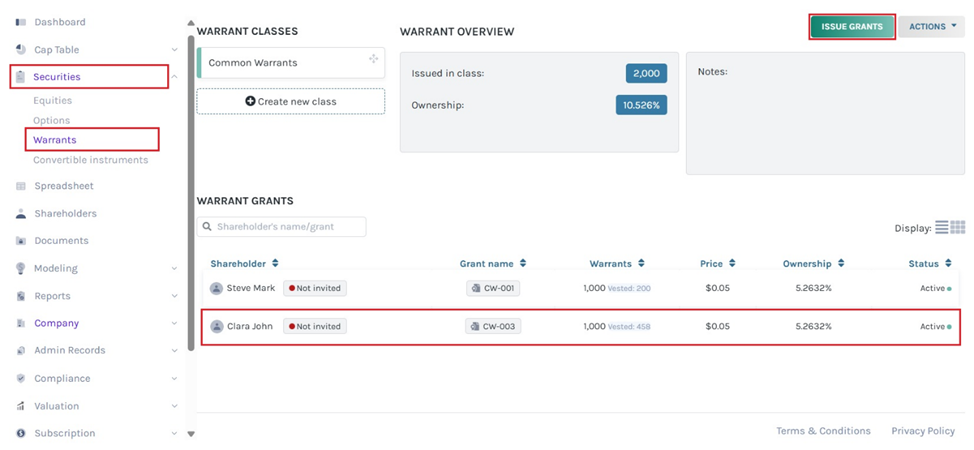
You can add another grant by clicking on “Add new grant”. This is if you want to issue warrants from the same warrant class to more than one shareholder. All you need to do is click on “Add new grant” and then select the shareholder profile or add a new shareholder and fill in the details.
Step 5: On the vesting and plans page under Cap Table, you will see all the grants that are vested under the plan based on the type of security – Equity Grants, Warrant Grants and Option Grants. Then, click on “Warrant Grants” to see the details of the grant vested under this plan.
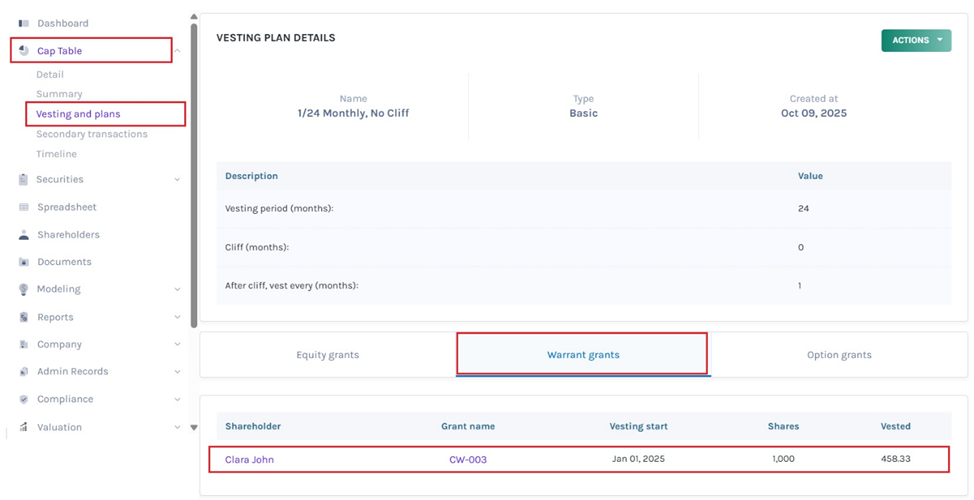
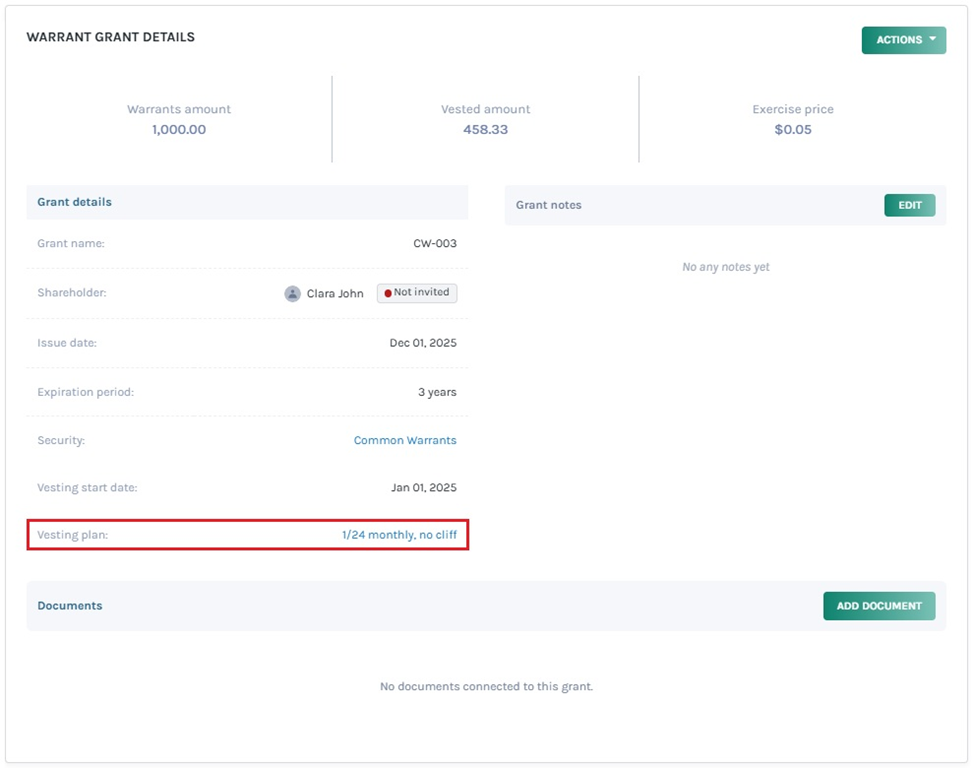
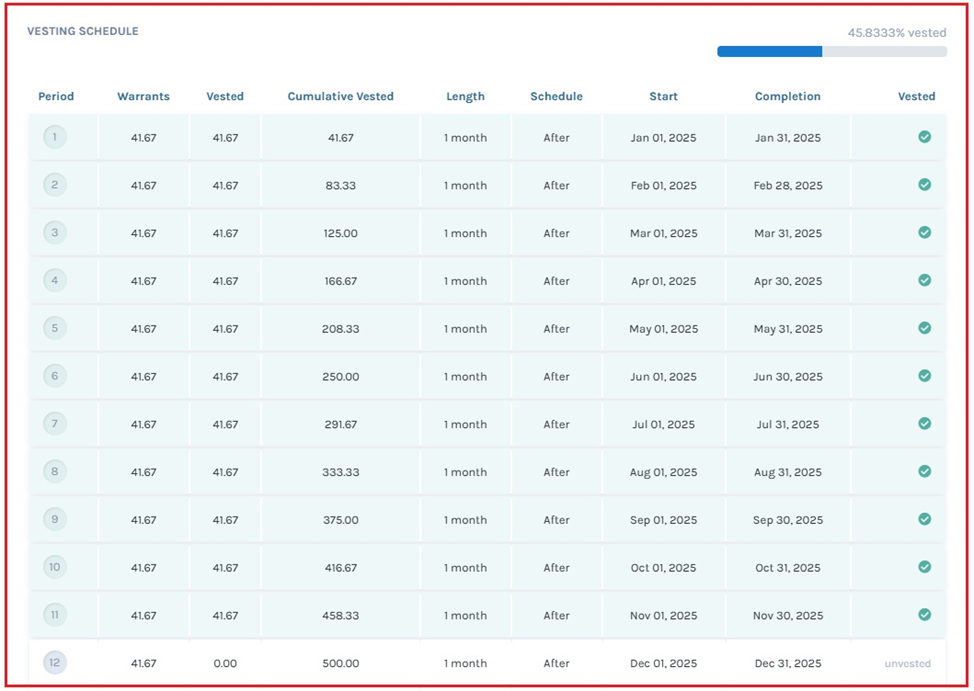
Step 6: To see the vesting schedule of the plan, click on the grant name “CW-003” and you will be redirected to the warrant grant details page with the vesting schedule.
Note: You can add document to the grant by clicking on “Add Document”. Check out the support article to know more about adding documents to grants.
Step 7: The vested option grant can also seen by clicking “Securities” on the left-hand side to get a drop-down menu. Then, click on “Warrants” and you will reach the page with the vested option grant under the plan.
Note: Suppose you want to issue another warrant from the class you issued. Then, click on “Issue grants”. Just ensure that you have selected the warrant class from which you want to issue warrants.
Further to the plan that was discussed above, the other 5 vesting plans—vesting plan 1, vesting plan 2, vesting plan 3, vesting plan 4, and vesting plan 6 —have similar processes.
To know more about Eqvista’s processes, check out our support articles and knowledge base. For further queries, get in touch with us!
