How to Add Documents to a Grant?
In Eqvista, documents can be attached to a grant directly or when sharing documents with stakeholders. Along with shares issued, the stakeholders can view the attached documents.
Add documents to grant
There are two ways in which you can add documents to a grant.
Here are the steps to follow:
Step 1: Log into Eqvista account and select your company.
Scenario 1: Sharing documents
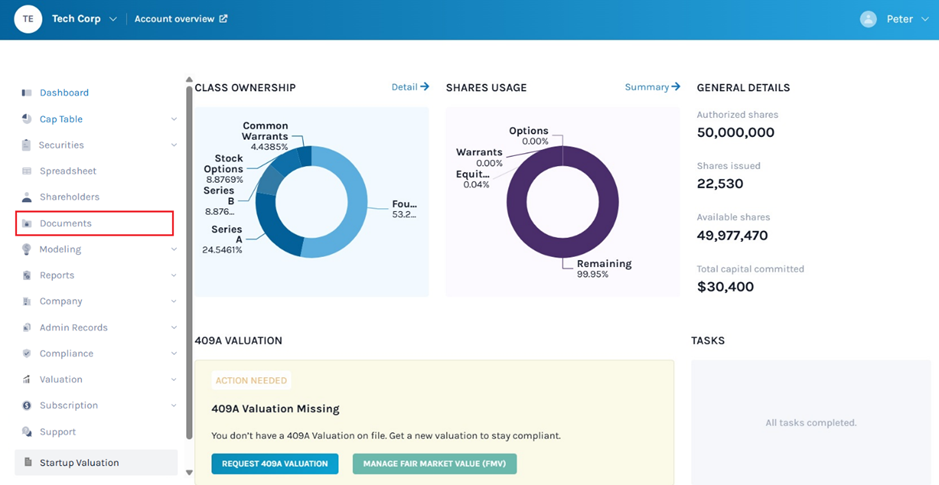
On the dashboard, click on “Documents” on the left side as shown below.
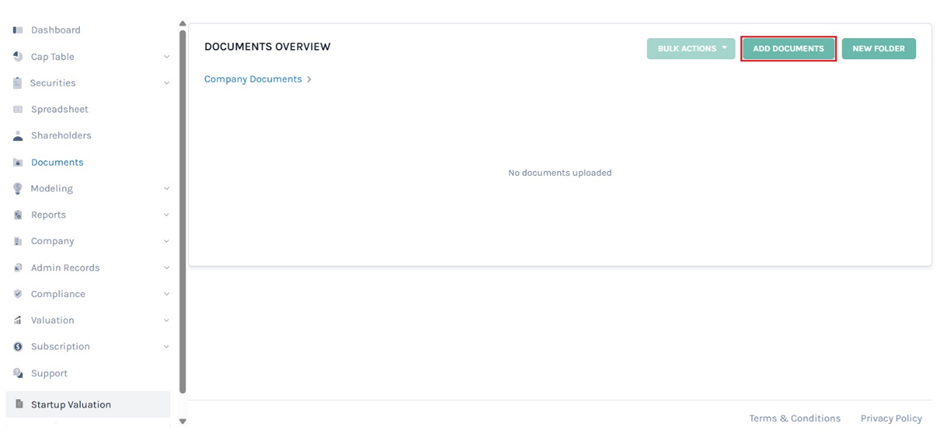
Step 2: Once you select, you will be directed to the following page. On this page, you can see all the documents that the company has. To add documents, click on “Add Documents”.
Note: Folders can be added by clicking on “New Folder”. Check out the respective support article to learn how to create folders.
Step 3: As soon as you click on “Add Documents”, a panel will appear as shown below.
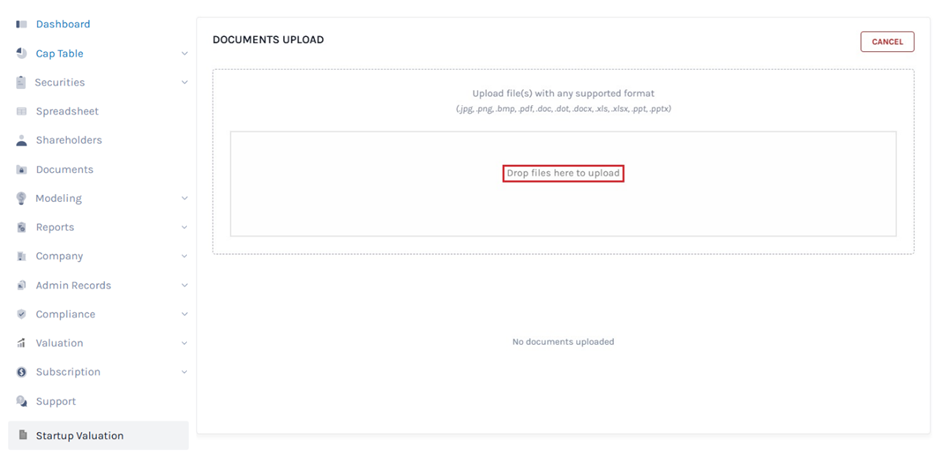
Here, you will see “Drop file(s) here to upload”, and click on this to select the files to upload.
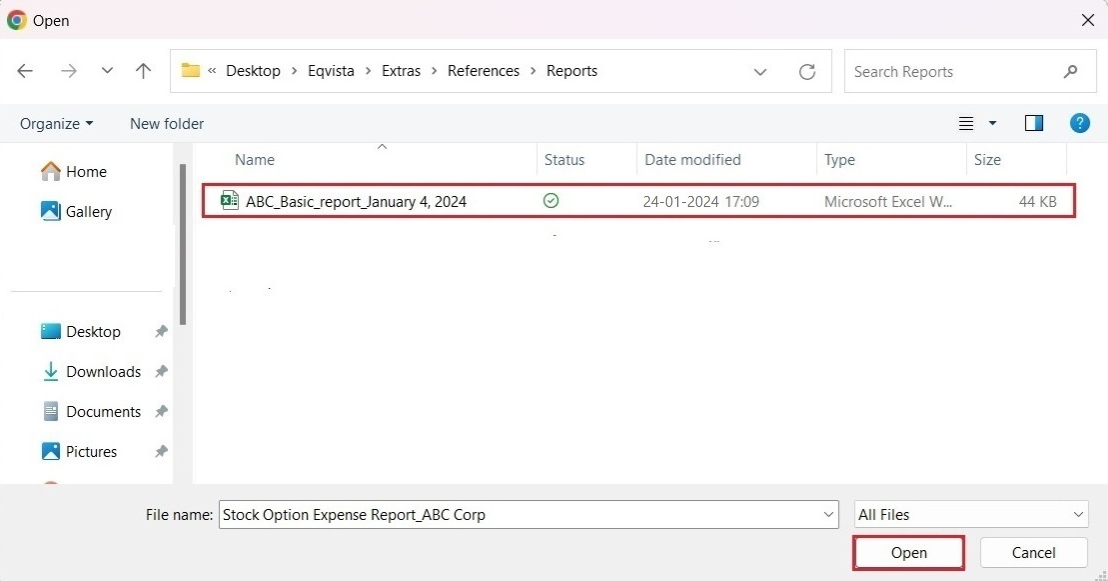
Step 4: Once you click, choose the file that you want to add and click on “Open”.
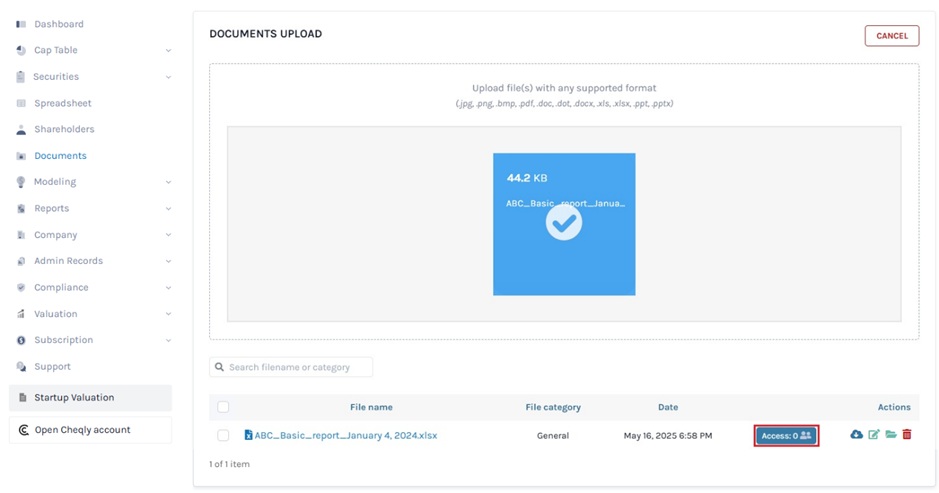
Step 5: The file will be added, and click on “Access” to add the document to a grant.
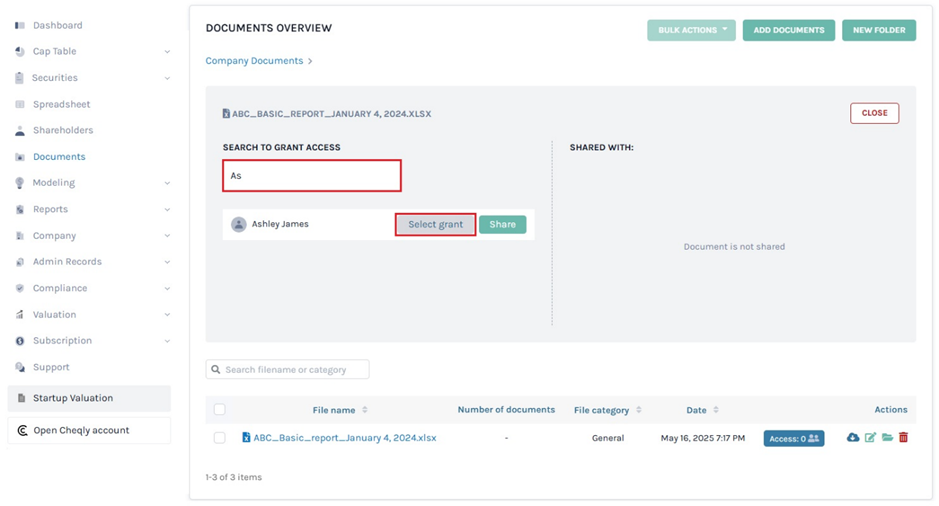
Step 6: When you click on “Access”, a new panel will appear. You can type in the shareholder’s name to whom you want to add the document to the grant. The name will appear along with an option “Select Grant”.
Step 7: Once you click, a pop-up panel will appear, and you can choose the grant to add the document to it.
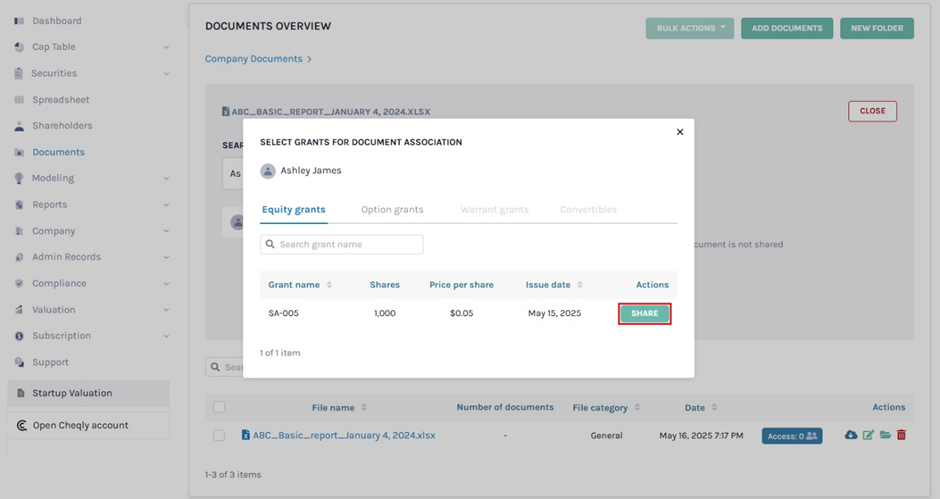
Once you click “Share”, the document will be added to the grant.
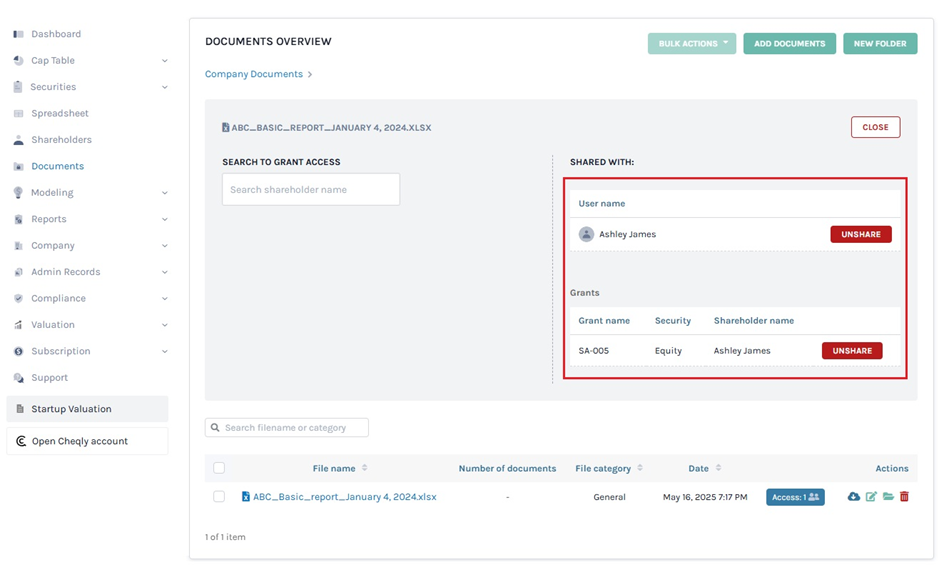
Note: You can view shareholders and grants having access to the document on the right, and click on “Unshare” to remove access. Check out the support article to learn about sharing documents.
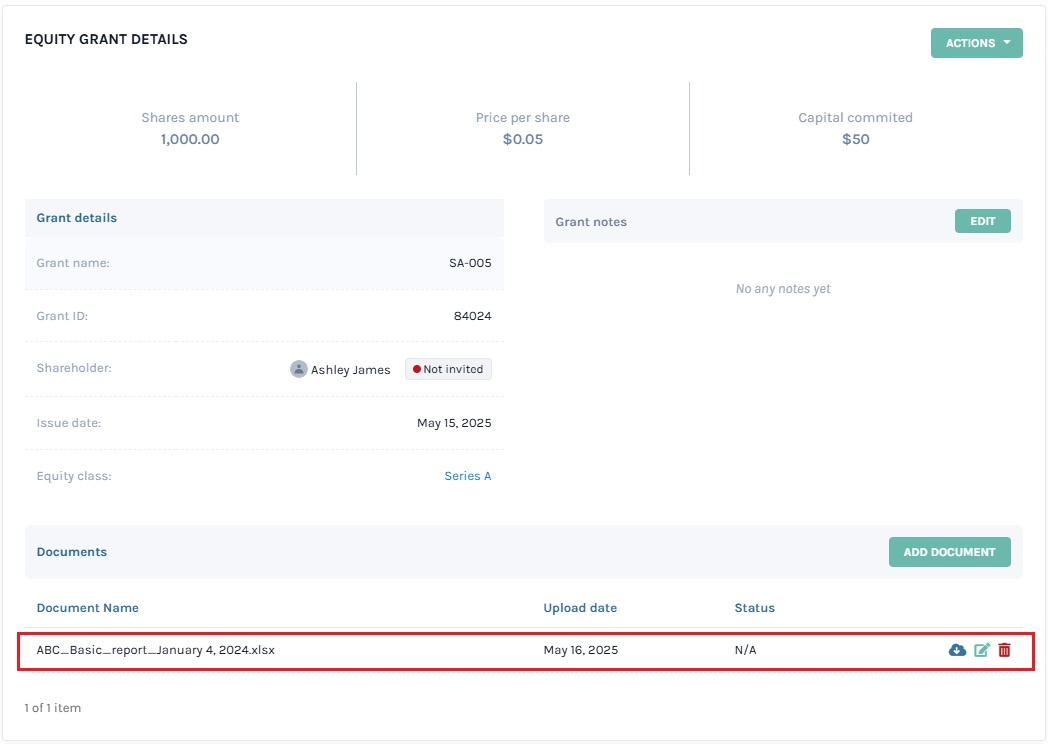
Step 8: You can view the document added to the grant by clicking Securities to get a drop-down, and selecting Equities. Then, click the grant name to view the equity grant details and the added document.
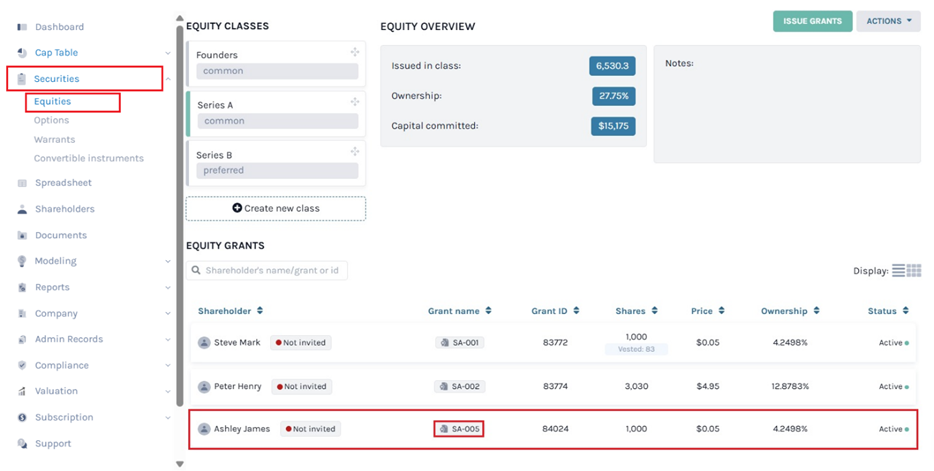
In this case, click on “SA-005” to view the equity grant details and the added document.
Note: For the shareholder to view the document, make sure to share access to the cap table.
Scenario 2: Add document to grant
Suppose you have already issued shares or securities and would like to attach a document to them. On the dashboard, click “Securities” on the left side to get a drop-down menu and select “Equities”.
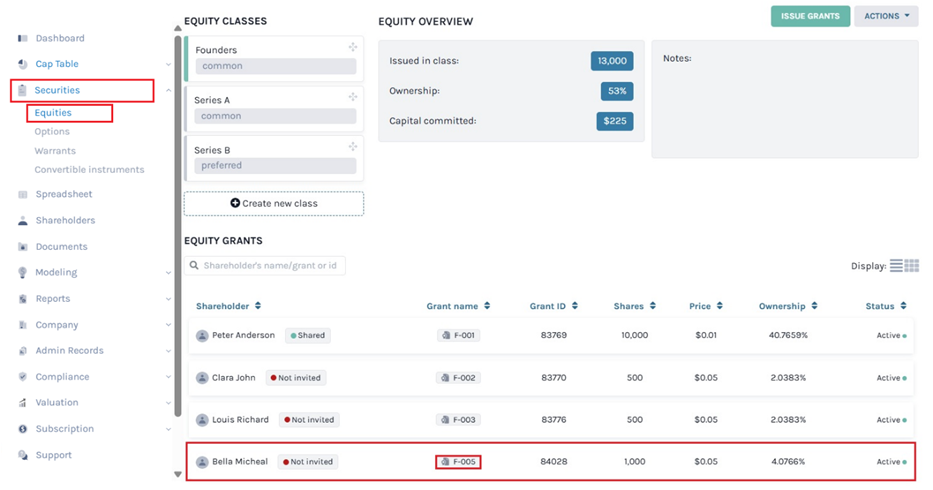
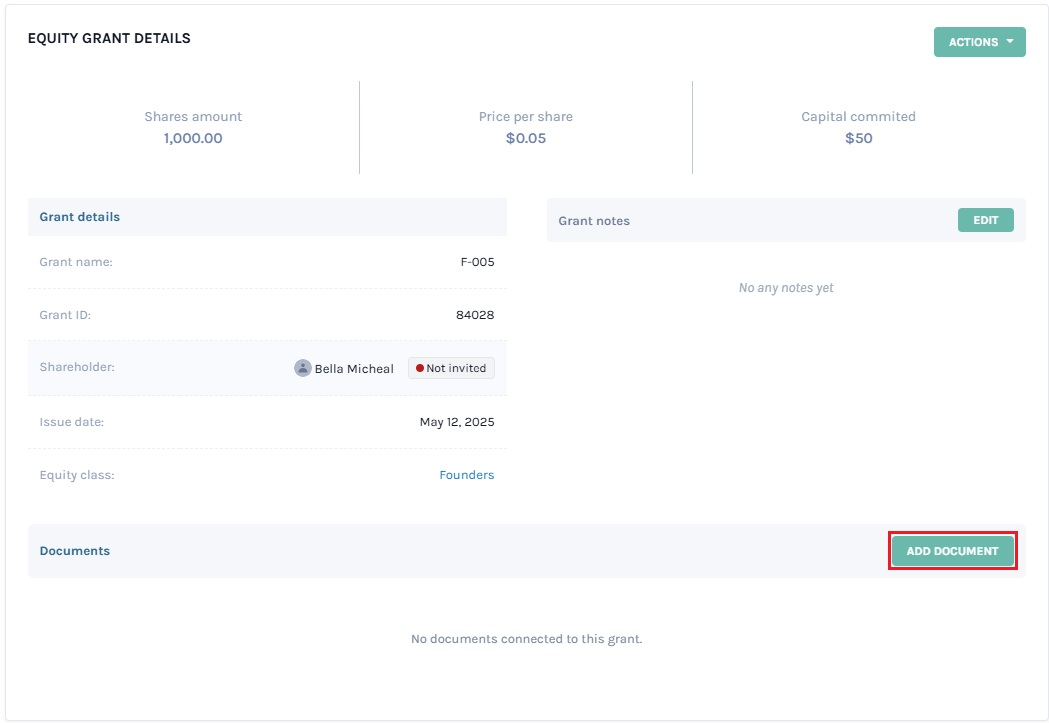
Then, click the grant name to view the equity grant details and attach documents. In this case, click the grant name “F-005”. To attach a document, click on “Add Document”.
Step 2: As soon as you click on “Add Document”, a panel will appear as shown below.
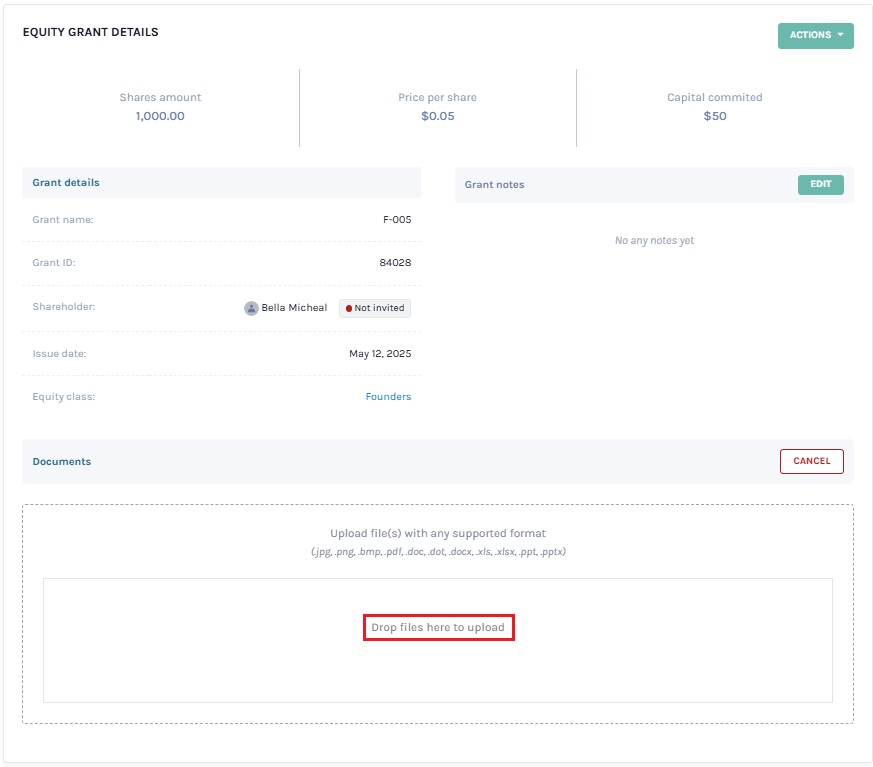
Here, you will see “Drop file(s) here to upload”, and click on this to select the files to upload.
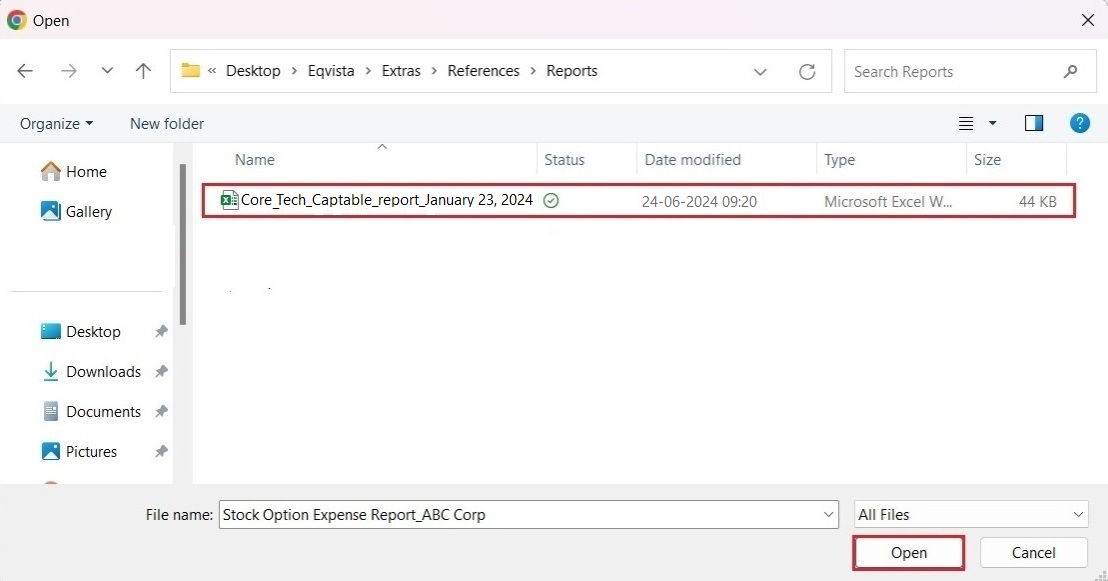
Step 3: Once you click, choose the file that you want to add and click on “Open”.
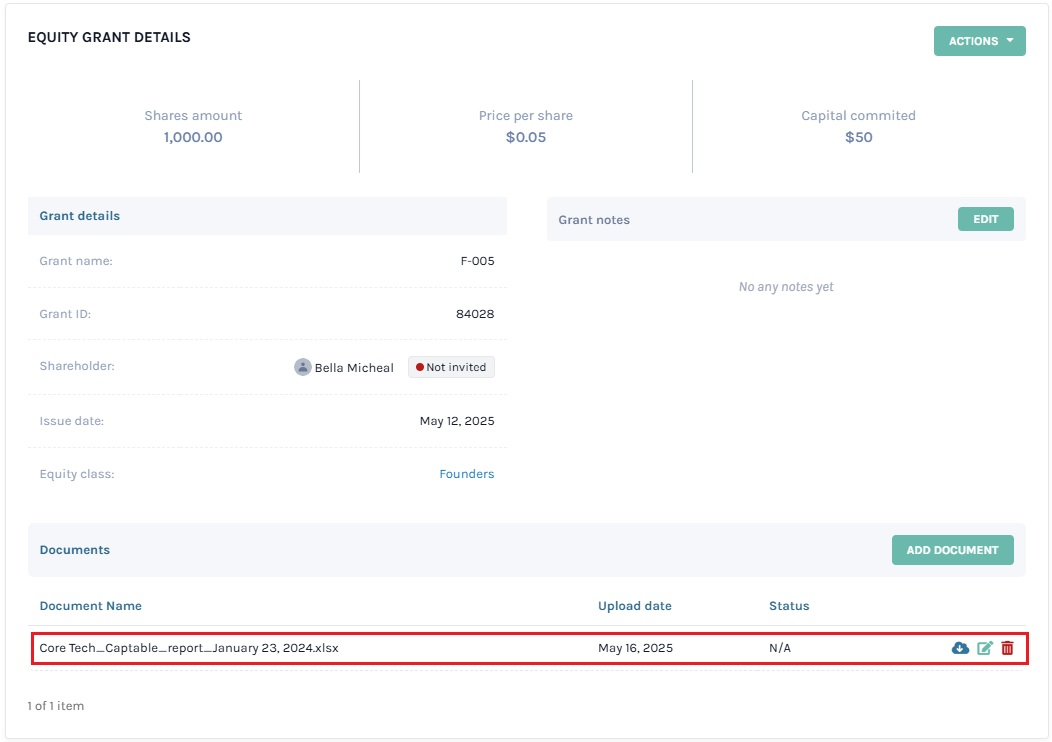
Step 4: Once you click, the document will be added to the grant as shown below.
Note: You will be able to perform many functions. To know more about it, check out the support article!
If you want to understand Eqvista, check out our support articles or contact us today!
