Share Access to Shareholder
The share access function allows the account owner to share access to the cap table with their shareholders, employees, investors, board members, lawyers, and accountants.
One great thing about this function is that it allows you to choose how much of the cap table you want to share with the person. So, this means that you can give them either “limited shareholder access” or “complete access” to the cap table. Keep in mind that when you give a shareholder complete access to the cap table, they will be able to make changes to the cap table. So, make sure you are sharing the right kind of access to the right people.
Complete access here also relates to giving the shareholder access to the cap table as an admin. So, there are two access types that you can give – shareholder access (which is limited access) and full access/admin access (which is complete access) to the cap table.
Share access to the cap table
To share access to the cap table with your shareholder, follow the steps shared below:
Step 1: Log into your account on Eqvista and select your company account.
From here, you will reach the dashboard of the company. Click on “Shareholders” from the left side menu.

Step 2: With this, you will be redirected to the page where you can see all the details of the shareholders as shared below.
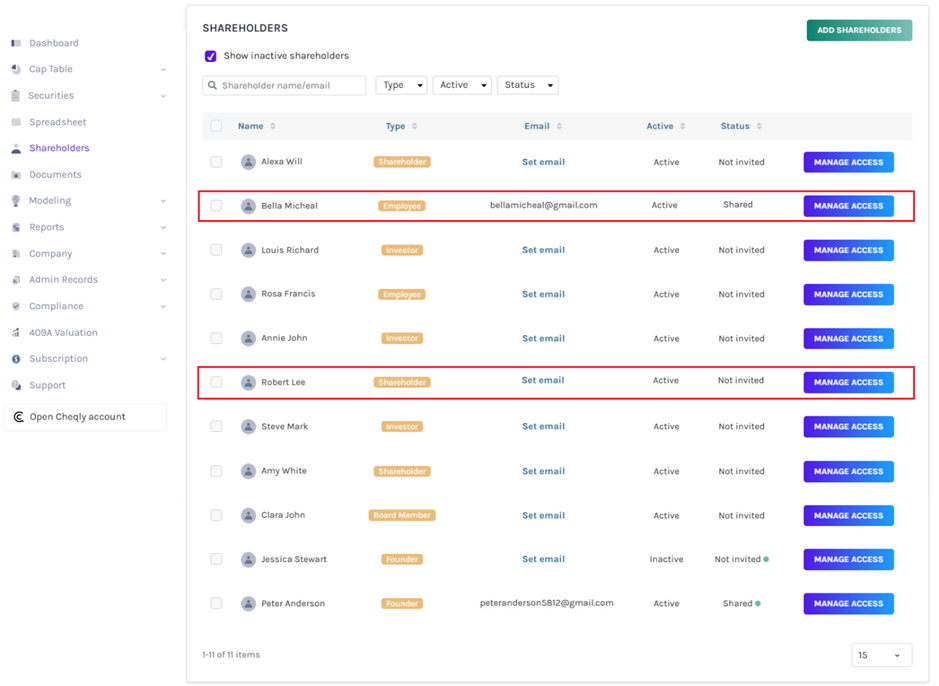
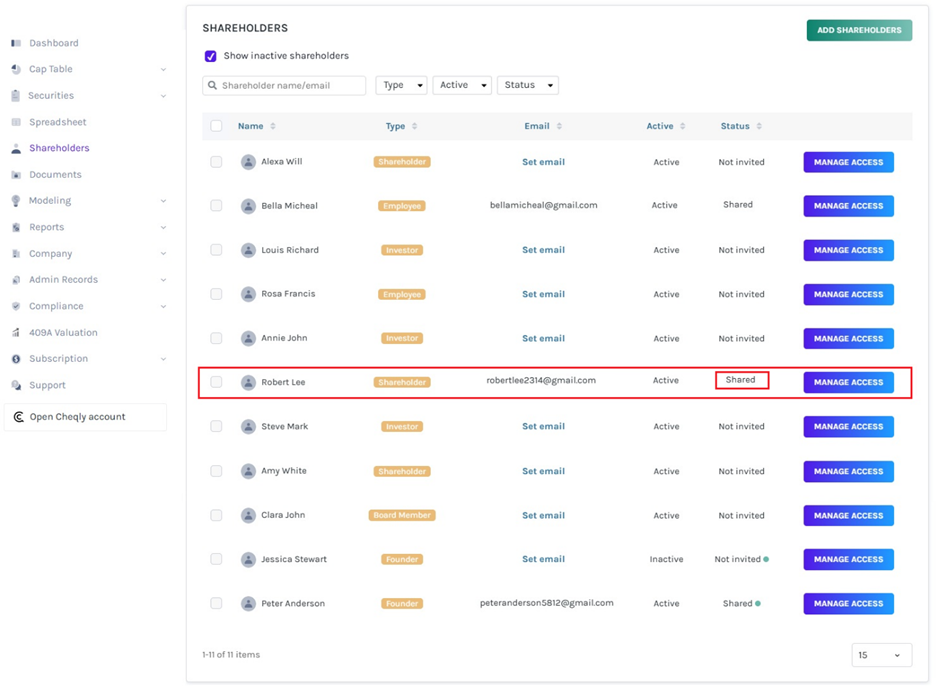
Here, you will see the shareholders who have access. The ones not invited will have the status of “Not Invited”. Besides the status, there is an “Manage Access” button that allows you to give access to the shareholder. Or, you can click on the shareholder’s name and go to their details page to share access.
In short, there are two ways by which you can share access. Both methods are below:
Method 1
In this method, we will share access to the shareholders right from the page where you can see all the shareholders. Assuming we want to share the access with the shareholder named “Clara John” click on the “Manage Access” button near the name.
Step 3: When you do this, a panel will appear as shown below.
Note: To delegate access to the cap table, click on “Delegate Access”. Check out the support article to understand about delegating access.
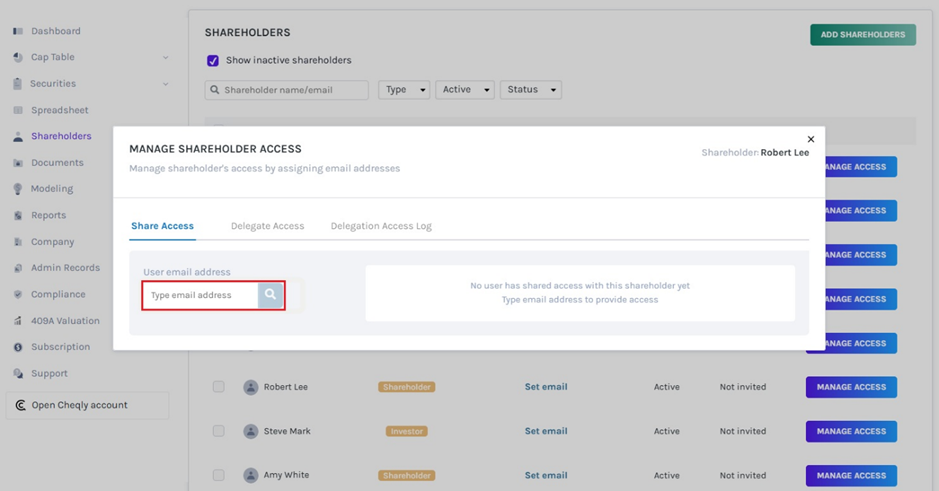
Here, you will see a “X” button on top which you can select in case you selected the wrong shareholder.
If the shareholder is right, type in the email address of the shareholder on which you will be sharing the cap table access. Once you add the email, click on the search button beside it that is in the shape of a magnifying glass.
Step 4: When you click on this after adding the email, a new panel will appear where you need to choose from the kind of access you want to share with your shareholder. There are two access types that you can choose from:
- Shareholder Access: Under this, the shareholder will only be able to see their grants, participate in board resolutions, sign and request electronic certificates for themselves, and sign grant acceptances for themselves. To select this option, click on “Shareholder Access” and then on the “Provide shareholder access” button. Check out the support article to understand the shareholder access view in detail.
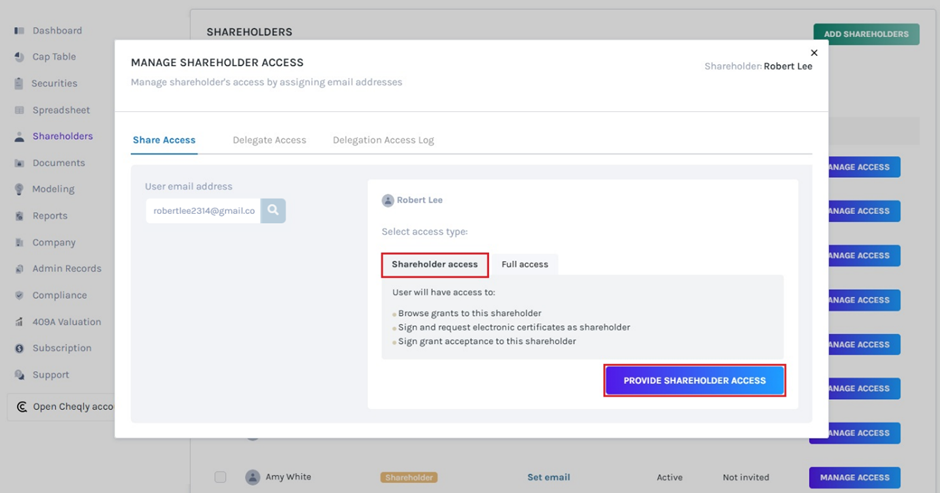
- Full Access/Admin Access: Under this option, the shareholder will get admin access to the cap table. This means that they will be able to view and edit the complete cap table, which includes all the features that come with the shareholder access as well. To select this option, click on “full access” and then on the “Provide full access” button. To know more about full access or admin access, check out our support article.

Select the option you want from the above.
Step 5: Once you do this, the access will be given and you will see the status change from “Not invited” to “Pending” and then “Shared” on the last column of the shareholder’s name.
Method 2
As mentioned above, there are two ways by which you can give access. One is directly from the Shareholder page. The second option is by clicking on the shareholder’s name.
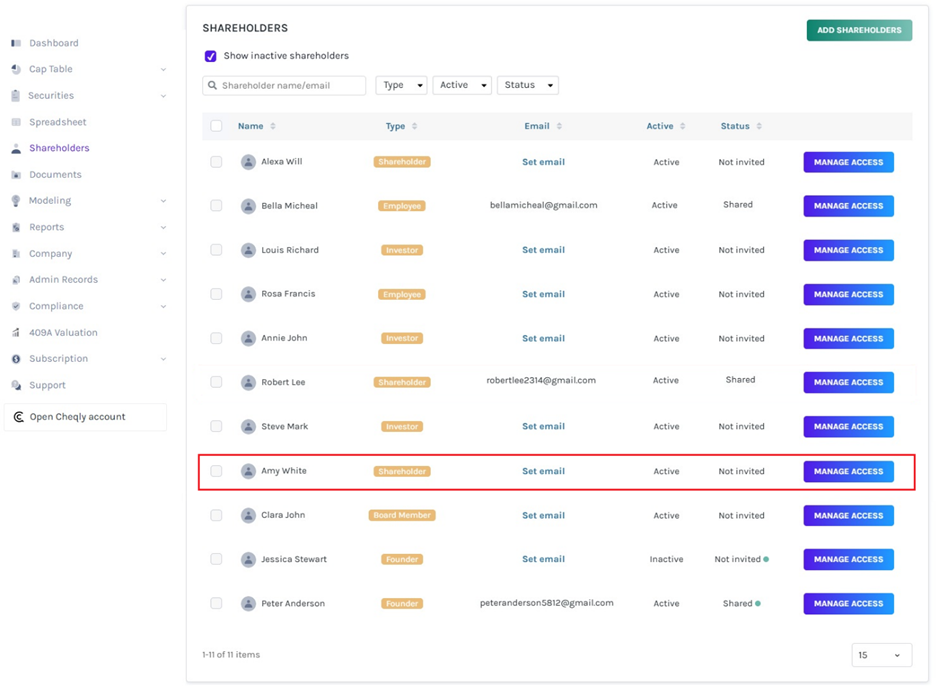
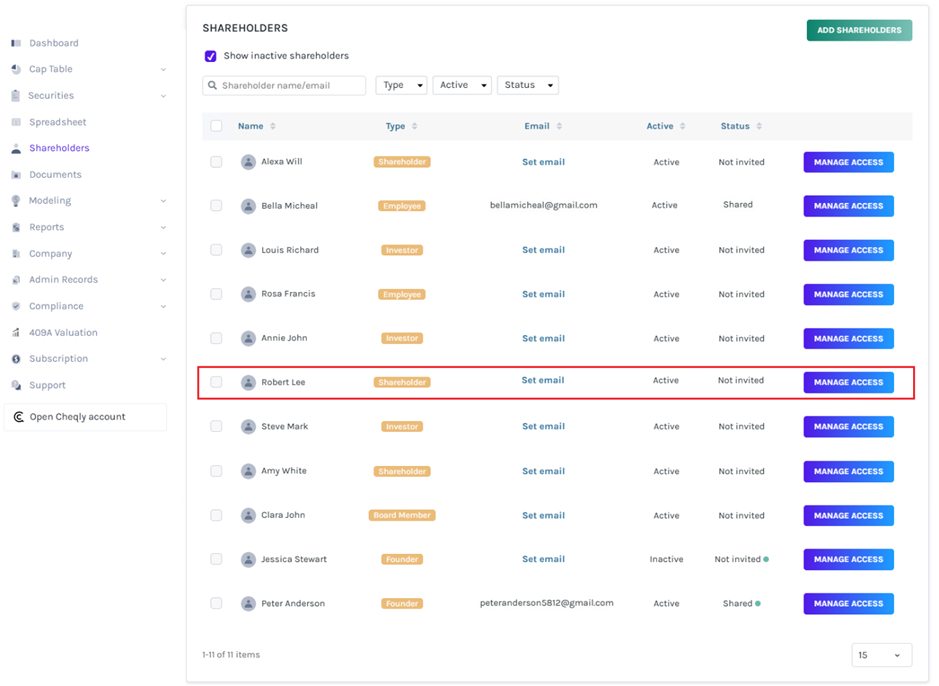
Let us assume you want to give access to the next shareholder – Amy White. Click on the name.
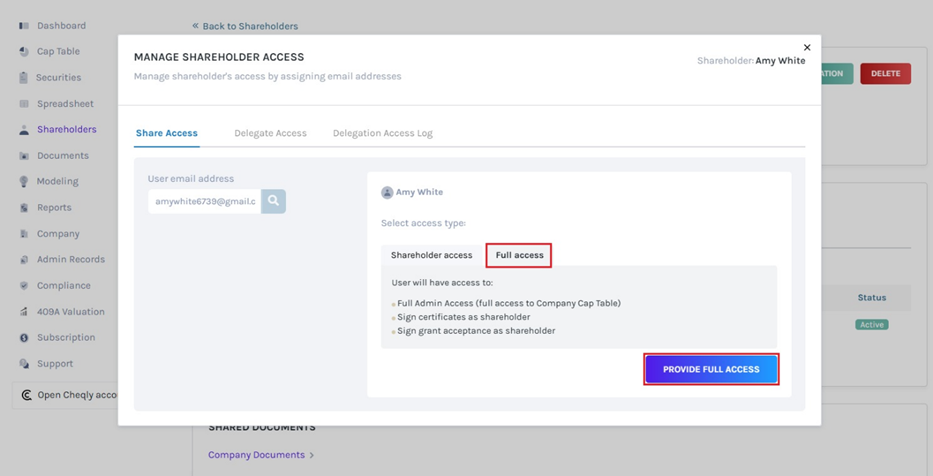
Step 3: When you do this, you will reach the page where you can see all the details of the shareholder as shown below.

From here, click on the button that says “Manage Access” below the shareholder’s name. When you do this, a panel will appear like in the first method where you need to add the email. Add it and click on search.
Step 4: When you do this, you will get the option to select the access types. Choose the option and then click on the button below it to share the access as shown below.
Note: To delegate access to the cap table, click on “Delegate Access”. Check out the support article to understand about delegating access.
When you do this, access will be given and the panel will close. You will see some options below the shareholder’s name as explained in the next step.
Step 5: Regardless of which type of access you give to the shareholder, if you go to the shareholder details page, you will see the following details below their name.
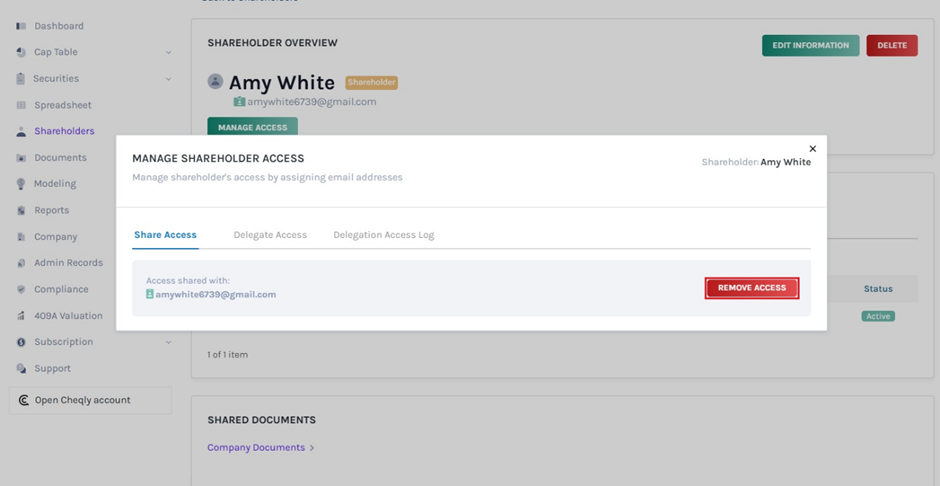
You will see that the access has been shared. Additionally, you can also remove access to the cap table if some issue comes up or in case you sent it to the wrong email.
Note: This is a sample of the invitation sent to the shareholder for access to the cap table.
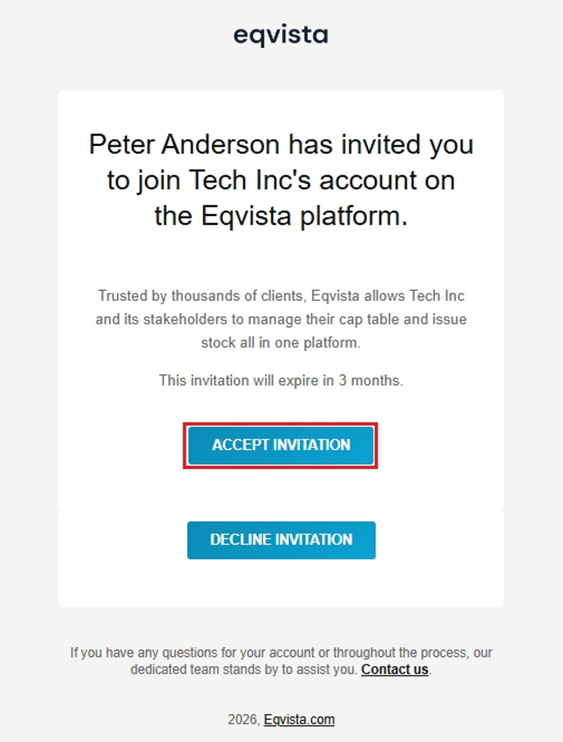
Being the shareholder who received the email, you will have to click on the button saying, “Accept Invitation”. With this, a new window will appear where you will be asked to make a profile on Eqvista.
Then, the shareholder creates a password and logs into their account, that is when they will be able to access the cap table based on the access they received.
For instance, if they get shareholder access, the shareholder would not be able to edit anything and view their transaction details, request their grant certificates, participate in board resolutions, and sign the grant acceptance. While the admin/full access gives complete access to the cap table.
To know more about how to navigate and use Eqvista, check out our support articles here!
