How to View Documents Onboarded for 409a Valuation Renewal?
Onboarding documents for 409A valuation renewal involve uploading the essential documents needed to ensure an accurate valuation of your company.
View Onboarded Documents for 409a Valuation Renewal
Documents onboarded for 409A valuation renewal are easily accessible and can be viewed in simple steps. This ensures a comprehensive overview of all information for an accurate valuation of your company.
Here are the steps to follow:
Step 1: Log into Eqvista and select your company account.
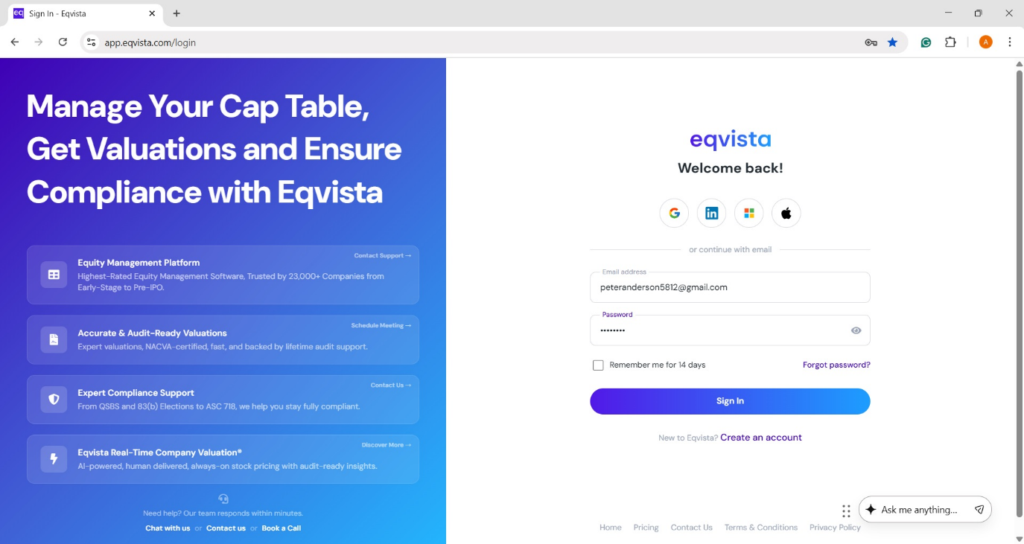
On the dashboard, click on “Documents” on the left side.
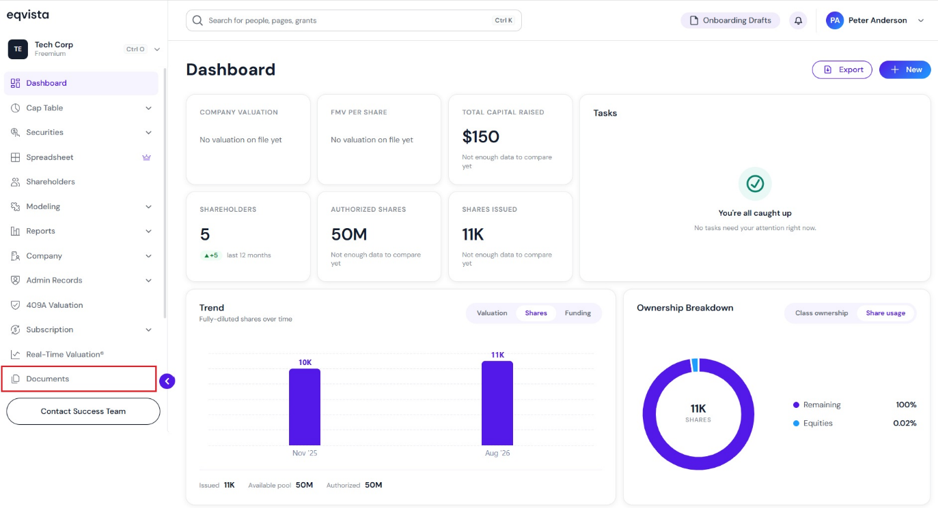
Step 2: On this page, you can see that a folder has been created in the name “409A Valuation Renewal (Sep 2026)” for documents onboarded for 409A valuation renewal.
Note: You can create a folder by clicking on “New Folder” and add documents by clicking on “Add Documents”. Check out the respective support articles to learn more!
Step 3: Once you click the folder “409A Valuation Renewal (Sep 2026)”, you will be redirected to the page where onboarded documents are organized into folders, as shown below.
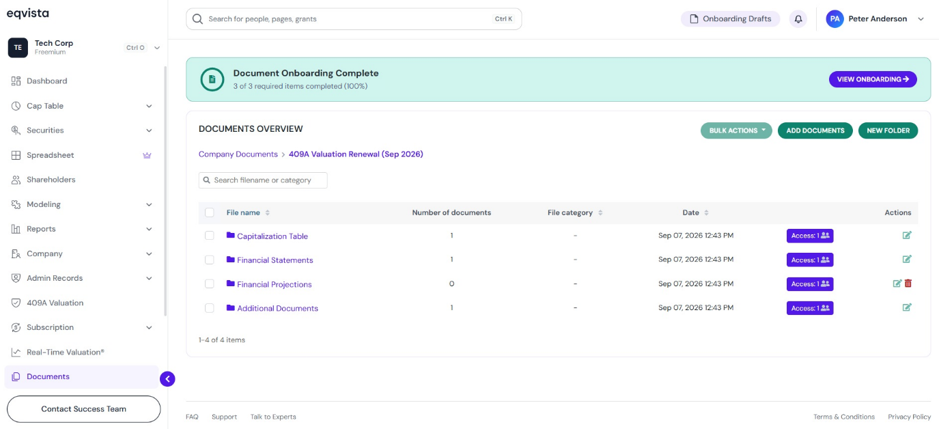
Apart from viewing the folders, you can perform the following functions:
#1 Edit Folder
You can change the folder name by clicking on:
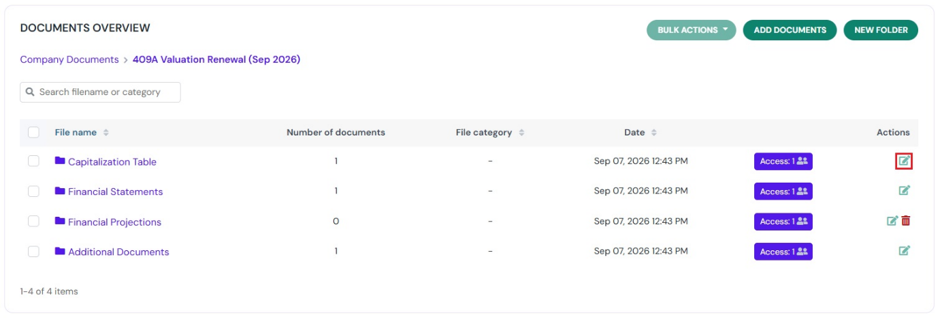
When you click on edit, a pop-up panel appears to edit the folder name.
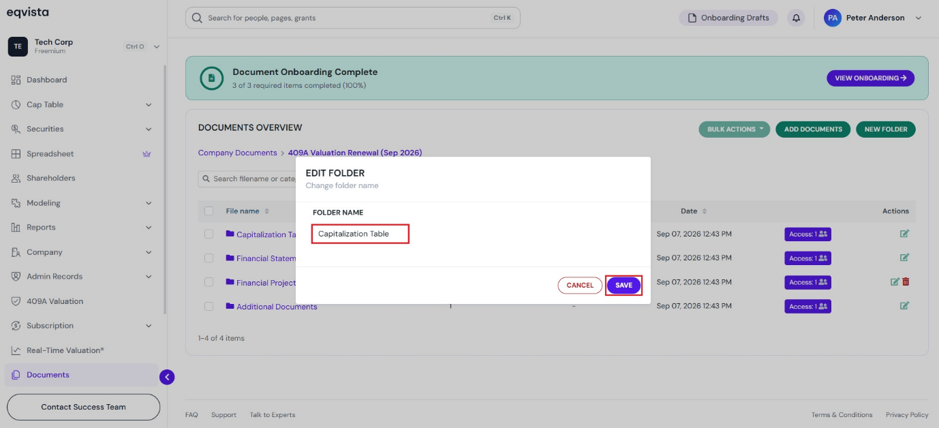
Once done, click on “Save”.
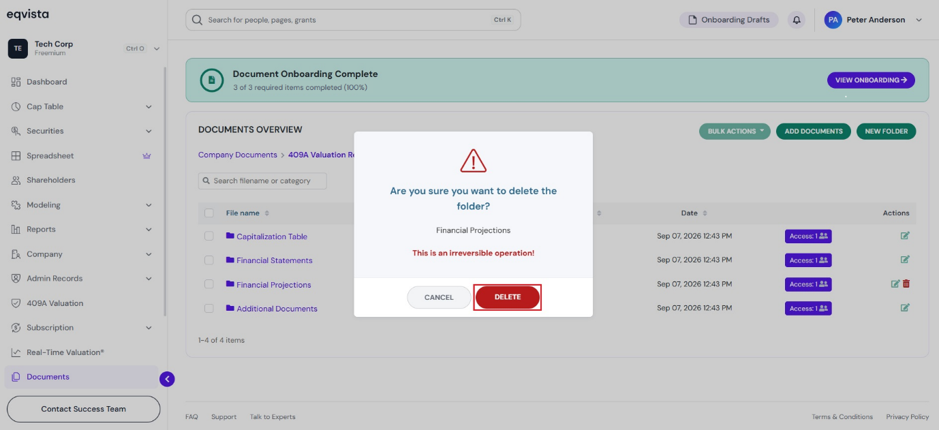
#2 Delete Folder
If you want to delete the created folder, then click on:
Note: You can delete a folder when there are no documents added to it.
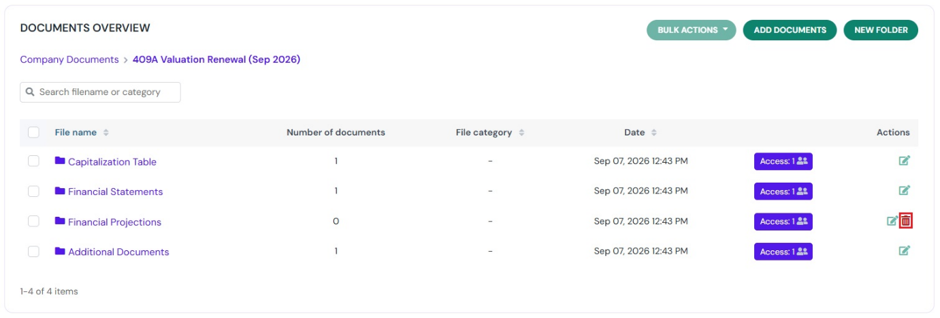
A confirmation message appears, and click on “Delete”. If you want to cancel the process, click on “Cancel”.
#3 Share Access
To share the folder with other shareholders, click on “Access”.
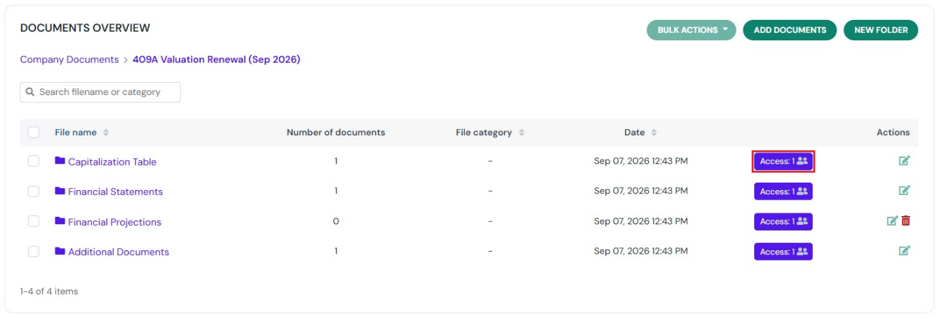
When you click on “Access”, a panel will appear along with two options:
A. Search to Grant Access
If the user already has an Eqvista account, the method links the folder directly to the user’s Eqvista account. The user will be able to access the folder after logging into their account
You can search for the shareholder by typing in the shareholder’s name to whom you want to share the folder. The name will appear along with an option “Share”.
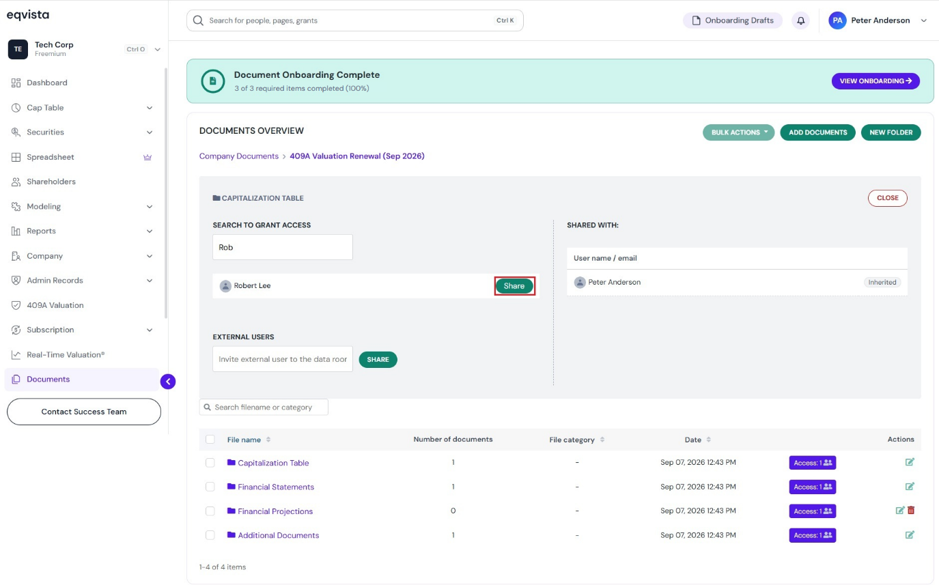
Note: For the shareholder to view the folder, you should share access to the cap table. Check out the respective support articles to learn more about it!
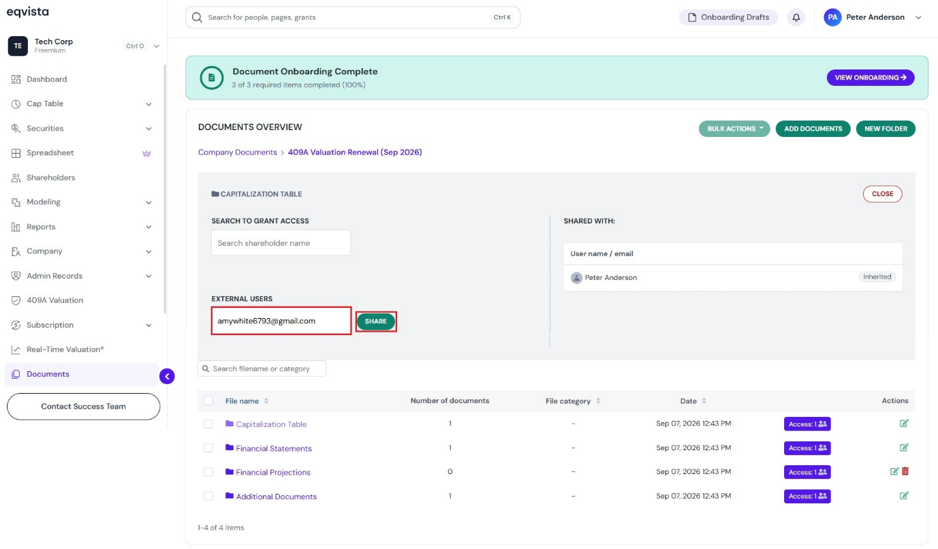
B. External Users
It is intended for users without an Eqvista account. The method does not link the folder to the user’s existing Eqvista account. The user can access the folder using the link sent to their email, rather than through their account.
Type the email address of the user to whom you want to share the folder.
Step 5: Once you click “Share”, the folder will be shared with the shareholder. In this case, we have searched to grant access to “Robert Lee”. The number has changed for those who have access to the folder.
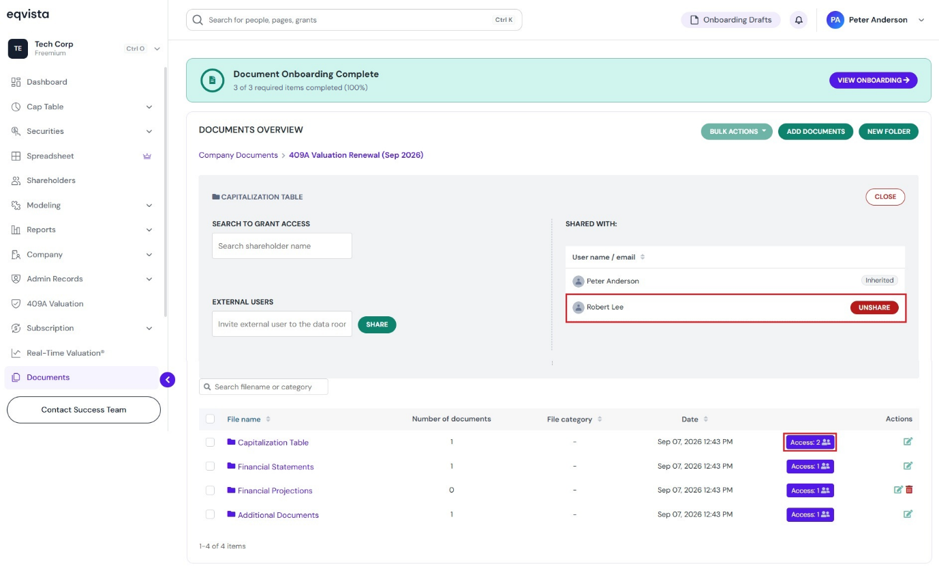
Note: You can view shareholders having access to the folder on the right, and click on “Unshare” to remove access.
Step 6: The onboarded documents can be viewed by clicking on the folder name as shown below.
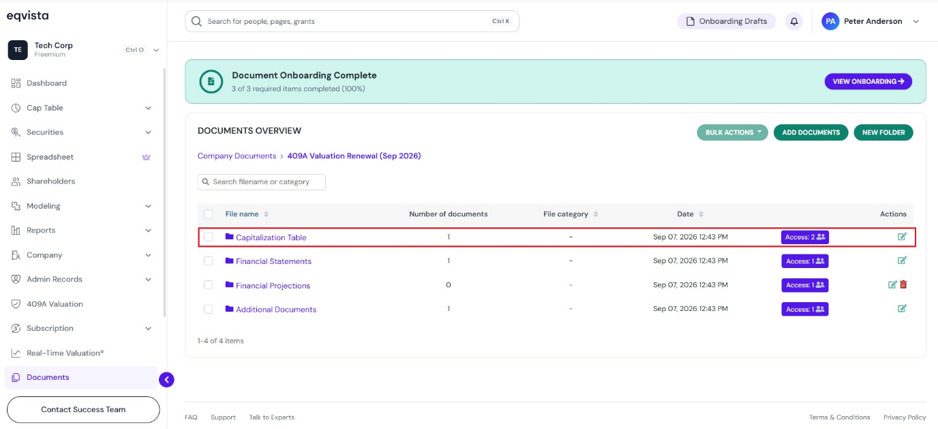
Once you click the folder name, it redirects to the page to view the document.
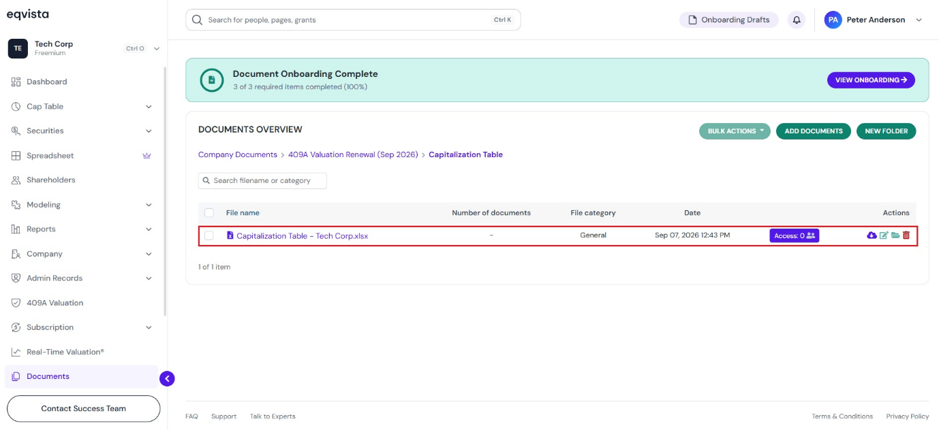
Apart from viewing the document, you can perform the following functions:
#1 Preview
The preview of the onboarded document can be seen by clicking on the document name.
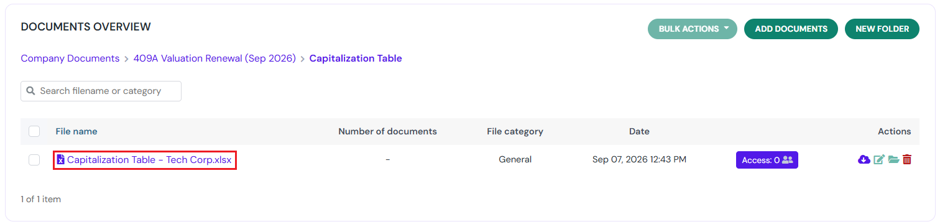
When you click on the document name, it redirects to display the preview of the document.
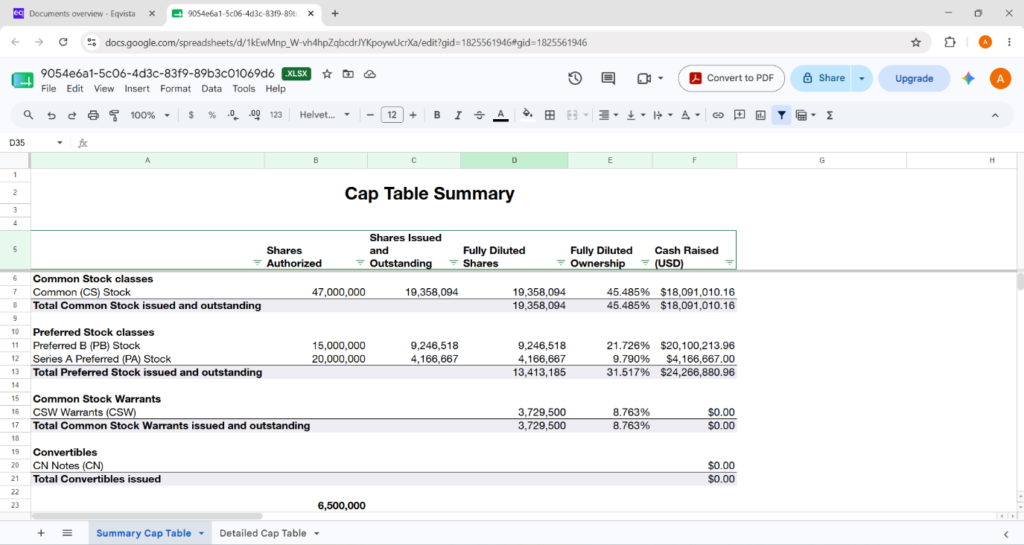
#2 Download Document
Just to explain further, you can download the document by clicking on
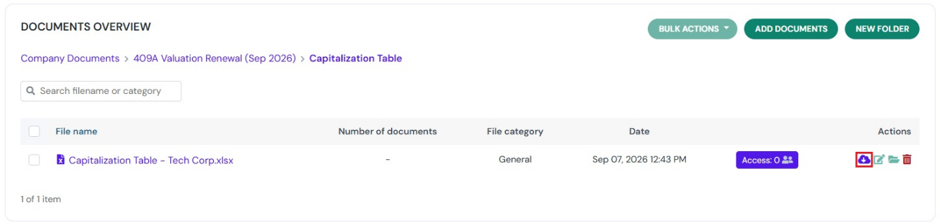
Once you click, the document gets downloaded to your Downloads.
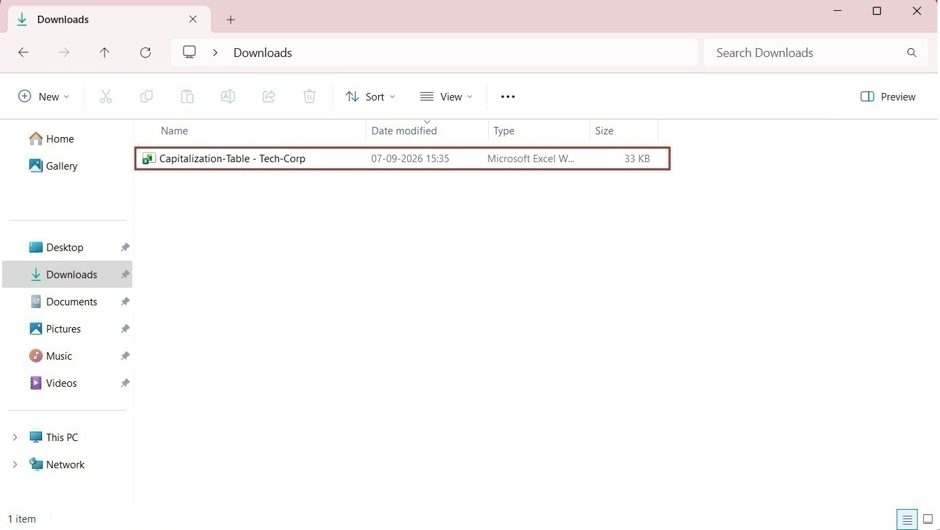
Double-click the Excel sheet to open the downloaded file.
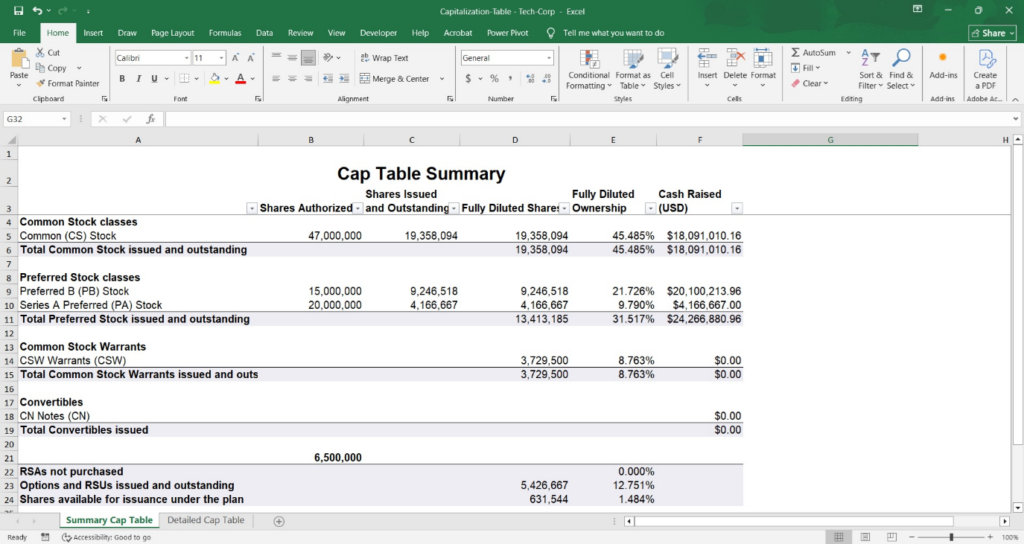
#3 Edit Document
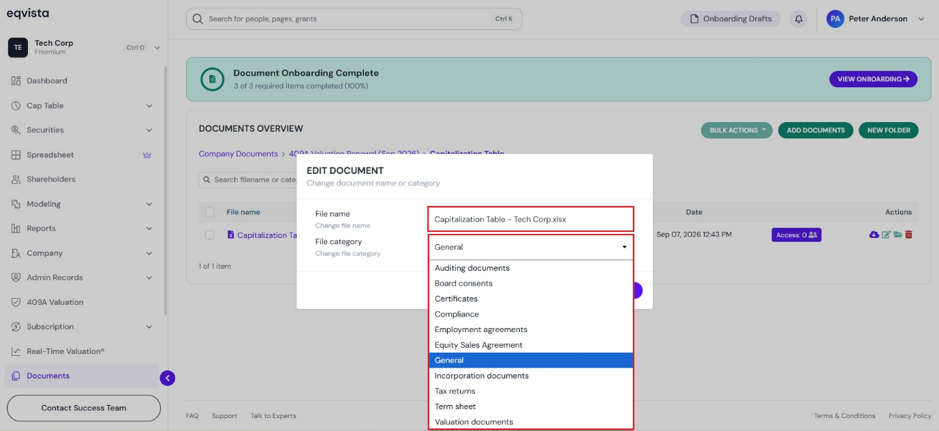
You can edit the file name along with the file category by clicking on:
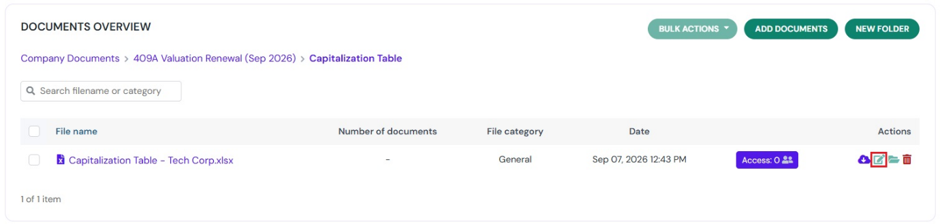
When you click on the button to edit the file, a pop-up panel appears to edit the file name and choose a file category from the drop-down list.
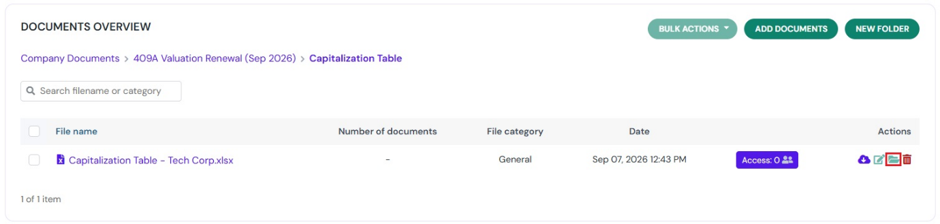
#4 Move Document
Suppose you want to move the onboarded document, click on:
Once you click, a pop-up panel appears listing the available folders along with the option “Move”. To move the document out of the folder, click on “Move Here”.
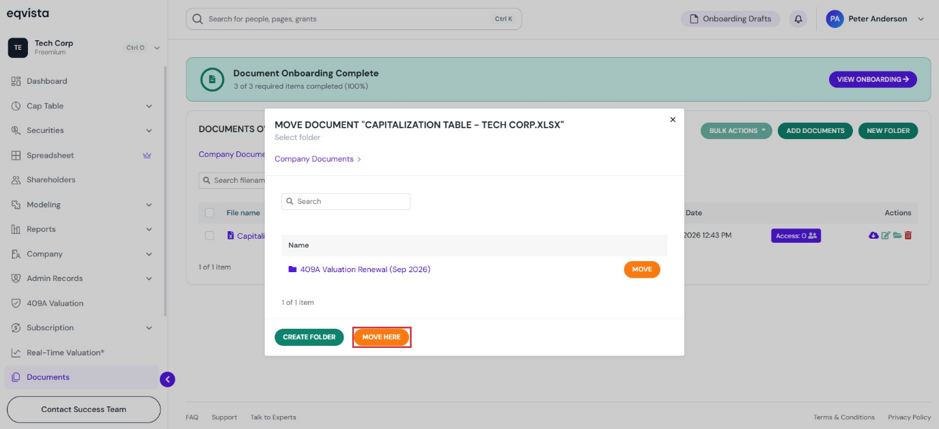
Note: You can create a folder by clicking on “Create Folder”. Check out the respective support article to learn how to create folders.
#5 Delete Document
If you want to delete the onboarded document, then click on:
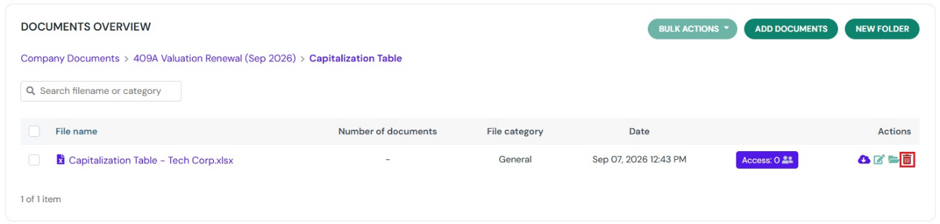
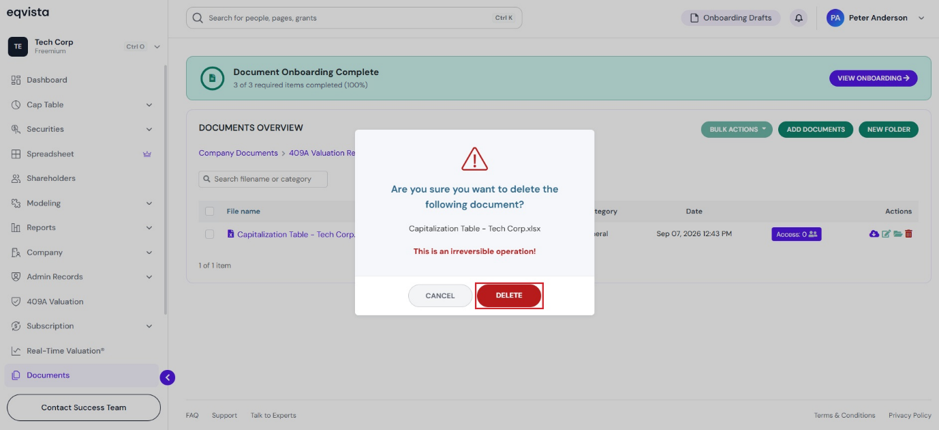
A confirmation message appears in a pop-up panel, and click on “Delete”. If you want to cancel the process, click on “Cancel”.
#6 Share Access
To share the document with other shareholders, click on “Access”.
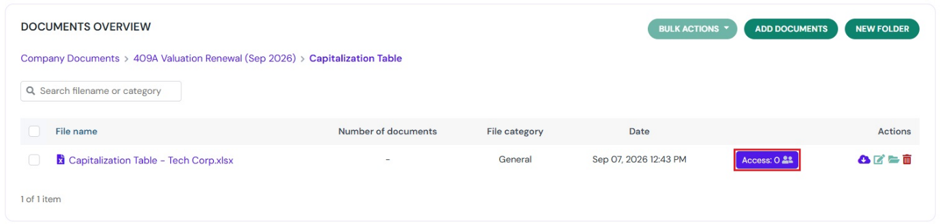
When you click “Access”. a panel will appear along with two options: individual shareholder and shareholder type.
A. Individual Shareholder
You can search for the shareholder by typing in the shareholder’s name to whom you want to share the document. The name will appear along with an option “Share”.
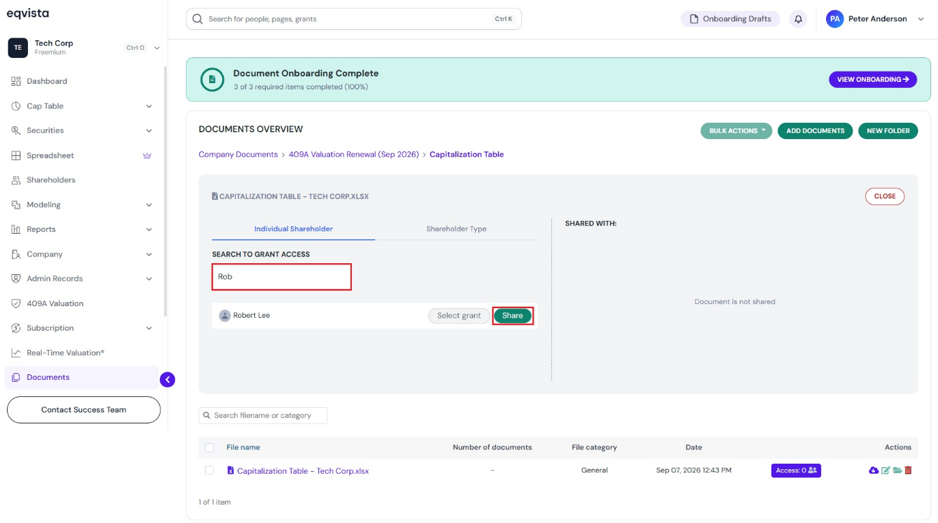
Note: You can click on “Select grant” to add the document to a grant. For the shareholder to view the document, you should share access to the cap table.
B. Shareholder Type
It displays the different shareholder types available in the company. Select a shareholder type and click on “Share”.
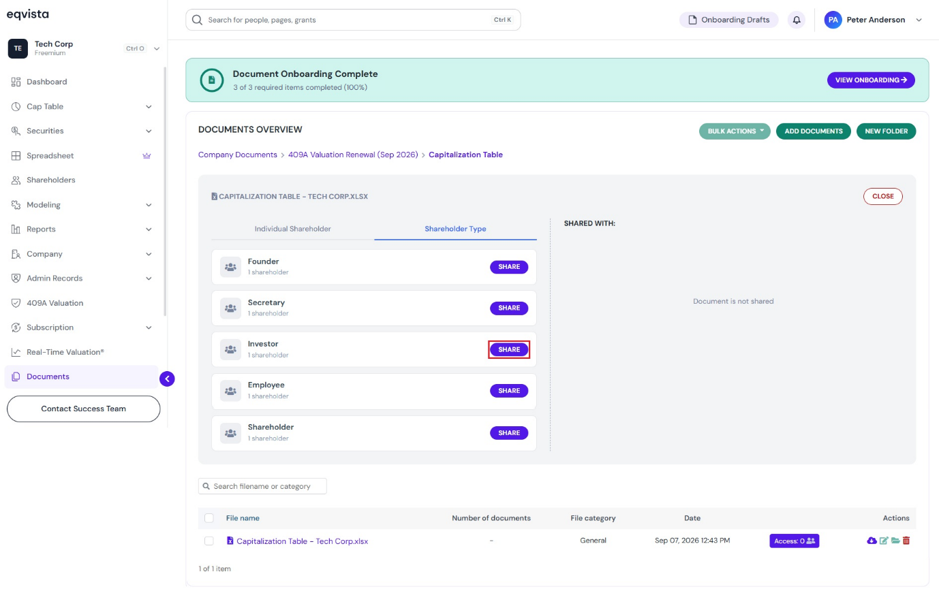
Note: Only individual documents can be shared with shareholder type, and folders cannot be shared the same way. For the shareholder type to view the document, you should share access to the cap table.
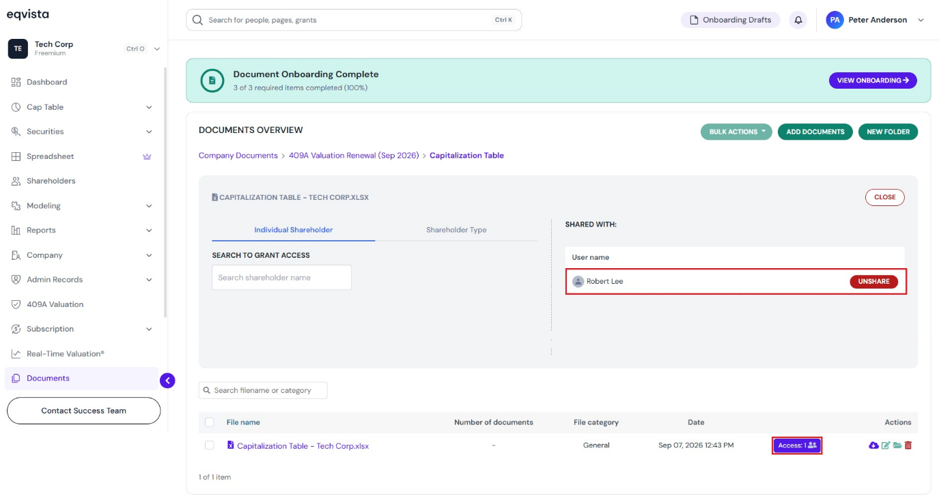
Step 7: Once you click “Share”, the document will be shared with the shareholder.
You can view individual shareholders, grants, and shareholder types having access to the document on the right. If you want to remove access, click on “Unshare”.
The number has changed for those who have access to the document.
To learn more about Eqvista, check out our support articles and knowledge base. For queries, get in touch with us!