Document Onboarding – 409a Valuation
It is very easy to create an account on Eqvista, add a new company, create shareholders, and upload documents for a 409A valuation.
How to Onboard Documents for 409a Valuation?
The process of onboarding documents for a 409A valuation is straightforward and designed to be user-friendly. By following a few steps, you can upload the necessary documents to facilitate a thorough and accurate valuation of your company.
Here are the steps to follow:
Step 1: Log into Eqvista and select your company account.
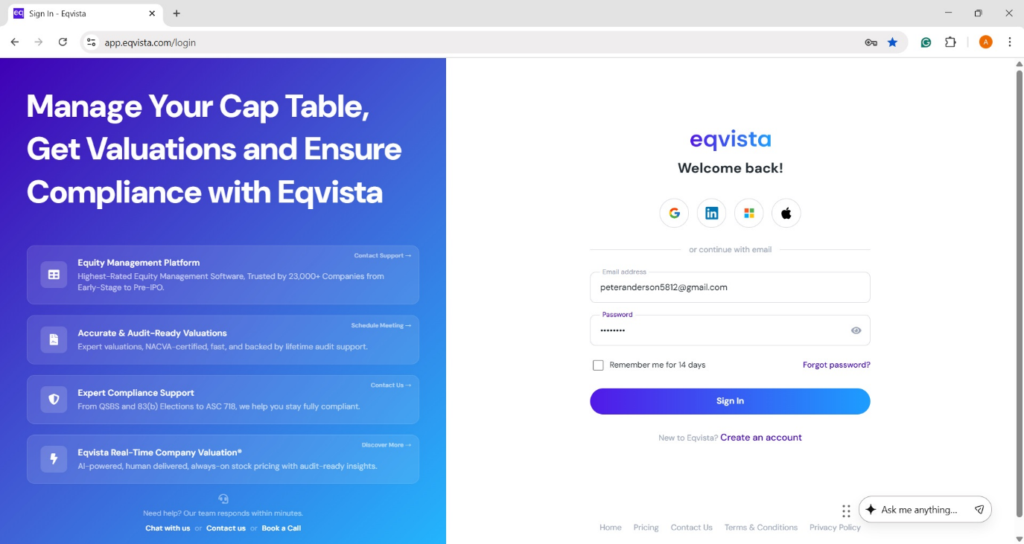
On the dashboard, click on “Documents” on the left side.
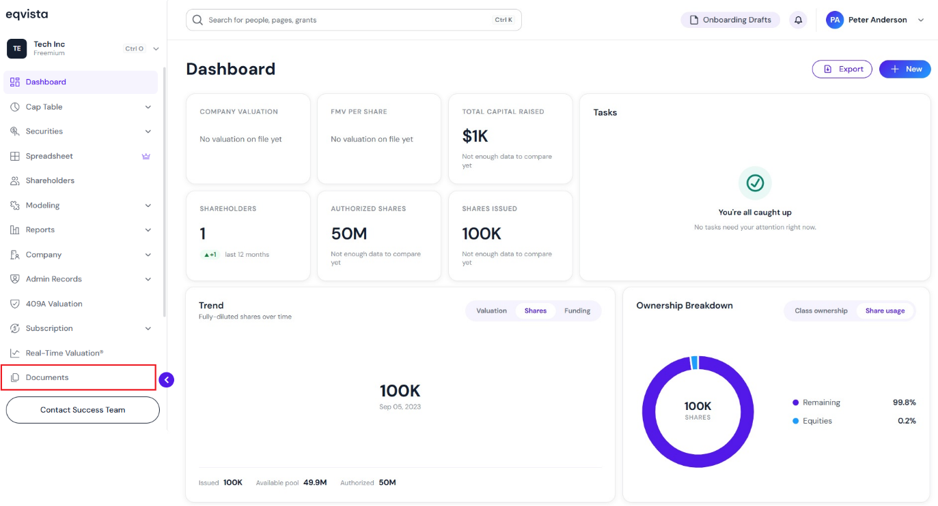
Step 2: On this page, it displays “Start uploading required documents for your company valuation” along with the option “Start Onboarding”.
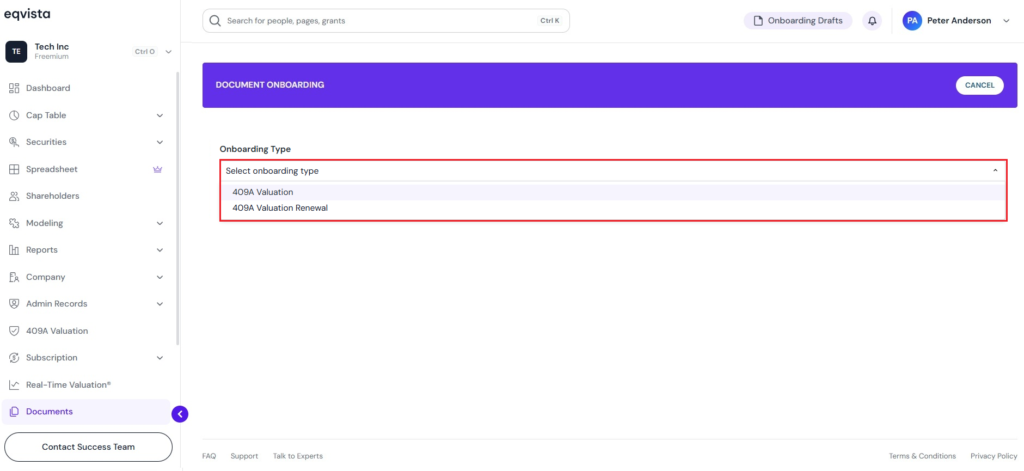
Step 3: Then, select onboarding type from the drop-down to onboard documents. In this case, selected the option “409A Valuation”.
Note: You can onboard documents by selecting “Renewal” from the drop-down menu. Check out the support article to learn more about renewal onboarding type option.
Step 4: Once you select the option, it displays the fields to fill in information about your company’s previous valuation.
- Valuation date, which will be automatically filled by default.
- Search or select your industry from the dropdown.
- Enter your company’s website URL (optional).
- Select the purpose of valuation.
- Estimated number of options
- Estimated liquidity timing or select the option “Too Early to Reasonably Estimate”.
- Known public comparable company by entering the company name or ticker.
- Company address for the final report.
- Provide the contact details for the lawyer or auditor (optional).
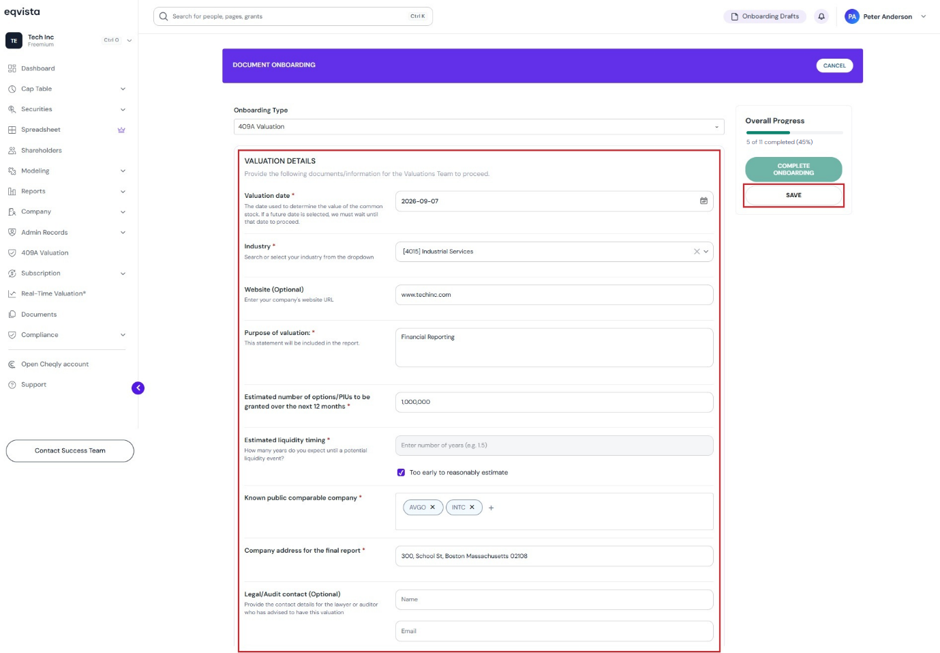
As you fill in the details, you can save your progress by clicking on “Save”.
Step 5: Moving on to the next section “Company Narrative”, which helps us understand your company better. Fill in the fields with information for the following:
- What does your business offer? – Sell products, services, or both by selecting the option from the drop-down menu.
- Revenue model (SaaS subscriptions, project-based, licensing).
- Who are your customers? –Businesses, Consumers or Government by selecting the option from the drop-down menu.
- The purpose of your products or services, and the problem they address.
- Country of registration by selecting from the drop-down menu.
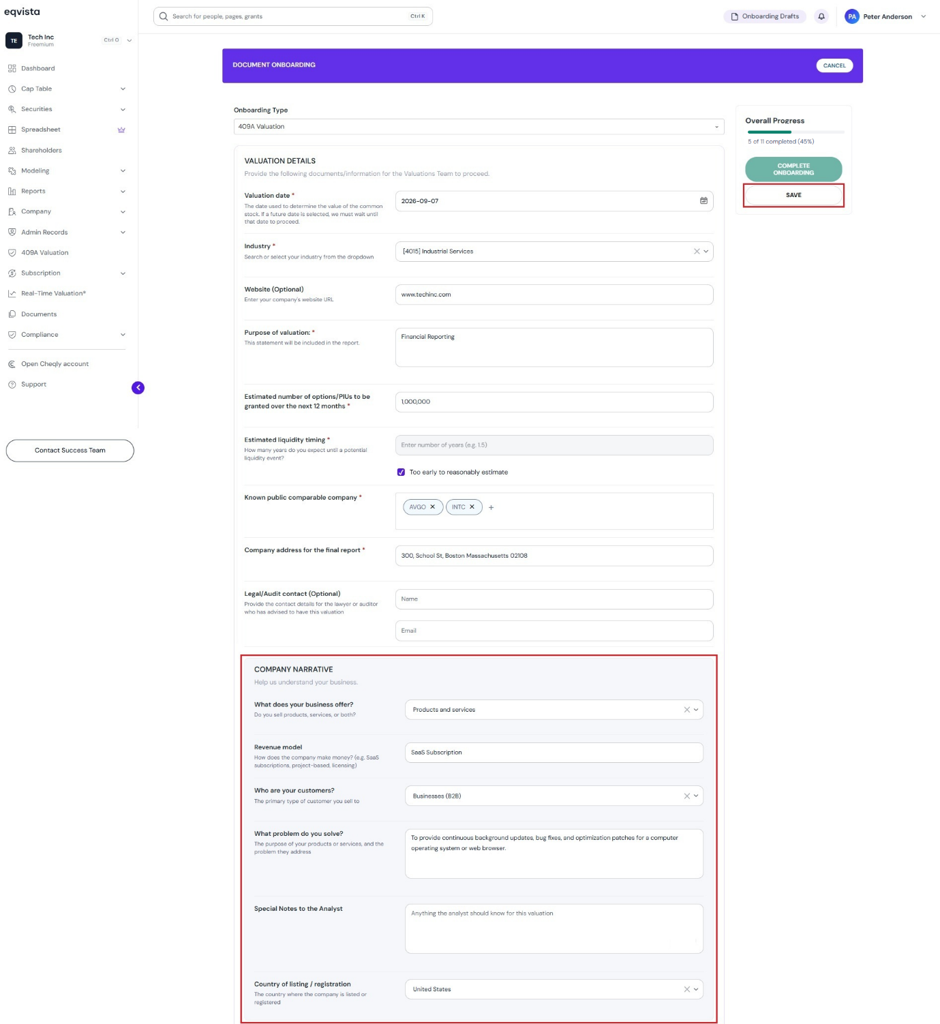
As you fill in the details, you can save your progress by clicking on “Save”.
Step 6: After entering details about your company, you must upload the following documents:
- Incorporation Certificate / Amendment
- Shareholder Agreements / Purchase Agreements
- Pitch Deck or Investment Memo
- Financial Statements
- Financial Projections
- Previous Valuation Report (if any)
- Capitalization Table
- Other Company Documents (if any)
When you upload documents, you have the option to upload the document or mark as unavailable.
#1 Upload File
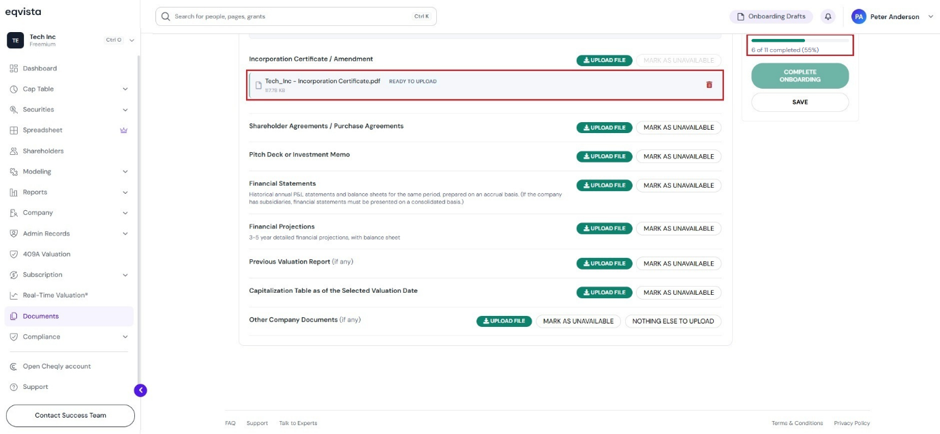
You can upload the documents by clicking on “Upload File”.
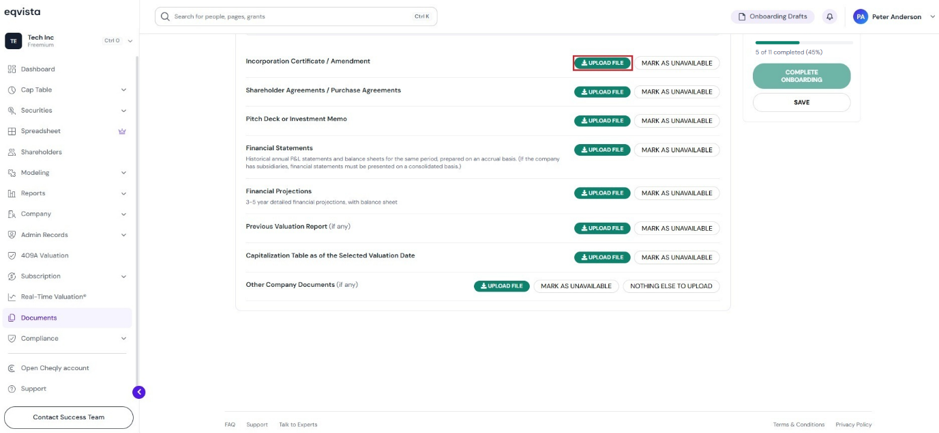
Once you click, a panel appears to choose the file you want to add and click on “Open”.
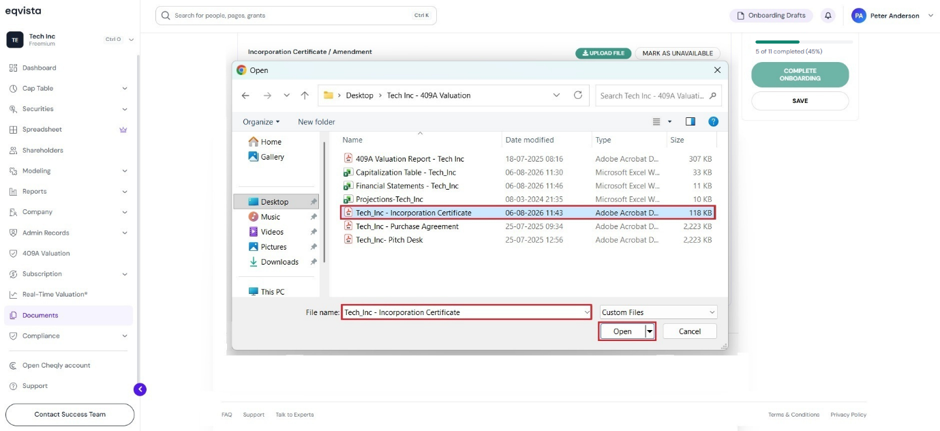
When you click on “Open”, the file will be uploaded as shown below. You can view the onboarding progress on the right side of the page.
#2 Mark As Unavailable
If you do not have the document, you can choose the option “Mark As Unavailable”.
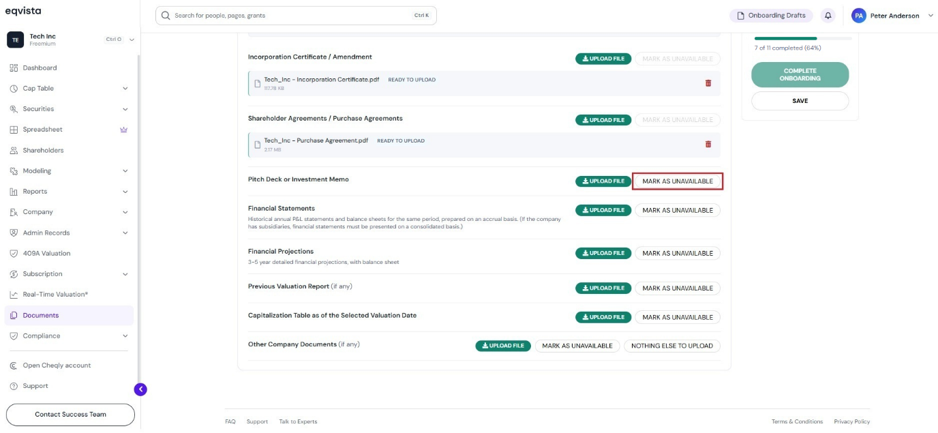
Once you click, a panel appears to fill in the reason for the document’s unavailability, and then click “Confirm“.
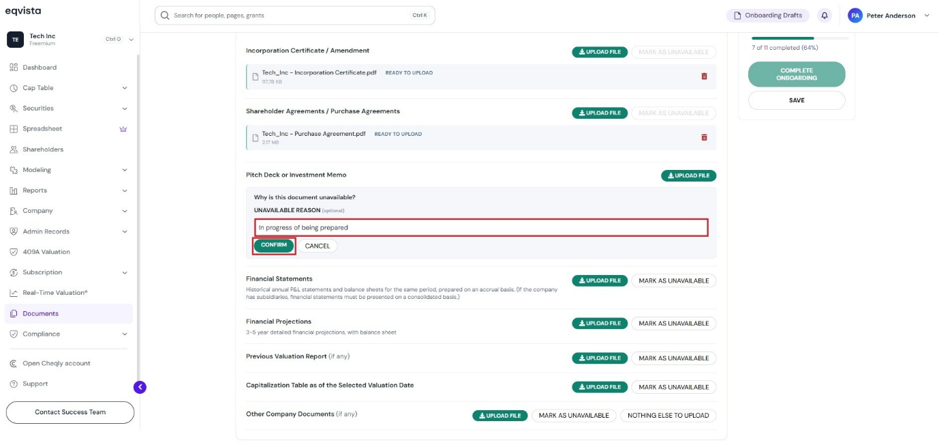
With this, it will be marked unavailable along with an option to “Update Reason”.
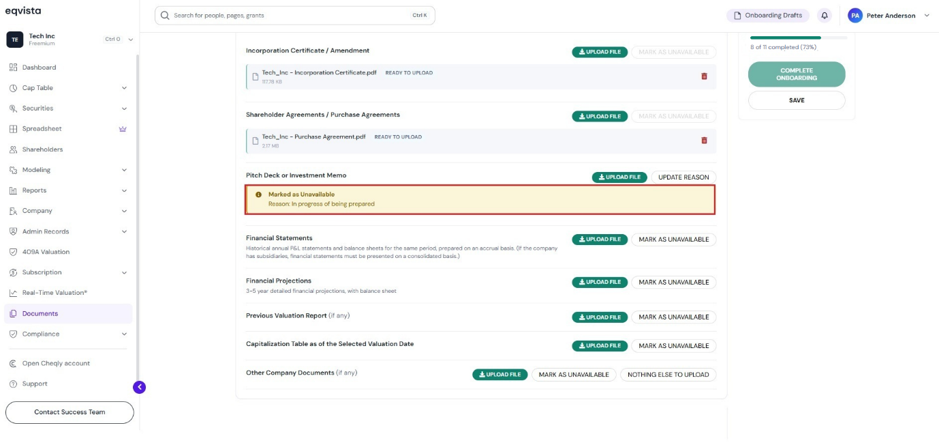
Step 8: When you have uploaded all the documents and do not have any documents, click on “Nothing Else to Upload”.
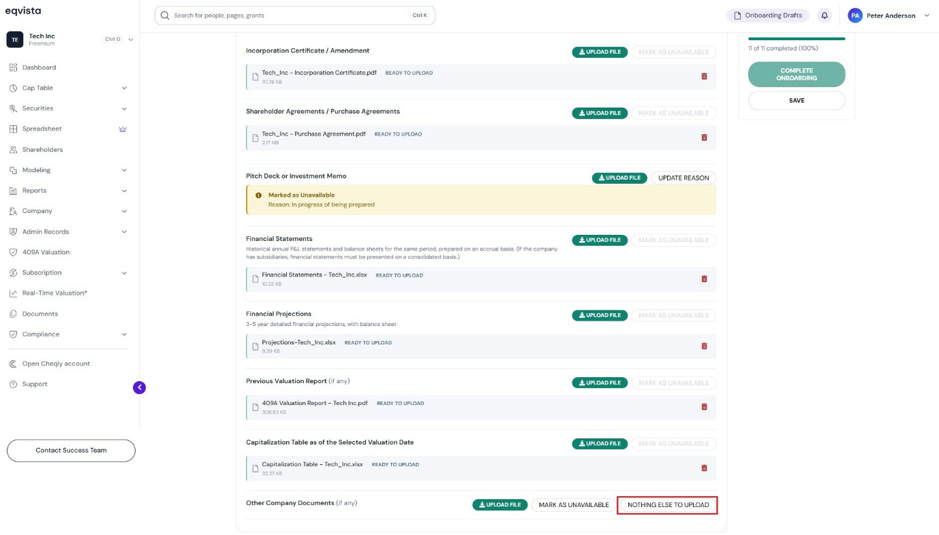
Once you click, it gets updated as shown below.
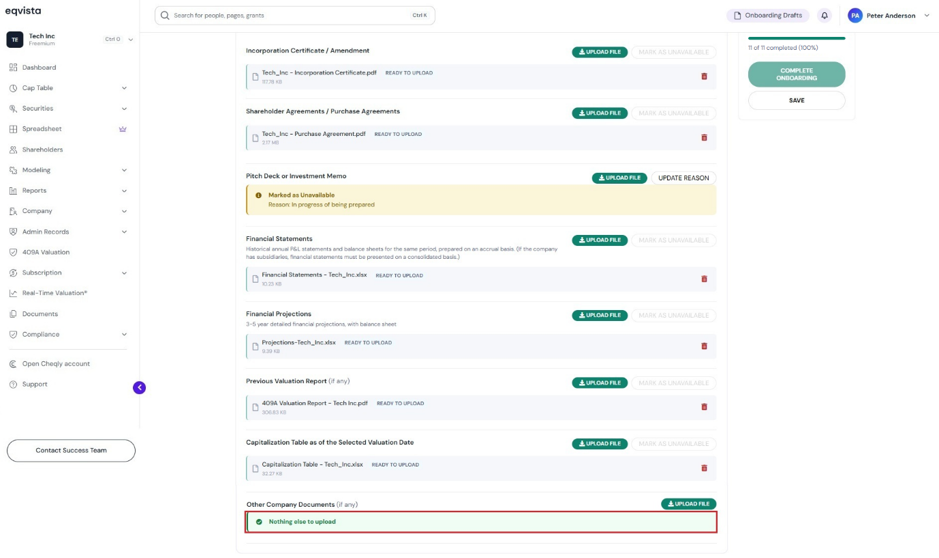
Step 9: After you have entered all details and uploaded all documents, click on “Complete Onboarding”.
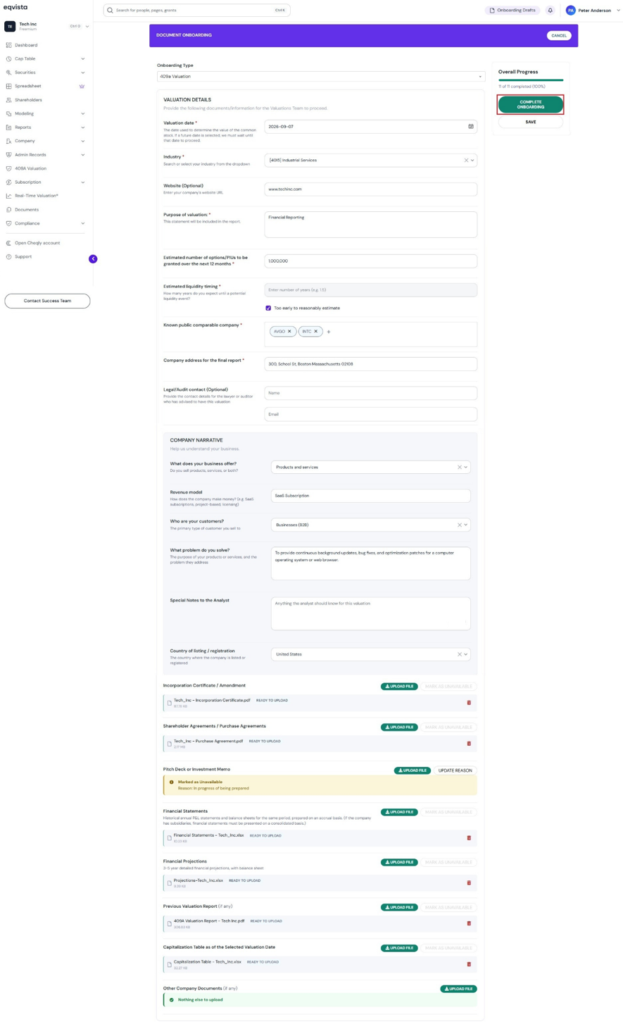
Step 10: Then, you will be redirected to the page displaying that document onboarding is complete, along with an option “View Onboarding”.
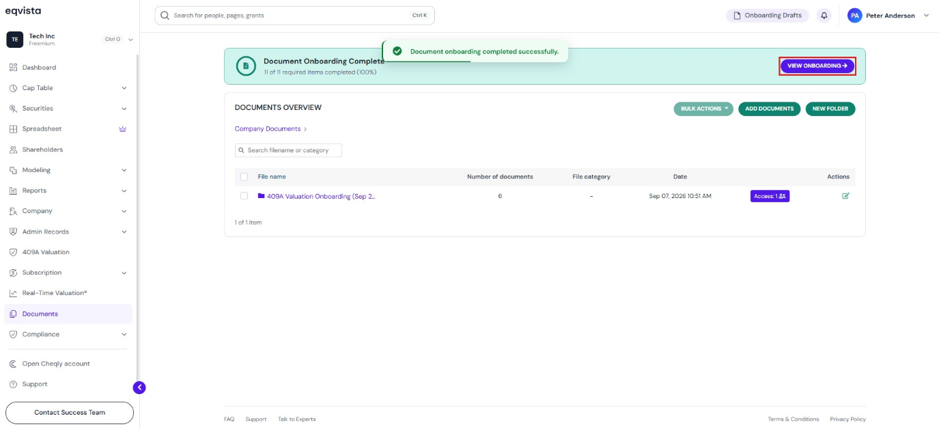
When you click it, it redirects to the page displaying the company details entered and documents uploaded.
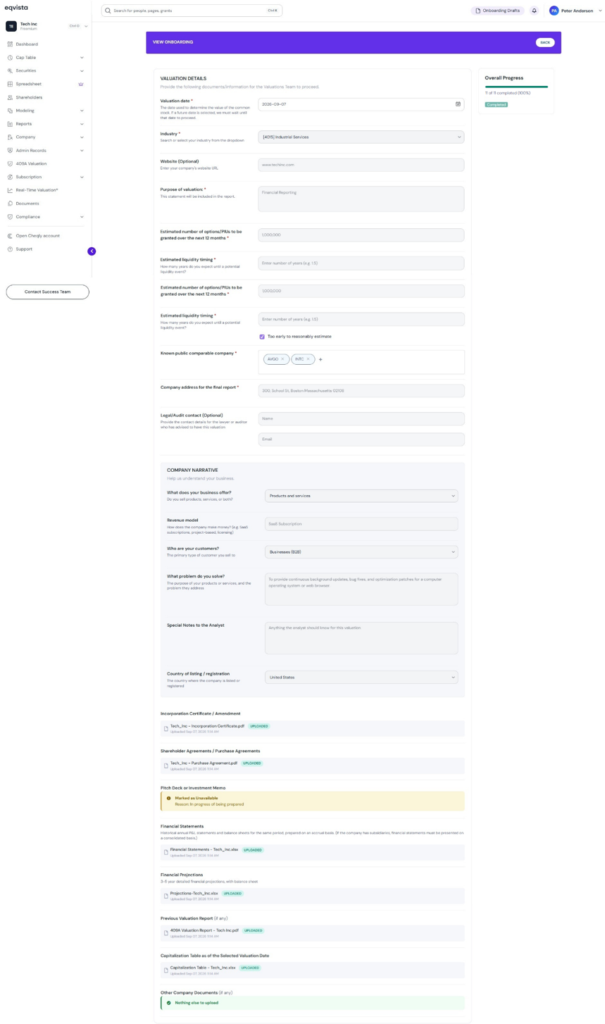
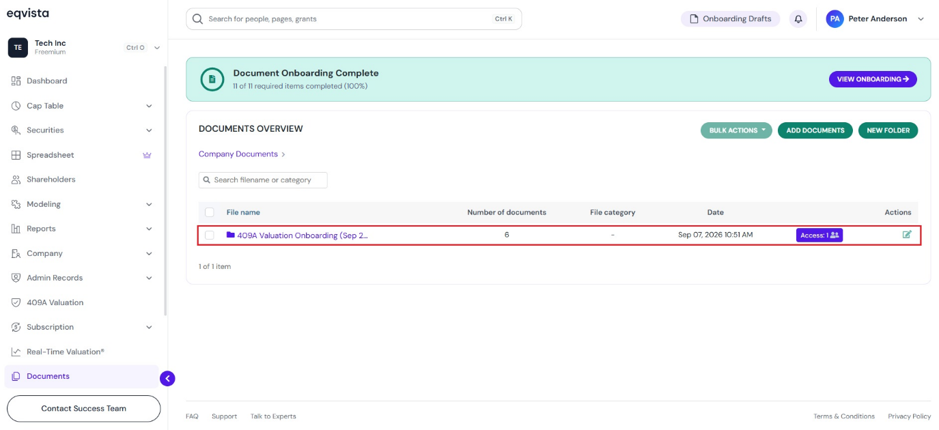
Step 11: On this page, you can see that a folder has been created in the name “409A Valuation Onboarding (Sep 2026)” for the uploaded documents.
Note: You can view the documents onboarded by clicking on the folder. Check out the support article to learn about viewing the onboarded documents!
To learn more about Eqvista, check out our support articles and knowledge base. For queries, get in touch with us!