How to Connect QuickBooks to a 409A Valuation?
The fair market value of your company’s shares is calculated using a 409A valuation performed by a professional expert like Eqvista. You can also connect QuickBooks to allow Eqvista to access your financial data.
Note: A 409A valuation is applicable for 12 months or year after the valuation date unless there is a significant material event.
Quickbooks Integration
The feature involves a QuickBooks connection, allowing Eqvista to automatically fetch your prior fiscal year and year-to-date Profit and Loss and Balance Sheet into your financial statements, and download them as Excel files for your 409A valuation.
Here are the steps to follow:
Open 409A Valuation Account
Step 1: Log into Eqvista and select your company account.
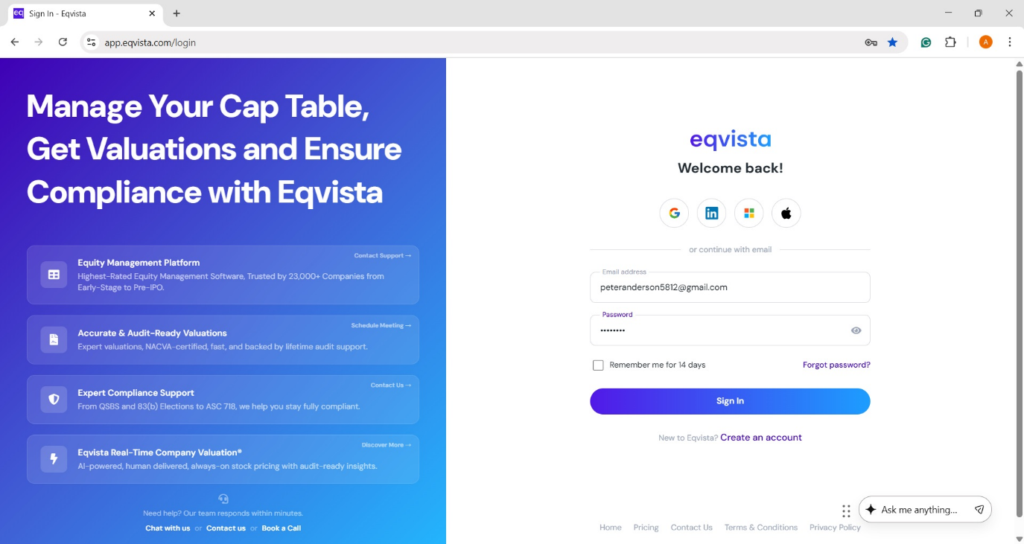
On the dashboard, click on “409A Valuation” or click on “Manage Fair Market Value (FMV)”.
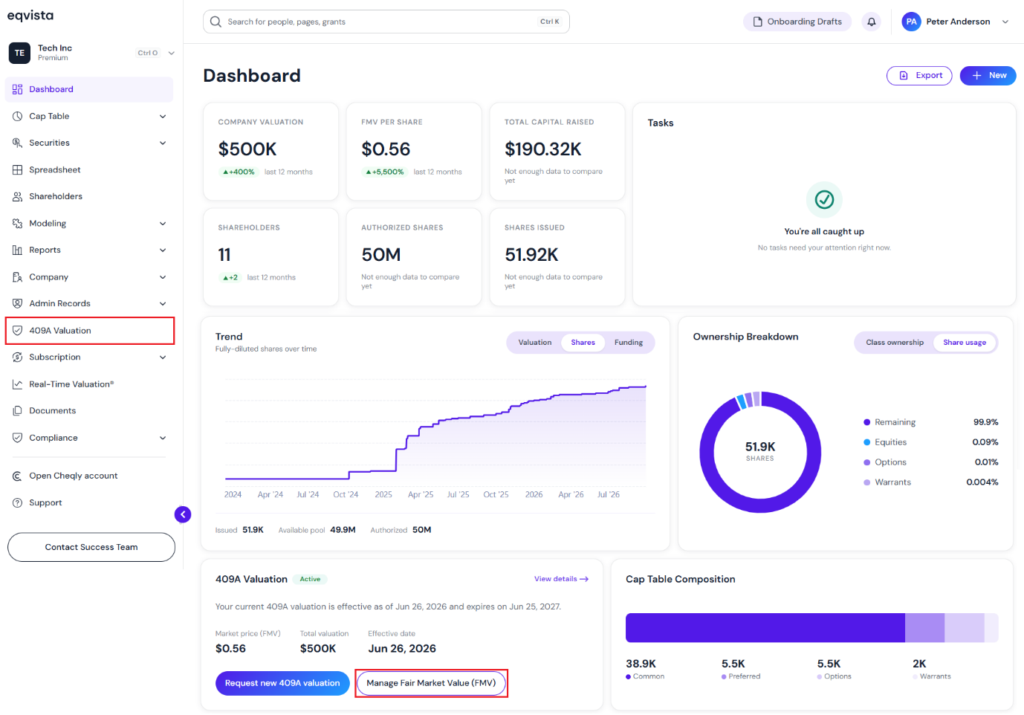
Click Connect Quickbooks
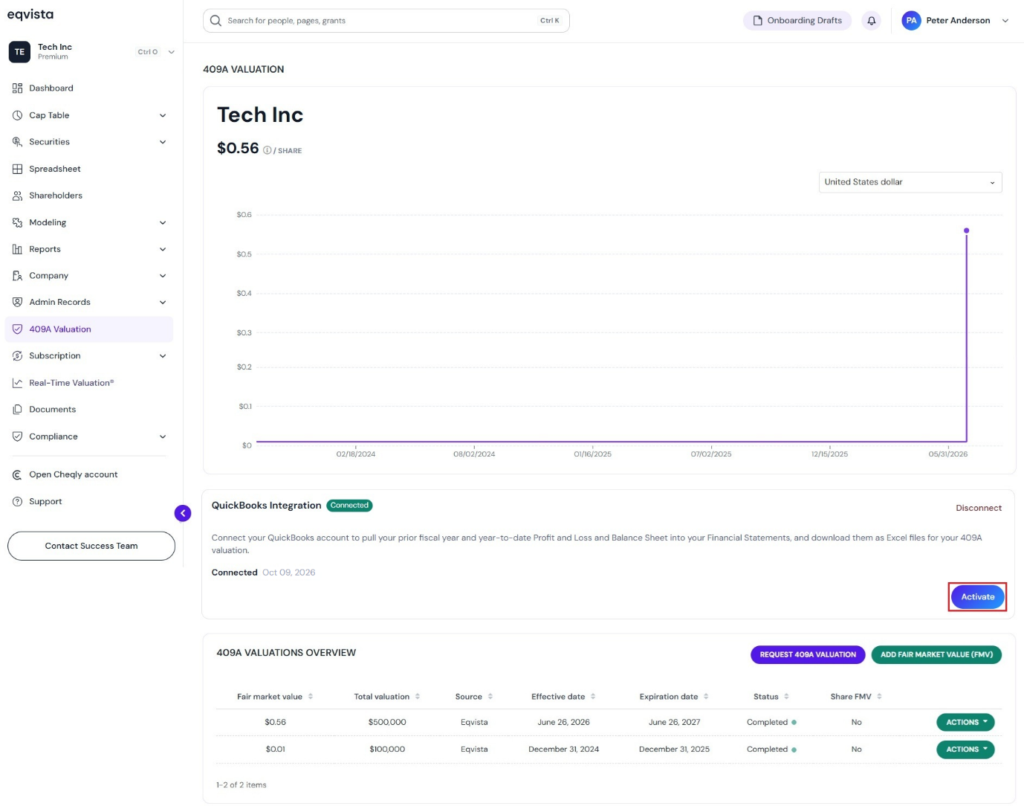
Step 2: Once you do this, you will be redirected to the next page, where you can view the valuation results, and a graph will be shown.
Note: You can request for a 409A valuation by clicking on “Request 409A Valuation”. By clicking on “Add Fair Market Value“, you can add fair market value. To share and edit the fair market value entered, check out the respective support articles.
You can connect to QuickBooks integration by clicking on “Connect QuickBooks”.
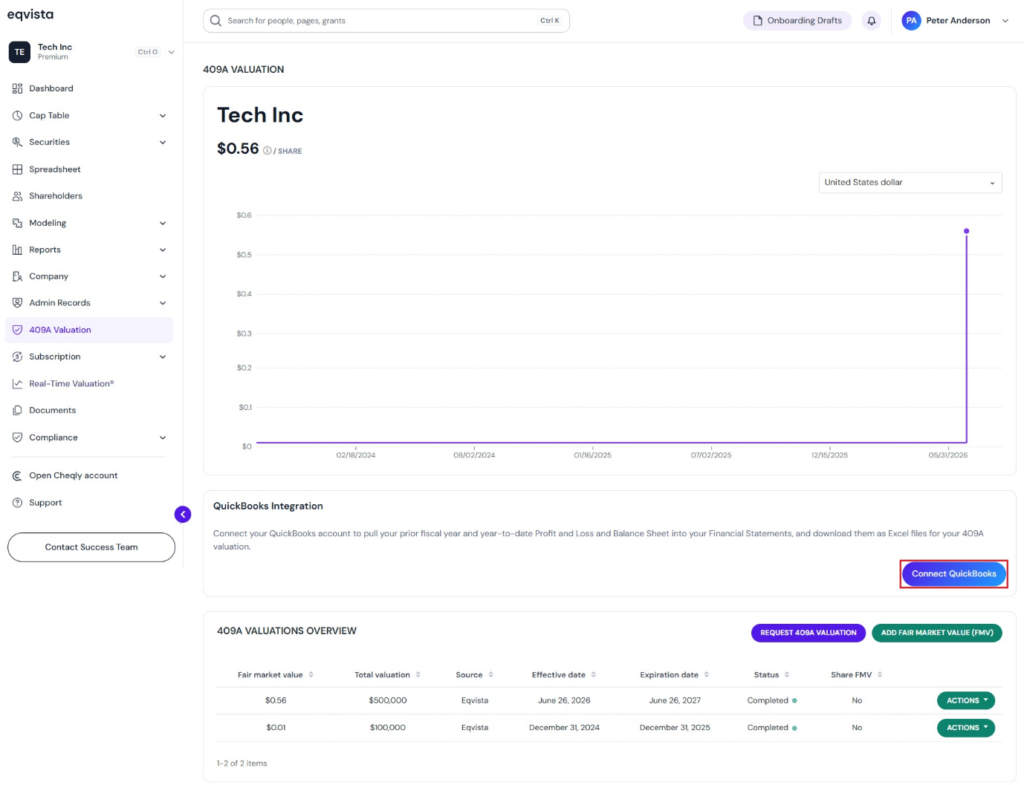
Sign in to Quickbooks
Step 3: Then, you will be redirected to enter the email or User ID of QuickBooks as shown below.
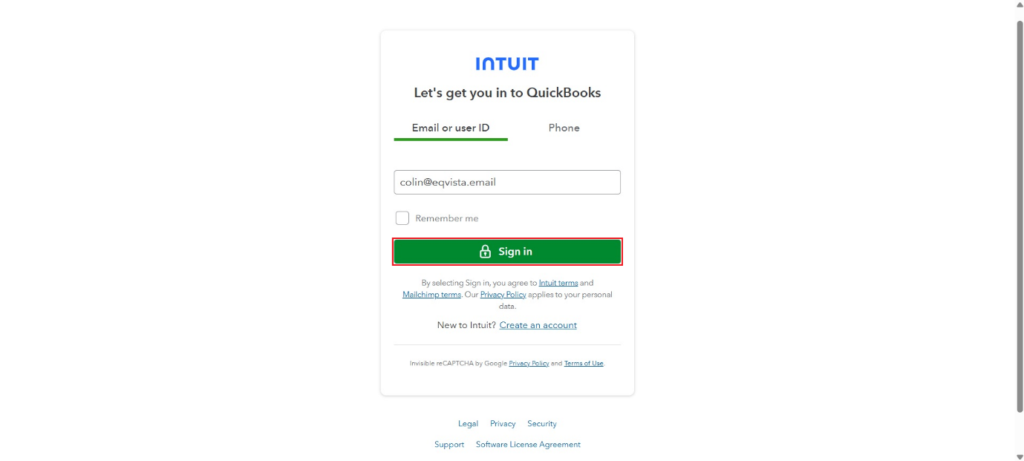
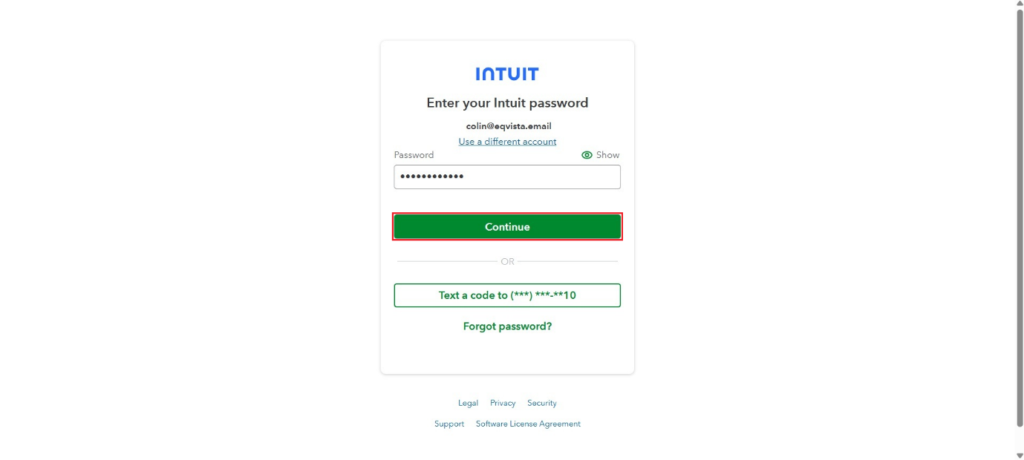
Once you click “Sign in”, you will be redirected to enter your password and click on “Continue”.
Allow Sharing of Your Quickbooks Online Data
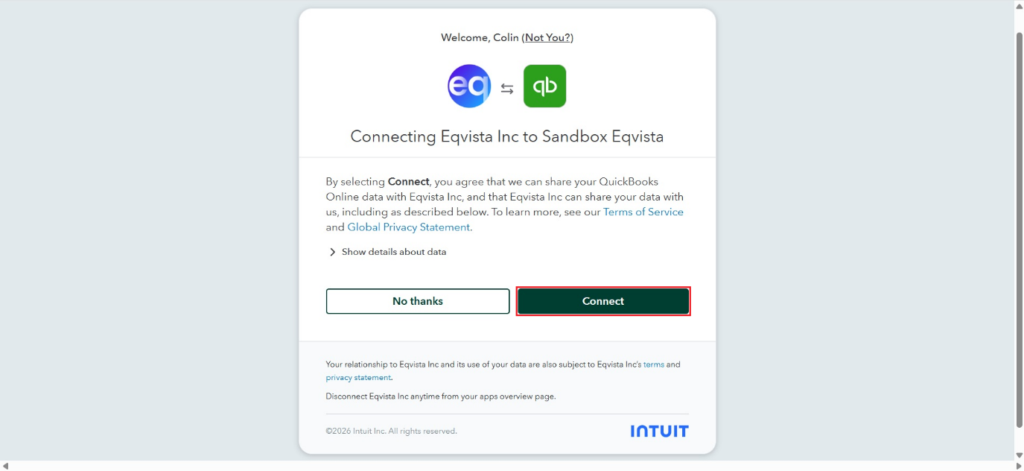
Step 4: Once you do this, you will be directed to the following page. By selecting “Connect”, you agree that we can share your QuickBooks Online data with Eqvista.
Click Activate to Synchronize Quickbooks Financial Data
Step 5: Then, you will be directed to the page displaying the QuickBooks integration status “Connected” along with an option to “Activate”.
Click Activate to Enable Financial Data Sync
Step 6: Once you click “Activate”, a pop-up panel appears to enable the financial data sync.
QuickBooks fills the Previous period and Current period columns of your Financial Statements and keeps them up to date. Figures you entered manually in those two columns are replaced. Every other column is kept.
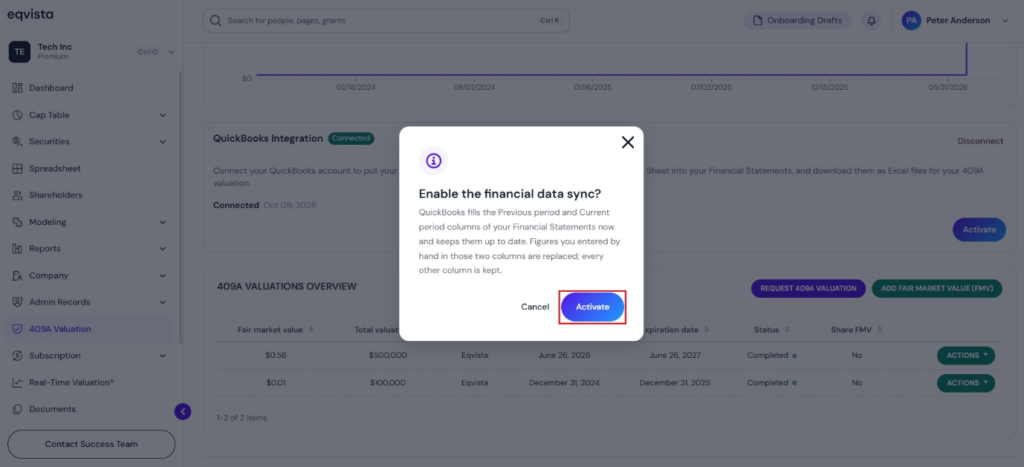
To enable the financial data sync, click on “Activate”.
Quickbooks Financial Data Sync Enabled
Step 7: Then, you will be directed to the page displaying the status of authorization valid until and last sync along with an option to “Download Data”.
The Previous period and Current period columns of your Financial Statements are refreshed whenever your QuickBooks data changes. Other columns stay as you entered them.
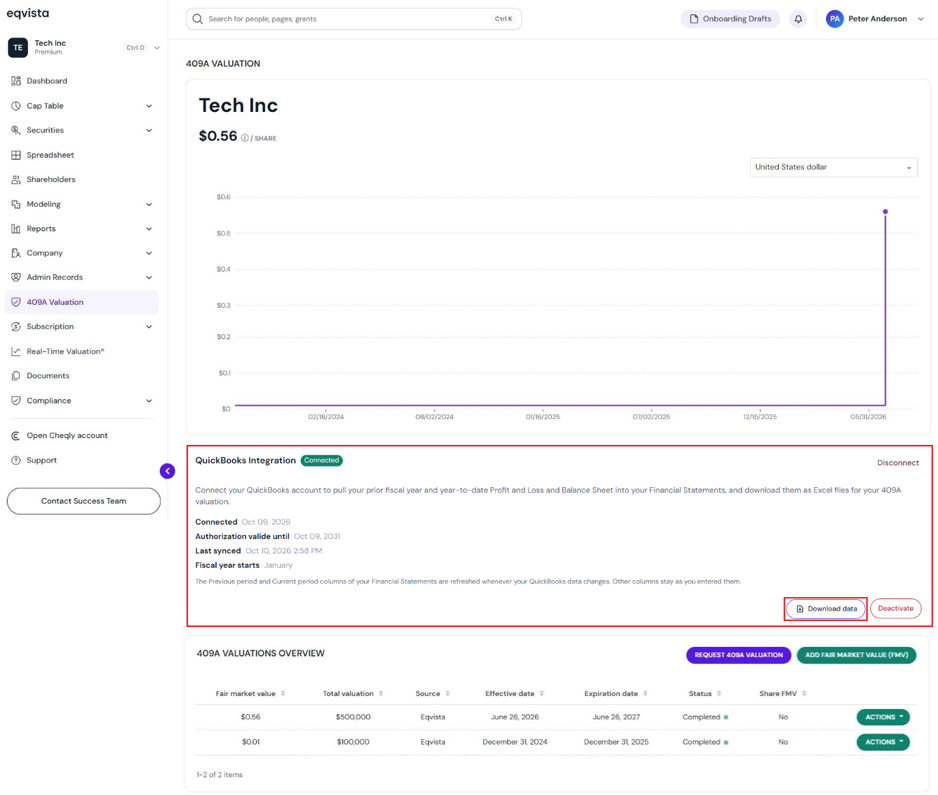
Download Data
Step 8:
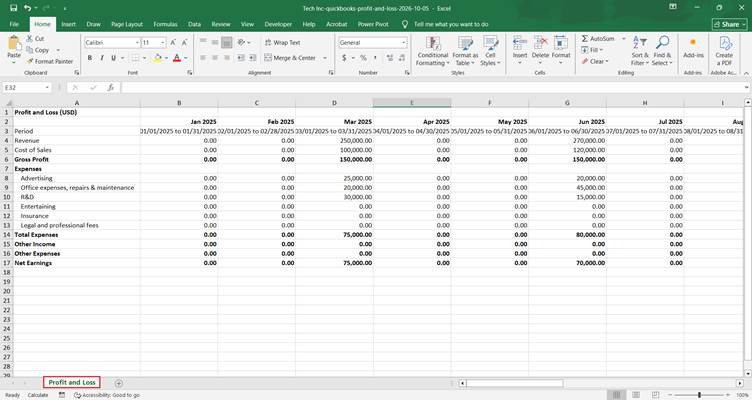
Once you click “Download Data”, the files get downloaded as Excel sheets to your Downloads.
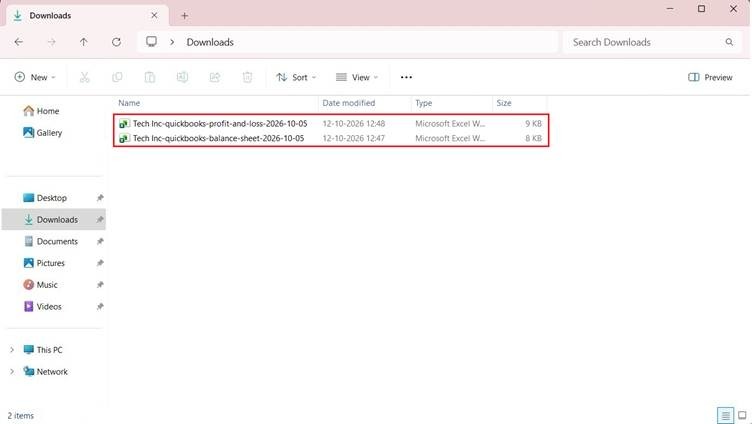
Double-click the Excel sheets to open the downloaded files.
Balance Sheet
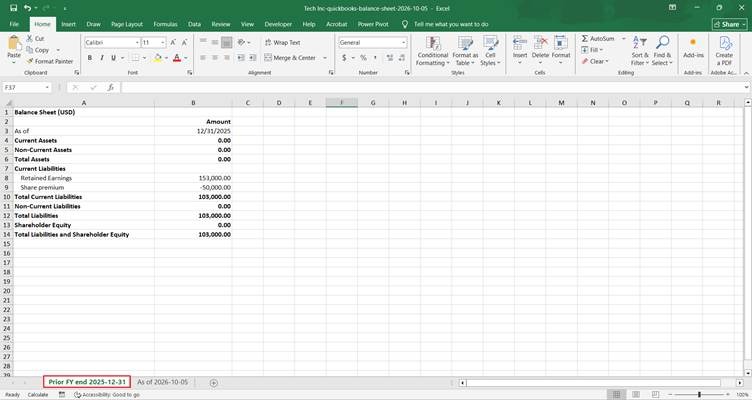
Profit and Loss
If you want to understand Eqvista, check out our support articles or contact us today!