Issuing Shares to Founders – Onboarding
New to Eqvista? Eqvista is a simple-to-use cap table management tool. We have created this support article to help you move smoothly through the process of issuing shares to founders.
Issue shares to founders
This support article is designed to guide you step-by-step through the process of issuing shares to your founders, ensuring that you have all the information you need to navigate this process with ease.
Here is a step-by-step process to issue shares to founders on Eqvista.
Step 1: Once you have created your company on Eqvista, you will be prompted to fill in company details. There are three steps to create a company account, out of which the third step helps you to add the founder profile and issue shares to the founder during the process.
Let us say that you have just created your company on Eqvista. You would be then directed to create a company account on Eqvista, as shown below:
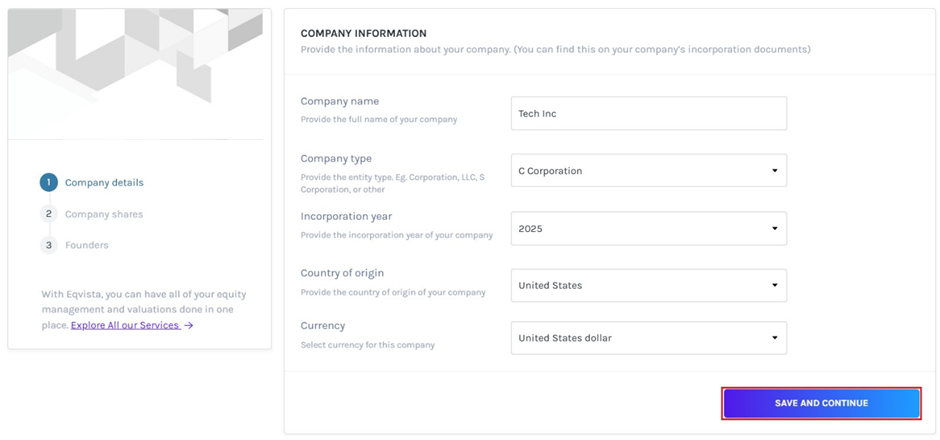
In the first step, you would have to fill in details including the company name, company type, incorporation date, country of origin, and currency. Once you have done this, click on “Save and continue”.
Step 2: After this, you would need to add the number of authorized shares in your company.
Note: When you register your company and obtain the incorporation certificate from the government, it comes with the number of authorized shares that your company has. You can get these details from the Company’s Articles of Incorporation. So, when creating your company account, do refer to it.
Add this number to the space provided along with the price per share at the time of incorporation (mostly if you have just incorporated your company). If your company has been in the market for a long time, the share value might have changed. Ensure that you add the exact number of shares and the share value while creating a company account on Eqvista as shown below.
Note: If you have not entered the right number of shares and share value, you can edit them after the company is created. To know how to edit the shares, check out the support article here.
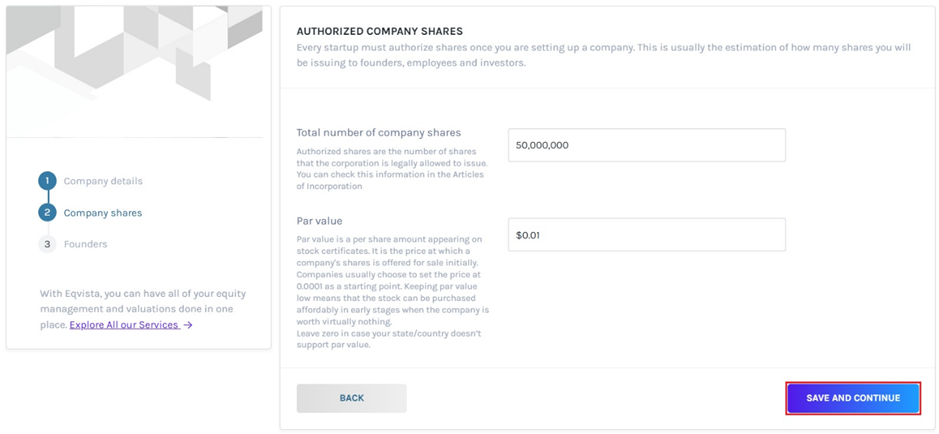
Once you have filled in all the details, click on “Save and continue”.
Step 3: After you click on the “Save and Continue” button, you will be directed to the next page.
In this step, you would be asked if you are a founder or not. In case you are a founder, you can click on “I’m a Founder” and move on to the next step. If you are not, you can click “I’m a Representative” and move on.
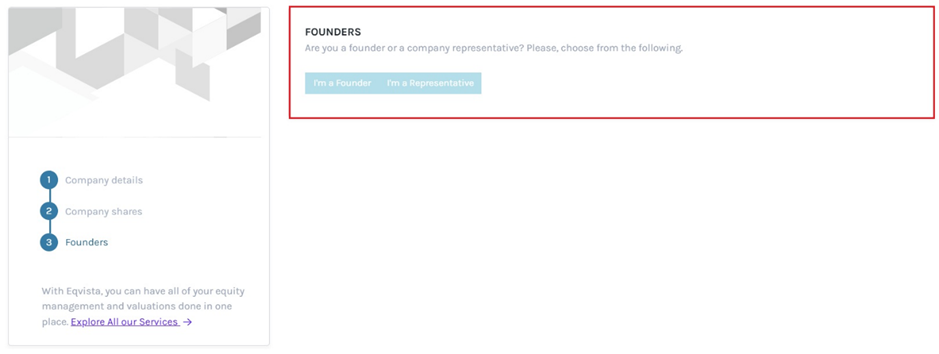
As mentioned above, there are two choices here, and each has been explained below.
Situation 1
By clicking on “I’m a Founder”, a page will appear allowing you to add your details as a founder of the company.
It is important to note that this step does not just help you add a founder’s details to the cap table, but also it helps you issue the shares to them from the founder equity class.
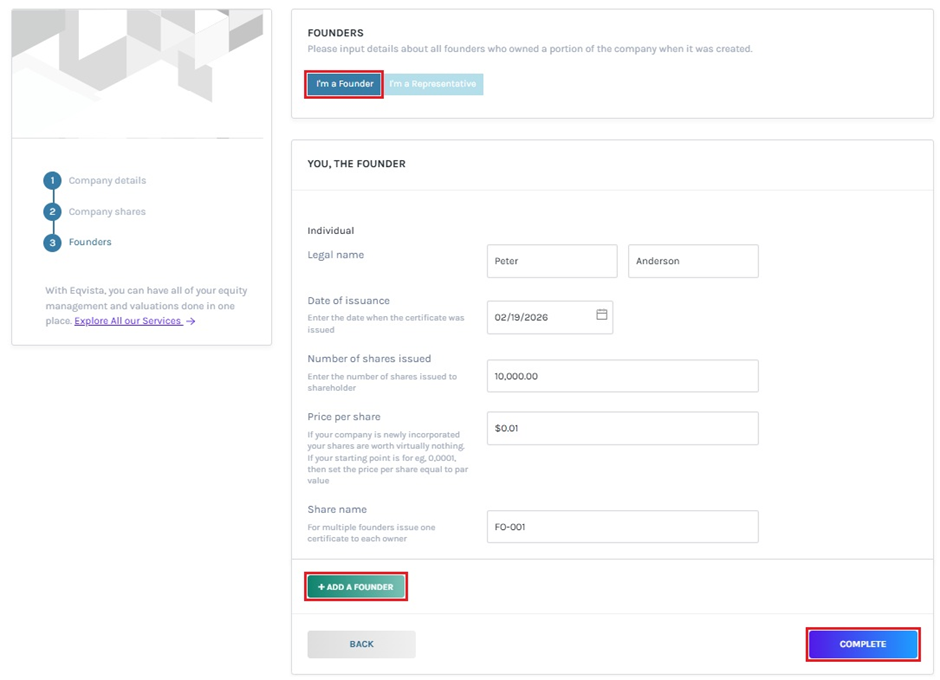
If you have already issued shares to the founder(s) you need to mention the same details while filling this. The details include the:
- Legal Name – This is the name of the person who is getting the shares. Ensure that the name is written properly and with the correct spelling. The name cannot be edited as it is based on what you added when creating the account.
- Date of Issuance – This is the date when the shares were issued. Ensure that you add the right date for this.
- Number of Shares Issued – This is the number of shares that the person is offered.
- Price per Share – This is the price of a share of the company at the time of issuance.
- Share Name – This is the certificate number being issued to the shareholder. Every certificate has a number. If the person has already been issued a paper certificate, ensure that the number entered here is the same as the number on the certificate.
Note: You can also add another founder to the company by clicking “Add Founder”. Once you do this, a drop-down box will appear as shown below where you can add the details of the next founder.
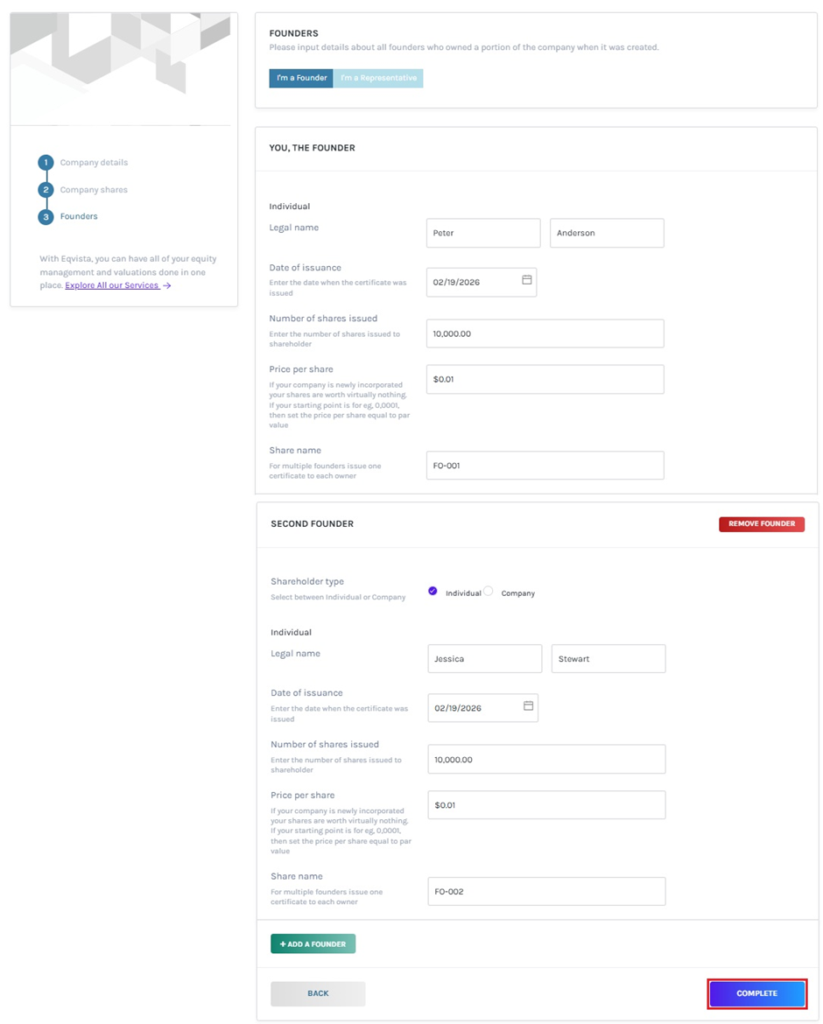
Once you have added all the details, you can click on “Complete”.
Situation 2
If you select the option where you are not the founder, the same page will open where you can add the name of the founder of the company. To explain better, we have selected the option “I’m a Representative”.
When you are adding the founder, you will first have to select if the founder is an individual or a company.
#Option 1 – Individual
In case, we selected the option “Individual”. For this, you will have the details of the founder according to the fields available.

As you can see, you will have to add the first name and the last name of the founder along with their other details like the date of issuance, number of shares issued, price per share, and the share name (which is the share certificate number) to issue the shares to them from the founder’s stock.
#Option 2 – Company
In case you select the option of a “Company”, these are the fields you will have to fill, as shown below.
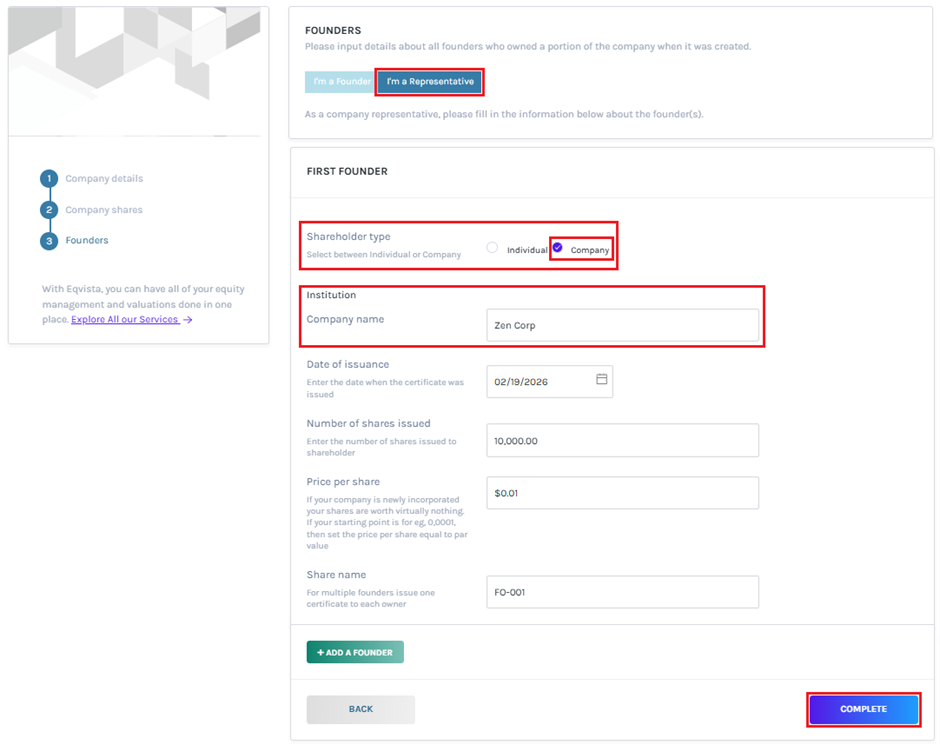
You will have to add the company name, while the rest of the details are the same as the ones shared above.
Once you are done adding the founder details, click on “Complete”.
If there is more than one founder in the company, you can click on the option “Add a Founder” and put in their details just like you did for the first founder.
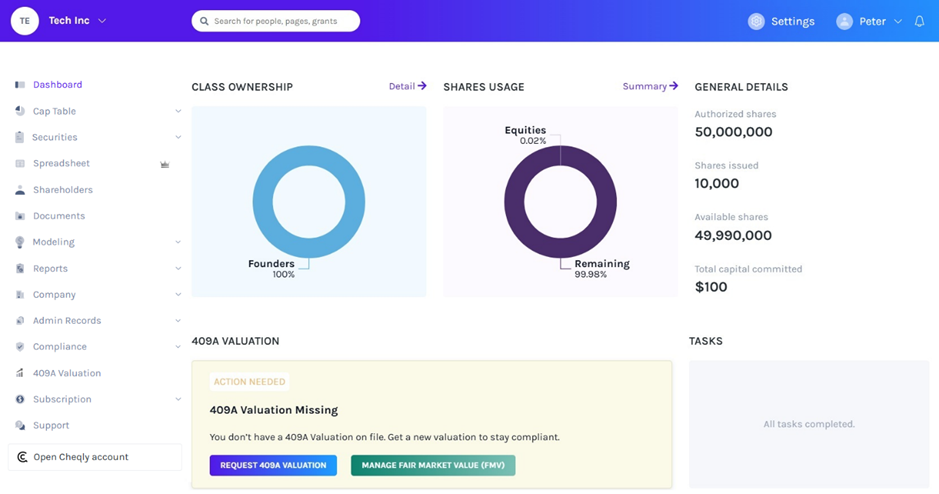
Step 4: When you click “Complete”, you will then be directed to the main dashboard for your company on the Eqvista platform and you can see the founders of the company along with the shares that they have been issued.
Further, you can upgrade your account to premium subscription to have access to unlimited features. To know more about it, check out the FAQ!
If you have any doubts or want to know more, check out the other support articles here or contact us!
