How to issue preferred shares on Eqvista?
Preferred equity is an equity investment that has a preference over common equity for cash flow distributions. The preferred equity is positioned between the senior debt and common equity in a real estate investment. This means that the distribution and return of capital to preferred equity holders’ investments are subordinate to the senior debt, and still have priority over the common equity holders. Thus, preferred equity is a hybrid of debt and equity products.
With the help of Eqvista, you can easily issue preferred shares. Preferred equity holders as a rule have some kind of rights, by which an exchange of control of the real estate can be constrained from the common equity holders to the preferred equity holders assuming that specific defaults happen. Preferred equity investments can be seen as more secure ventures when contrasted with the normal value given the rank in getting appropriations.
Issue preferred shares
Now that you know all about preferred equity and how it is beneficial over common equity, the next question that arises is how shall you create the preferred equity. The answer to this is simple: with the help of Eqvista. Given below is the step-by-step guide to issuing preferred equity.
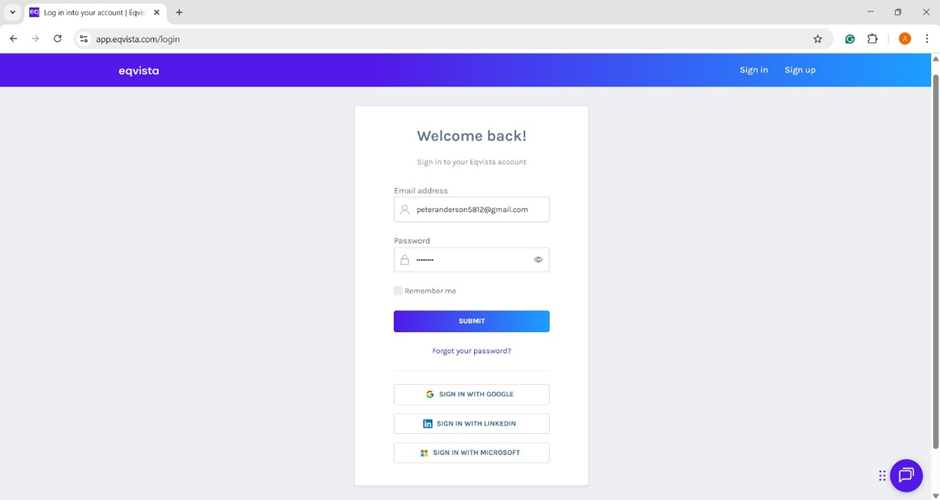
Step 1: Log in to your Eqvista account and select your company account.
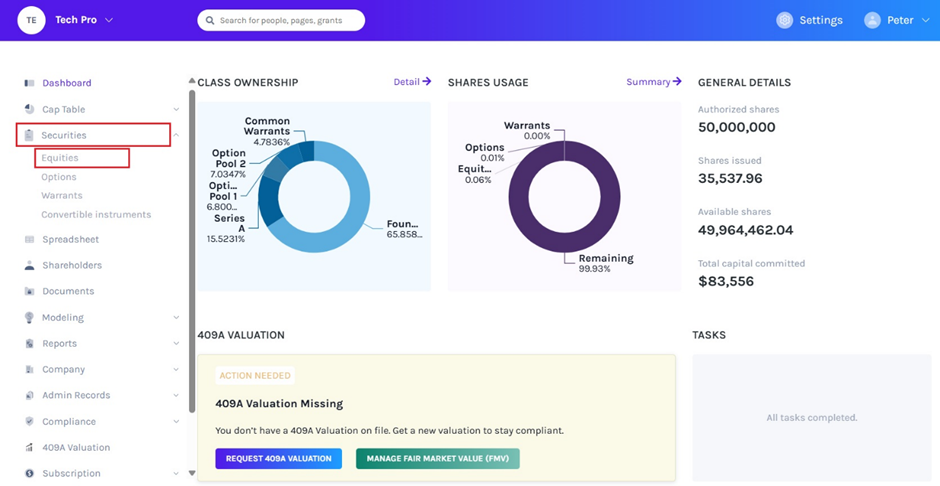
On the dashboard, click on “Securities” and then on “Equities” from the left side menu.
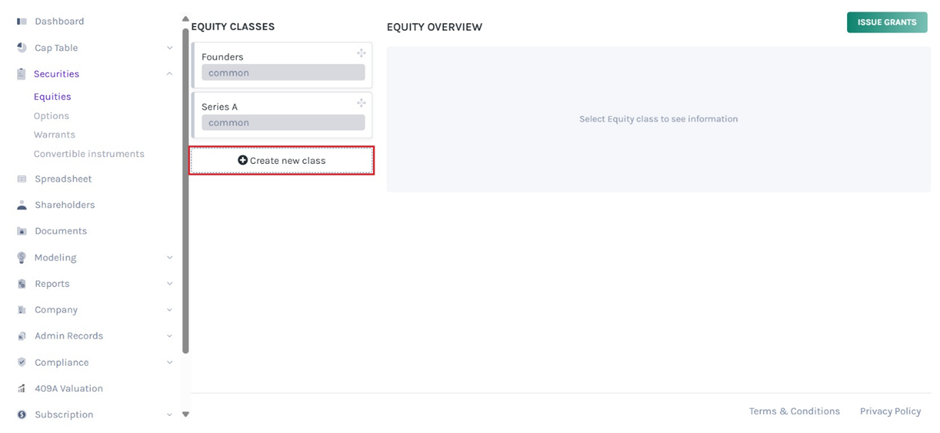
Step 2: Once you click on the “Equities” feature, a page will open for you as shown below. Under “Equity Classes” on the left-hand side, select “Create New Class”.
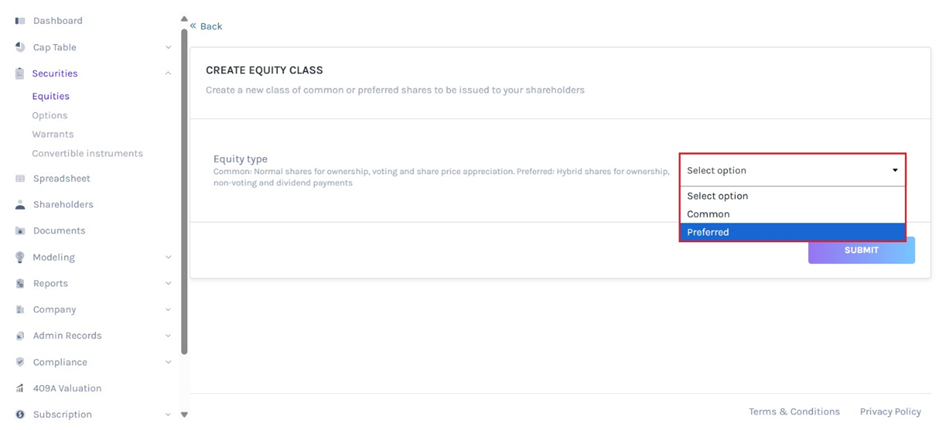
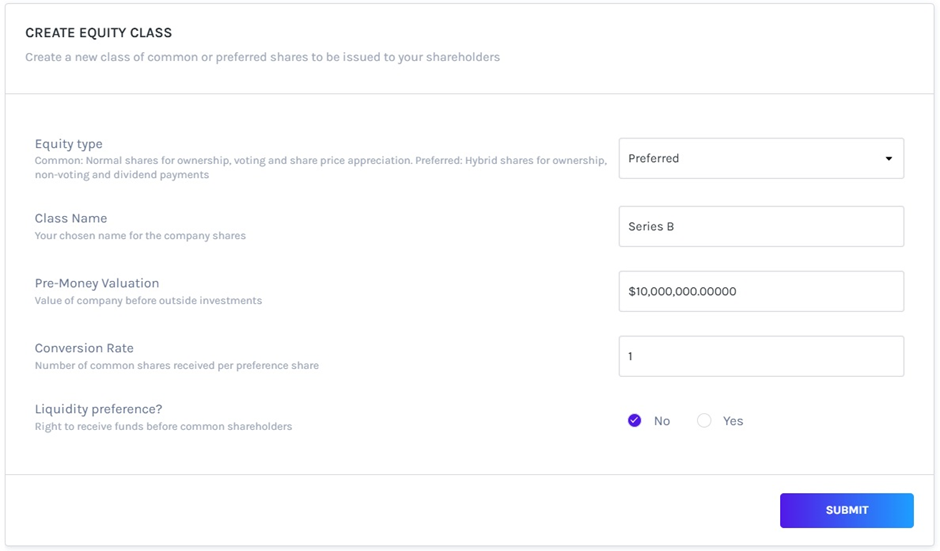
Step 3: Under the Equity type, select the option: Common or preferred equity. You can choose “Common” for normal shares of ownership, voting, and shared price appreciation and “Preferred” for hybrid shares for ownership, non-voting and dividend payment. In this case, select “Preferred”.
Step 4: Once you have selected Preferred, you will be asked to input the following information: class name, pre-money valuation, conversion rate, and liquidity preference. Fill in all the details and then click on “Submit”.
Note that the pre-money valuation must be at least USD$1.
If Liquidity Preference is selected “Yes”, you need to fill in additional information as shown below.
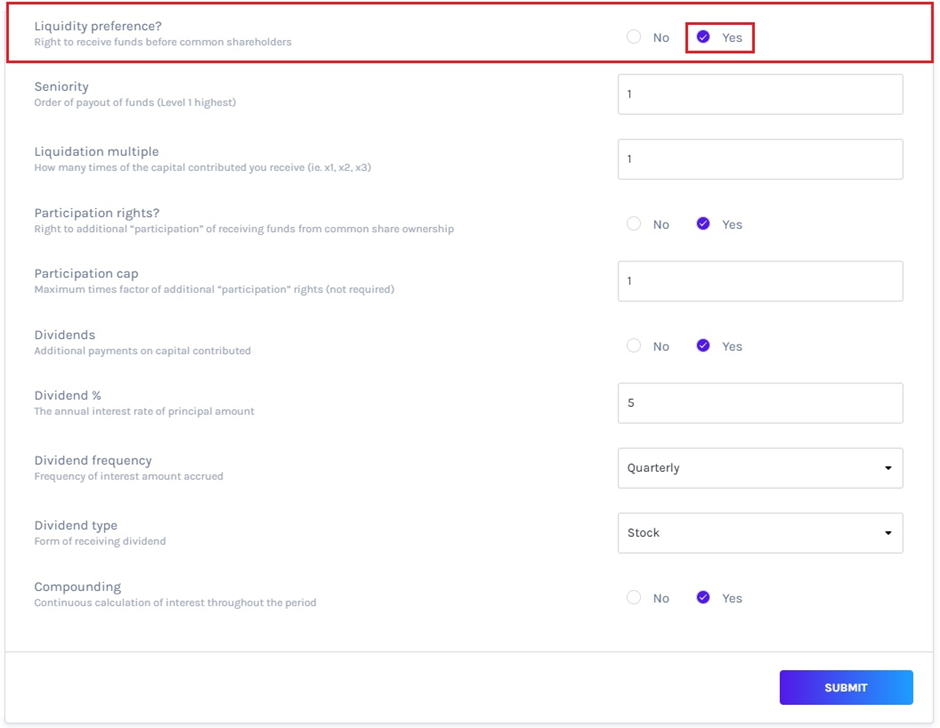
Each of the parts that you need to add has been explained below:
- Seniority: Order of payout of funds (Level 1 highest).
- Liquidation Multiple: How many times of the capital contributed you receive (i.e. x1, x2, x3).
- Participation Rights: Right to additional “participation” in receiving funds from common share ownership.
- Participation Cap: Maximum times factor of additional “participation” rights not required. The participation cap must be greater or equal to the Liquidation multiple.
- Dividends: Additional payments on capital contributed.
- Dividend %: The annual interest rate of the principal amount.
- Dividend Frequency: Frequency of interest amount accrued (Daily, Monthly, Quarterly, Semi-Annually, Annually).
- Dividend Type: The form of receiving dividends (Cash or Stock).
- Compounding: Continuous calculation of interest throughout the period.
In the above example, we selected the option “No” for Liquidity preference. Once done, click on “Submit”
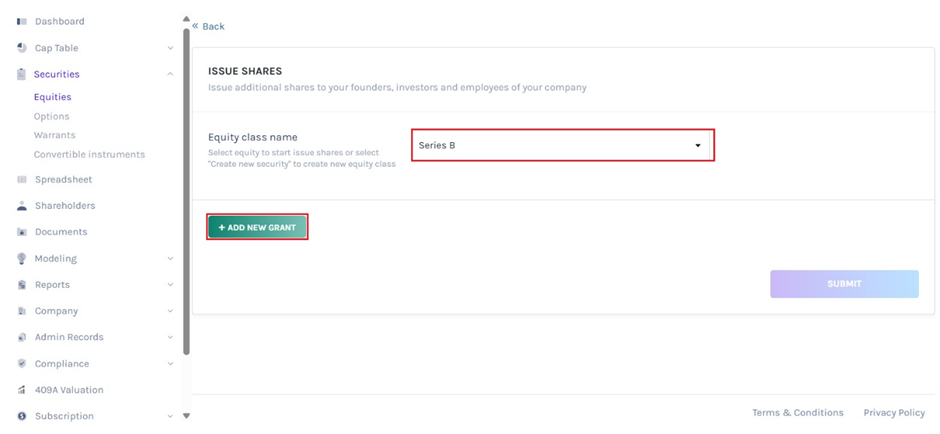
Step 5: Once you have added all the details and clicked on submit, you will see the new preferred equity created and you are taken to the next page where you can now begin the process of issuing shares by clicking “Add New Grant”.
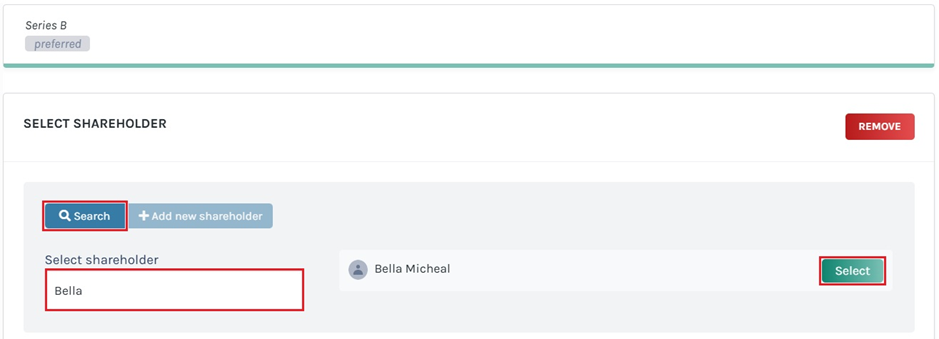
Step 6: This would take you to the next page where you now have to find or or add the shareholder to whom you want to issue the shares.
Note: You need to have the shareholder profile already created. Check out the support article to add a shareholder. If you do not have it created, you can choose the option “Add New Shareholder” here too.
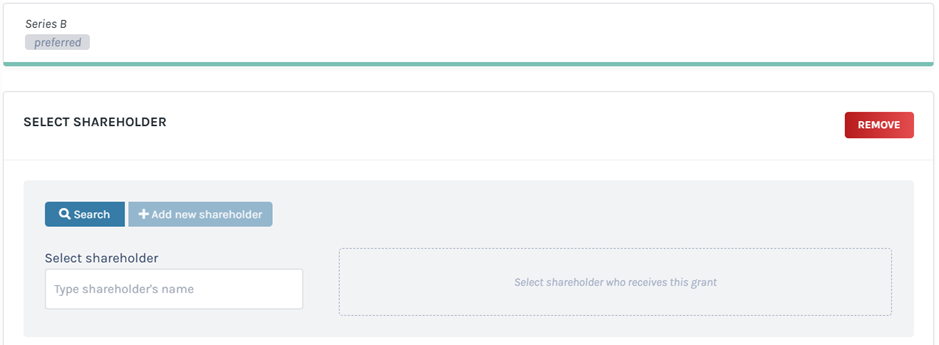
In this case, the shareholder’s profile is already there, so we type in the name of the shareholder in the field to get the name on the right side. From here, click on “Select” beside the shareholder’s name.
Step 7: As soon as you do this, a new panel will appear where you need to add the details for the issuance.
Here, add in the details like the number of shares or select the option anti-dilution, the price per share at the time of the issuance, the date of issuance, and the share name. After this, you will get the option to add a vesting schedule.
Note: You can add a vesting schedule while issuing shares, options, and warrants. In addition to this, you can create your vesting plan or choose from six default plans. To know more about vesting plans, check out the support article here!
In this case, we selected “No” for the vesting schedule.

Once done, click on “Submit”.
Note: You can add another grant using the “Add new grant” button. This is if you want to issue shares from the same equity class to more than one shareholder. All you need to do is click on “Add new grant” and then select the shareholder profile or add a new shareholder and fill in the details.
Most importantly, all this can be done without losing any of the first grant details.
Step 8: You will be redirected back to the following page, where you can see the created equity class and all the grants issued under it.
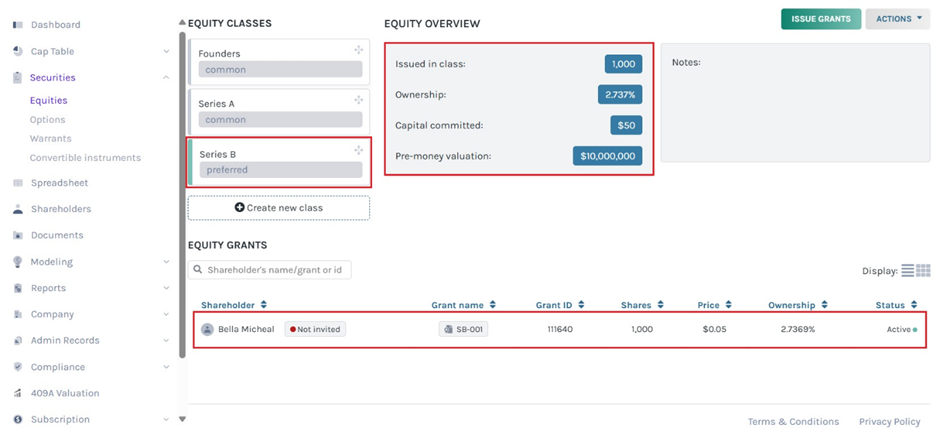
Note: Suppose you want to issue another equity from the class you just created. Then, click on “Issue grants”. Just ensure that you have already selected the equity class from which you want to issue equities.
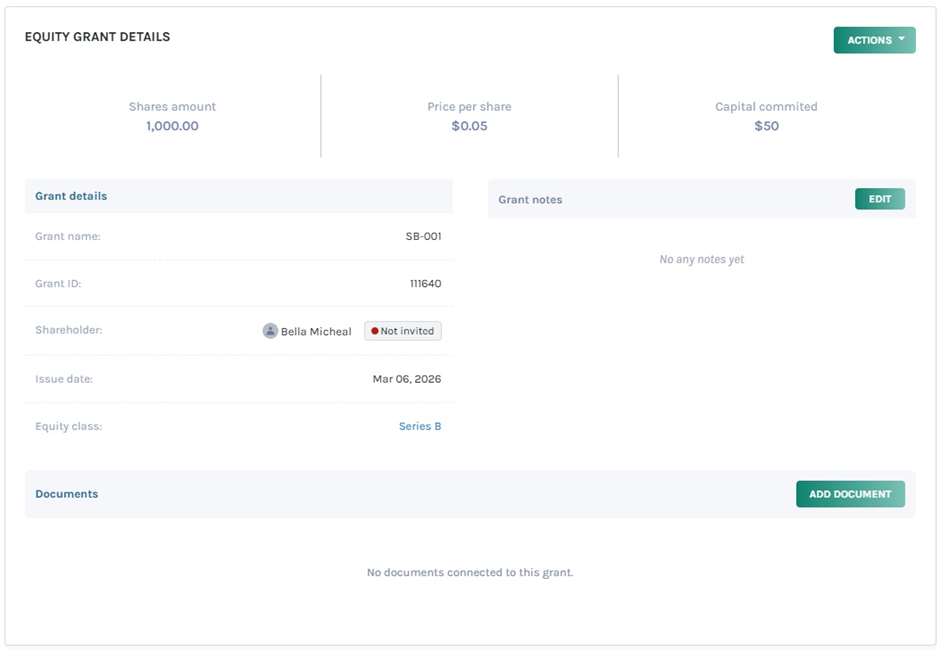
If you want to see the details about the issuance, click on the shareholder’s name. In this case, click on “SB-001”.
This would take you to the page where you can see the details of the share issuance.
Note: You can add document to the grant by clicking on “Add Document”. Check out the support article to know more about adding documents to grants.
To know more about other features of Eqvista and understand how other tables work under the latest Spreadsheet feature, check out our other support articles here. Feel free to contact us for further information.
