How to Issue Profits Interest Units (PIUs)?
Profits Interest Units (PIUs) are a form of equity compensation issued by LLCs and partnerships that grant the holder a share of future profits and company growth without giving them a claim to the company’s existing capital or assets.
Issue Profits Interest Units (PIUs)
Once you have enabled the profits interests equity by creating a new LLC company or changing the type in company profile settings, you can issue profits interest units (PIUs)
Open Profit Interests
Step 1: Log into Eqvista and select your company account.
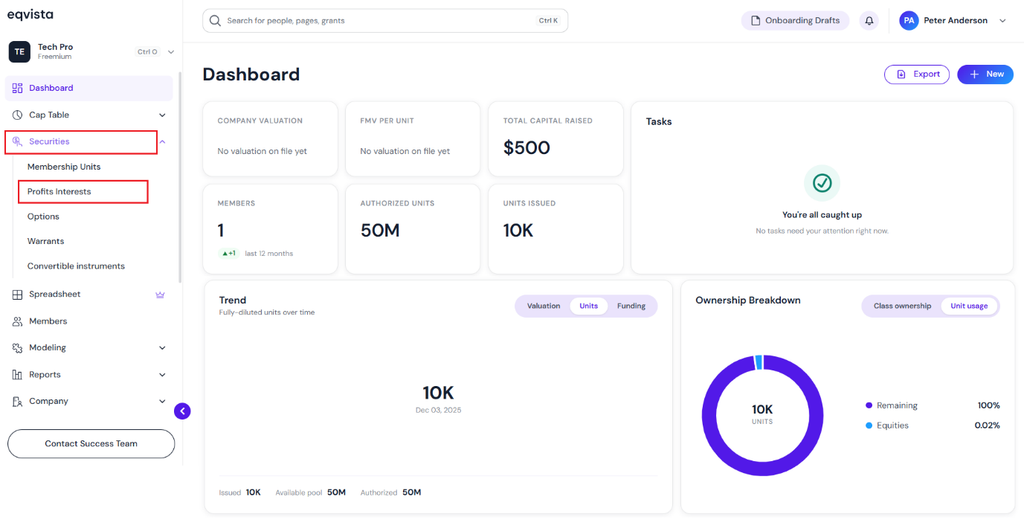
On the dashboard, click on “Securities” on the left side to get a drop-down menu and select “Profits Interests”.
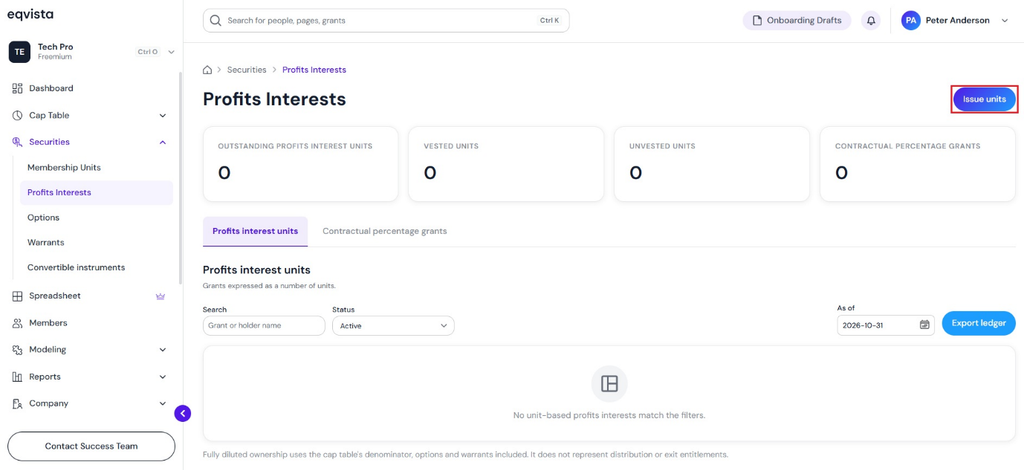
Click on Issue Units
Step 2: Then, you will be redirected to the dedicated ledger for profits interests. On this page, you will find data to manage your transactions from the ledger. To issue profits interest units (PIUs), click on “Issue Units”.
Note: A detailed feature-by-feature analysis of the profits interest ledger will help you understand it better. Check out the support article to understand the profits interest ledger in detail!
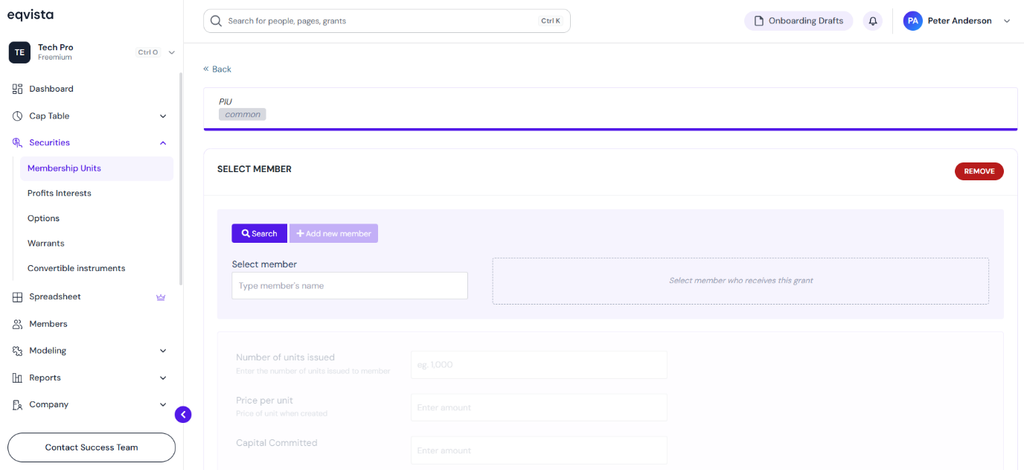
Select Member
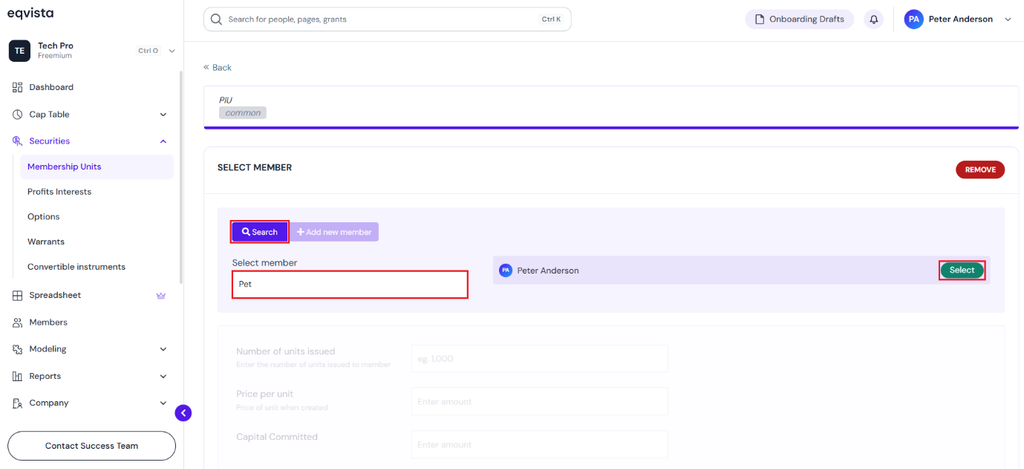
Step 3: Here, you can search for a member or add a member directly from here.
Method 1
If you have already added the shareholder profile in the cap table, you can just type in the name in the search box and the name will appear on the side of it. Click on “Select” and begin the process of issuing the shares to this investor.
Note: You need to have the member profile already created. Check out the support article to add a member. If you do not have it created, you can choose the option “Add New Member” here too.
Method 2
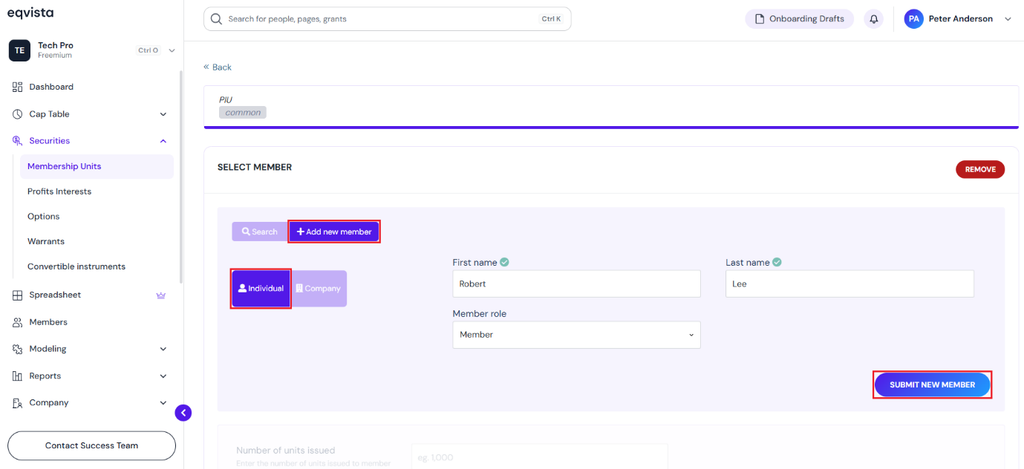
The second way is by adding a new member profile while issuing units. This is when you have not added the member profile in the cap table. In this case, we have not added the member. So, we will click on the option, “Add New Member”.
A new panel appears to add the details of the member. First, select whether the member you are adding is an individual or a company. For a company, you will need to add its name and role. For an individual, it is the same with two fields for the first name, the last name, and the person’s role.
Here, we selected “Individual” and added in the details. Once done, click on “Submit New Member”.
Fill in Details to Issue Units
Step 4: Once you click, you will be directed to the next page to issue units.
- Fill in the details such as the number of units, price per unit, the capital committed, the date of issuance, and the unit name. The capital committed will be automatically filled based on the product of the unit amount and price per unit.
- Threshold value (the amount above which the interest starts to participate), select the threshold currency and threshold basis from the drop-down menu.
- The last option is where you need to choose the “Vesting Schedule”. Select “Yes” and three options show up – the vesting plan, the vesting start date, and the vesting restrictions.
Note: There is an option to add a vesting schedule while issuing units, options, and warrants. Additionally, create your vesting plan or choose from six default plans. To know about vesting plans, check out the support article here!
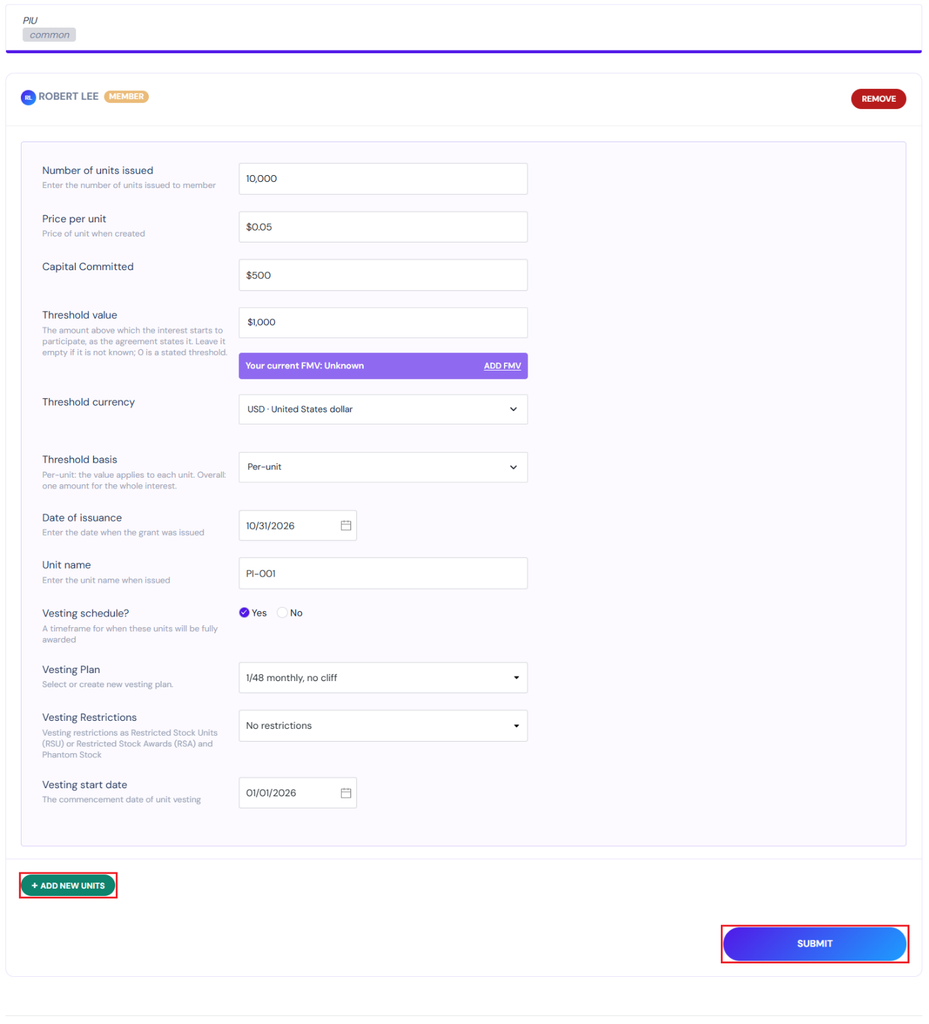
Once done, click on “Submit”.
Note: If you want to issue units from the same class to more than one member, click “Add New Units”. Then select the member profile or add one and fill in the details.
Profits Interest Units (PIUs) Issued
Step 5: You will then be redirected to the profits interests ledger, where you can view the units issued.
Note: The company has issued profits interests, so it remains an LLC. The company type cannot be changed in the company profile settings.
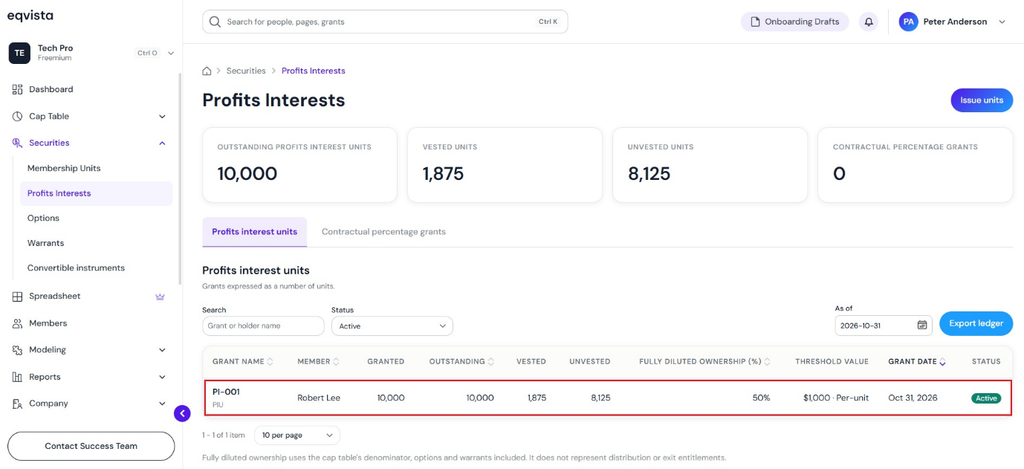
Then, click the grant name to view the unit details. In this case, click the grant name “PI-001”.
Note: You can add a document to the grant by clicking on “Add Document”. Check out the support article to know more about adding documents to grants.
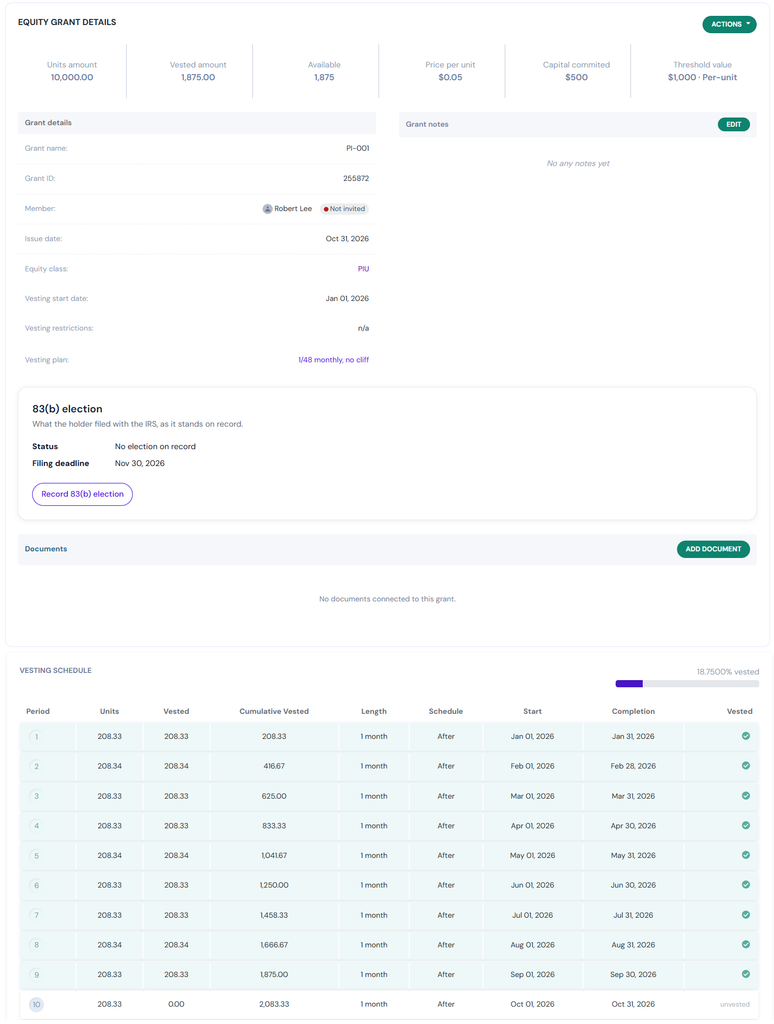
Record 83(B) Election
Step 6: On the equity grant details page, you can record the 83(B) election by clicking on “Record 83(B) Election”.
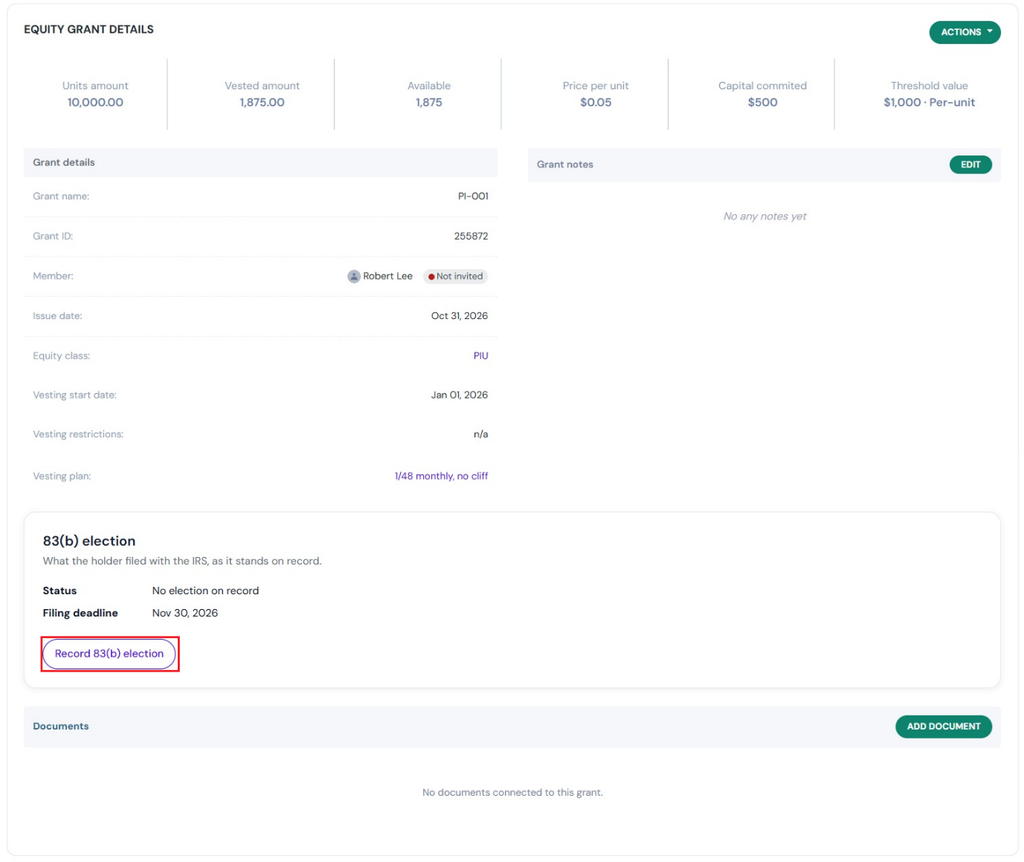
A pop-up panel appears to select the status “Filed” and fill in the filing date using the calendar. Upload the file copy for reference by clicking on “Browse Files”.
Note: This records the 83(B) election. It does not file the 83(B) election.
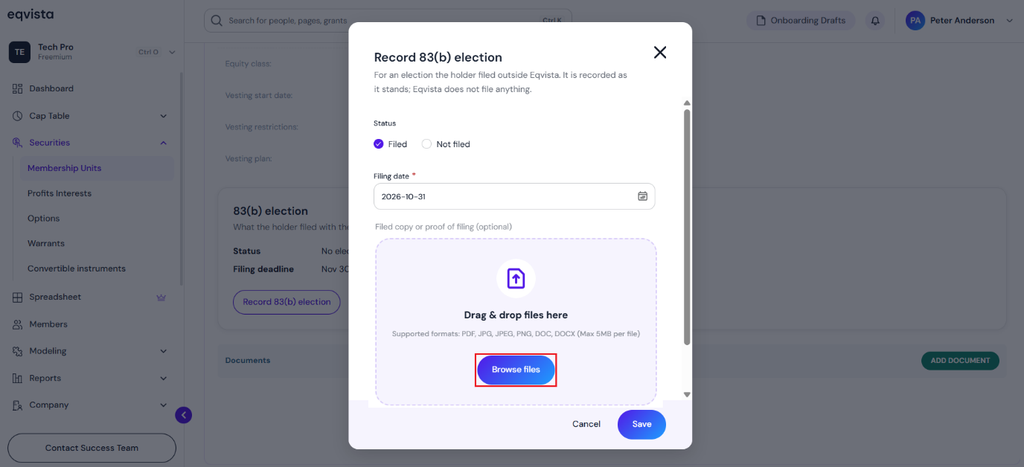
Choose the file that you want to add and click on “Open”.
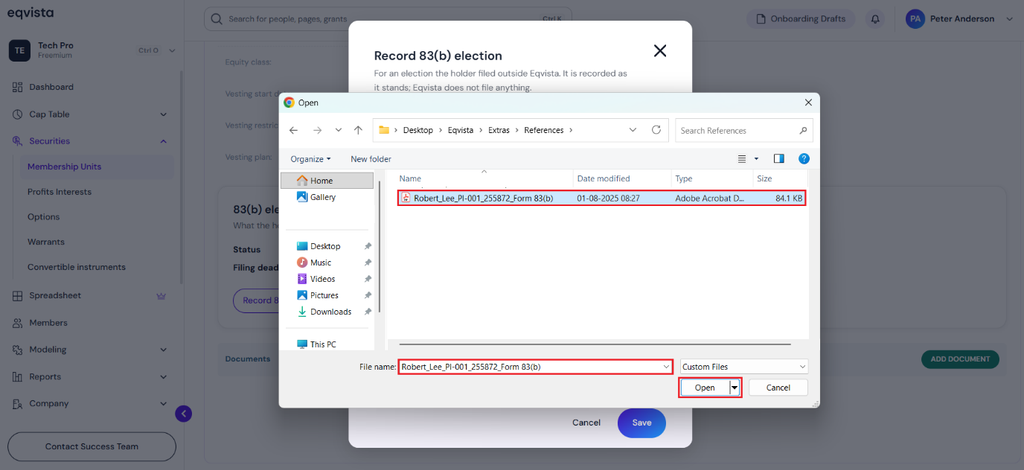
When you click on “Open”, the file will be uploaded as shown below.
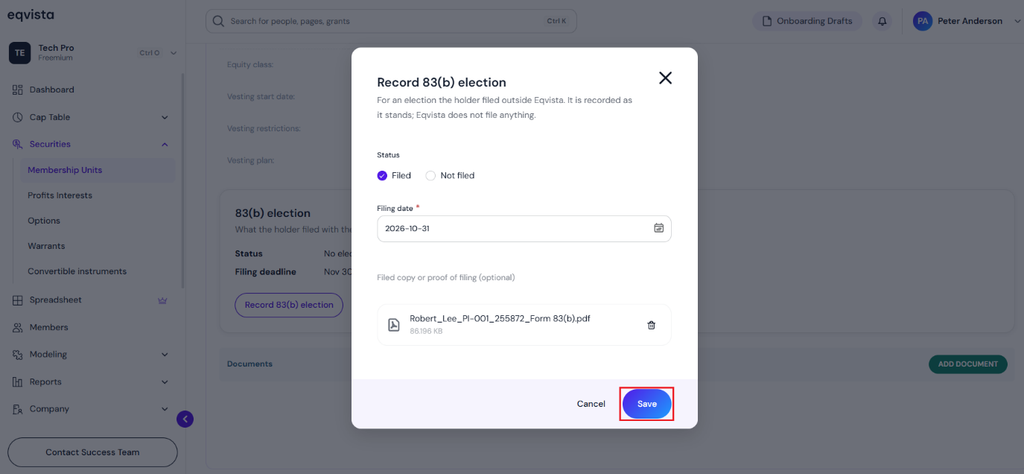
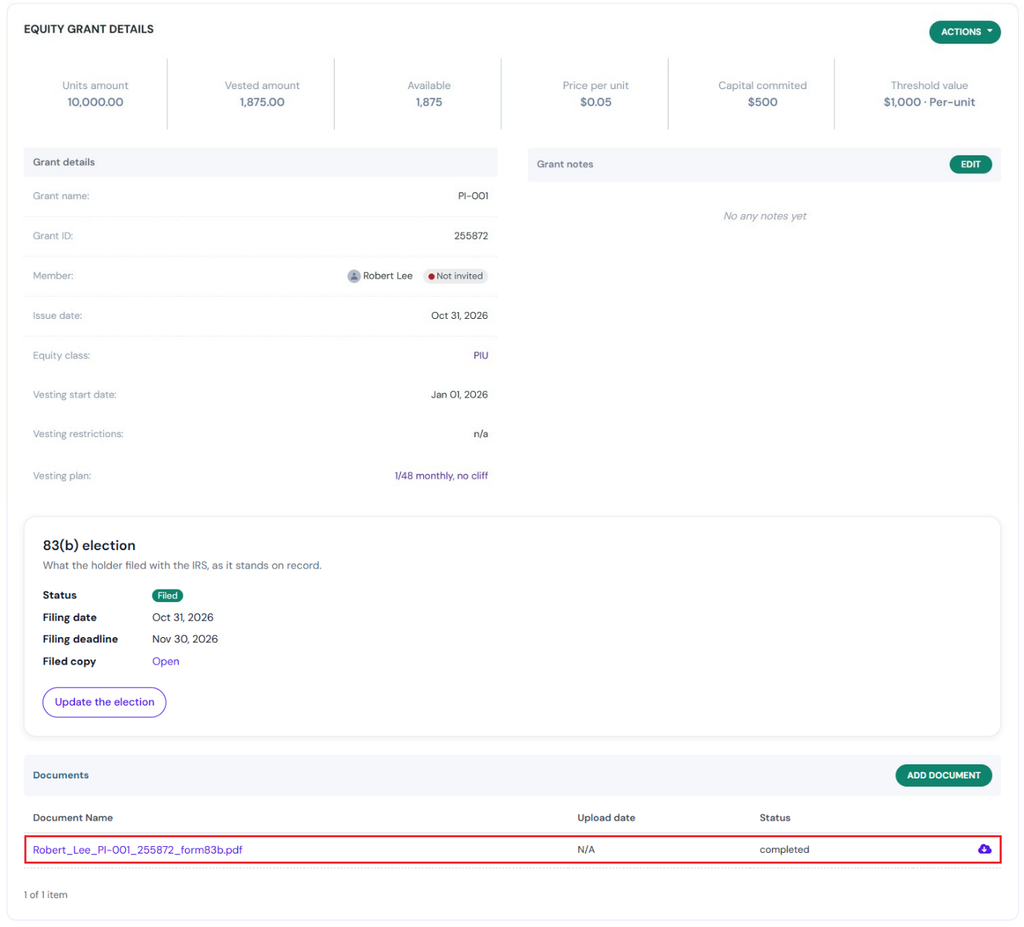
Once done, click on “Save”. The status, filing date, and file copy attached will appear in the 83(b) election section along with the option to “Update the Election”. The document section displays the file attached.
View Profits Interest Unit (PIU) Equity Class
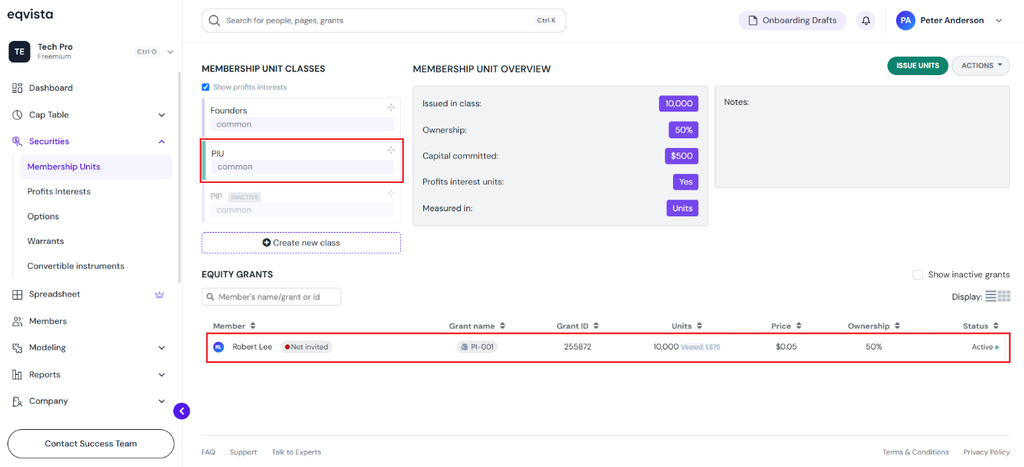
Step 7: Once the profits interest units are issued, you can view them under the Profits Interest Unit (PIU) equity class. Click on the Profits Interest Unit (PIU) equity class to view the record of the issuance.
To learn more about Eqvista, check out our support articles and knowledge base. For queries, get in touch with us!
