How to Partially Cancel Vested Options?
After creating your company account in Eqvista, it is possible to partially cancel the shares that have been issued to a shareholder.
Partially cancel vested Options
Here are the steps to follow:
Step 1: Log into your Eqvista account and choose the company account to cancel the shares.
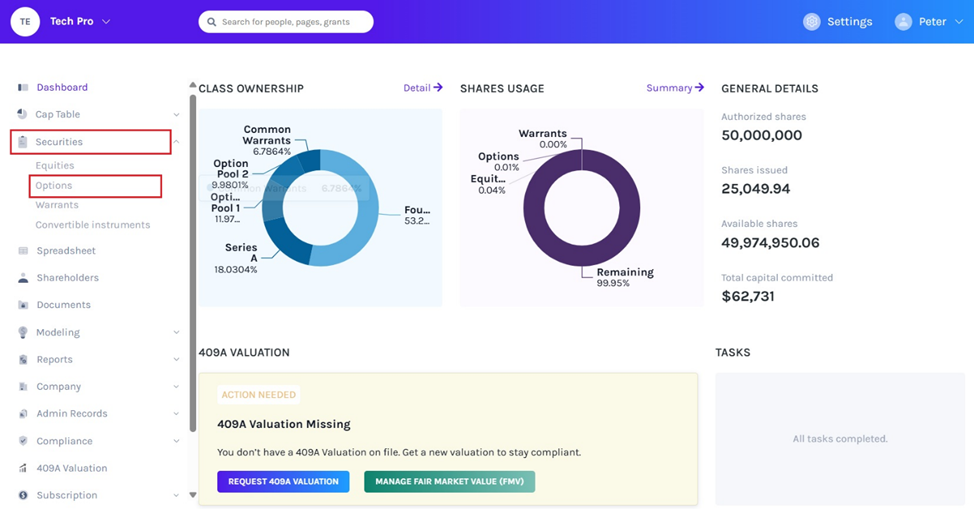
On the dashboard, click on “Securities” on the left-hand side to get a drop-down menu.
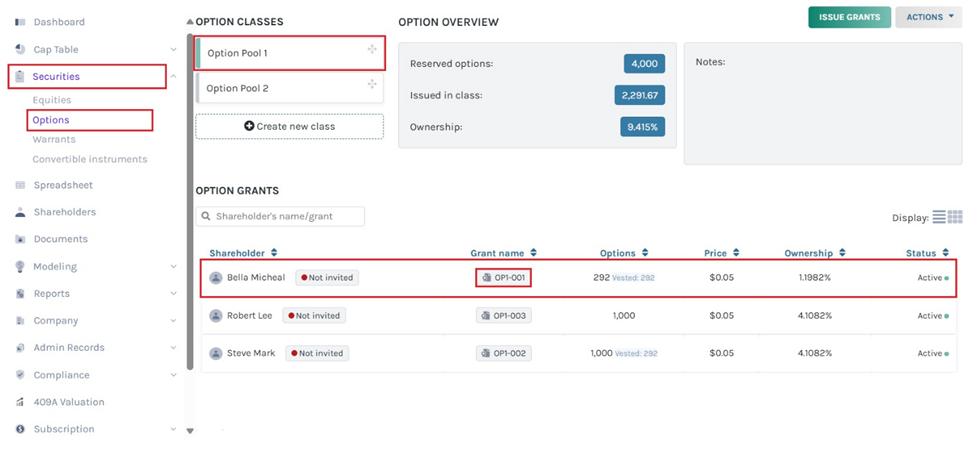
Step 2: Once you do this, you can click the option class created to get the overview of the class and list of shareholders issued under the class along with details such as grant name, options, price, ownership and status.
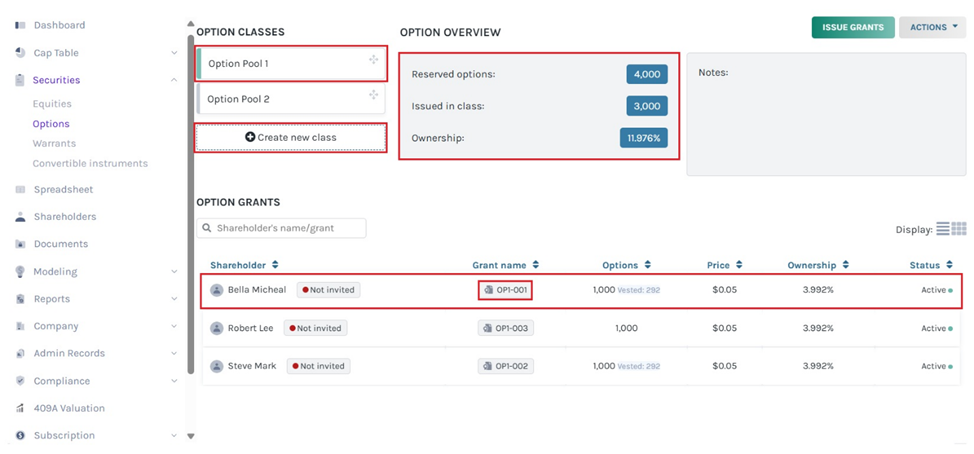
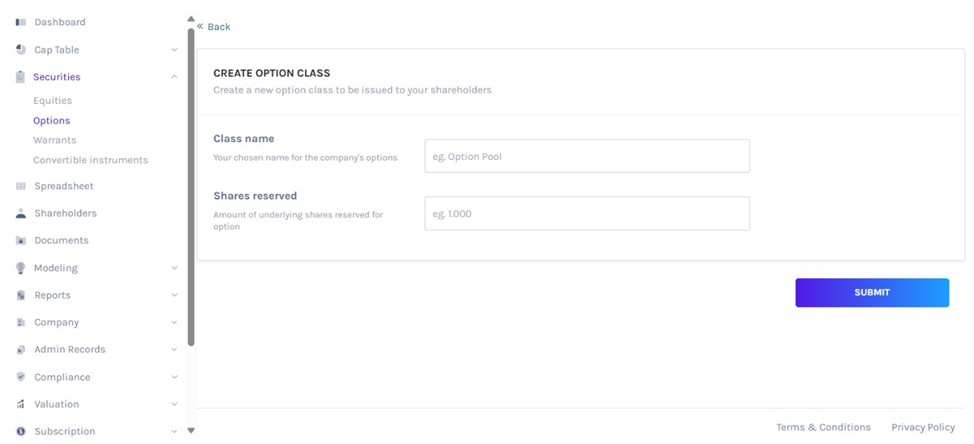
Note: On this page, click on “Create New Class” to create an option class and if you have created one, you can issue options and implement a vesting schedule.
Step 3: For instance, click on the grant name “OP1-001” to partially cancel the issued option and you will be redirected to the option grant details page. Then, click on “Actions” on the right-hand side to get a drop-down menu.
Note: You can fully cancel grants without a vesting plan. But for partial cancellation, the grants must be vested. Cancelled shares will return to the company. Check out the support article on how to cancel shares on Eqvista.
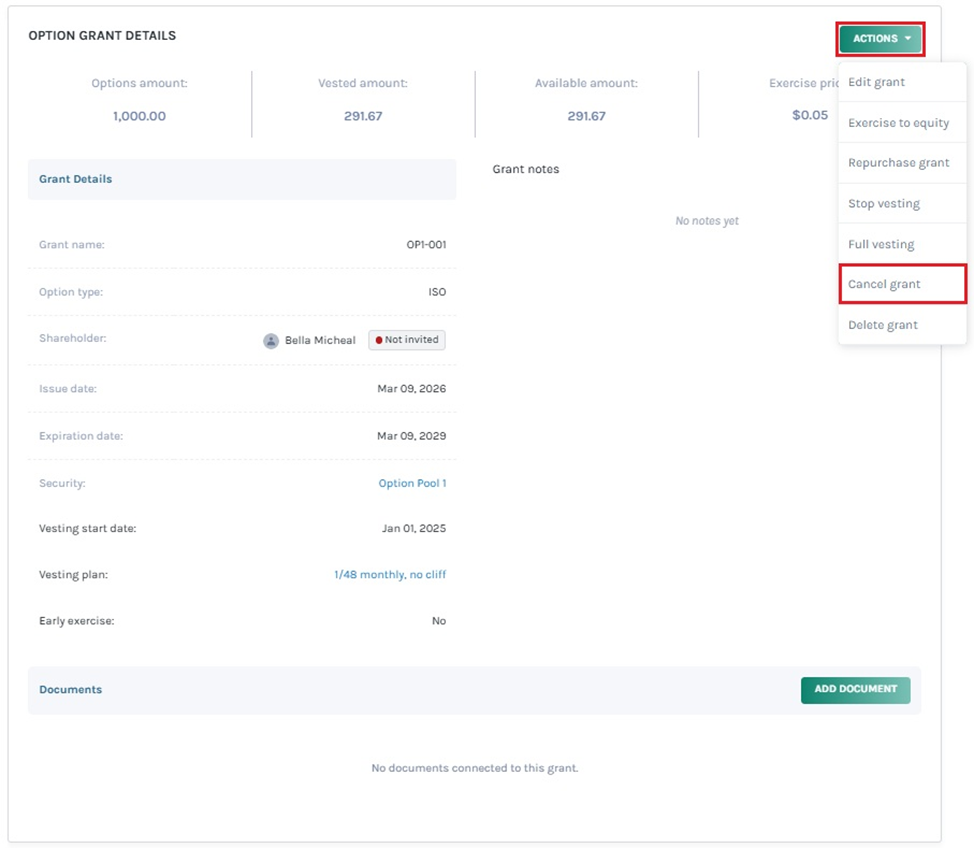
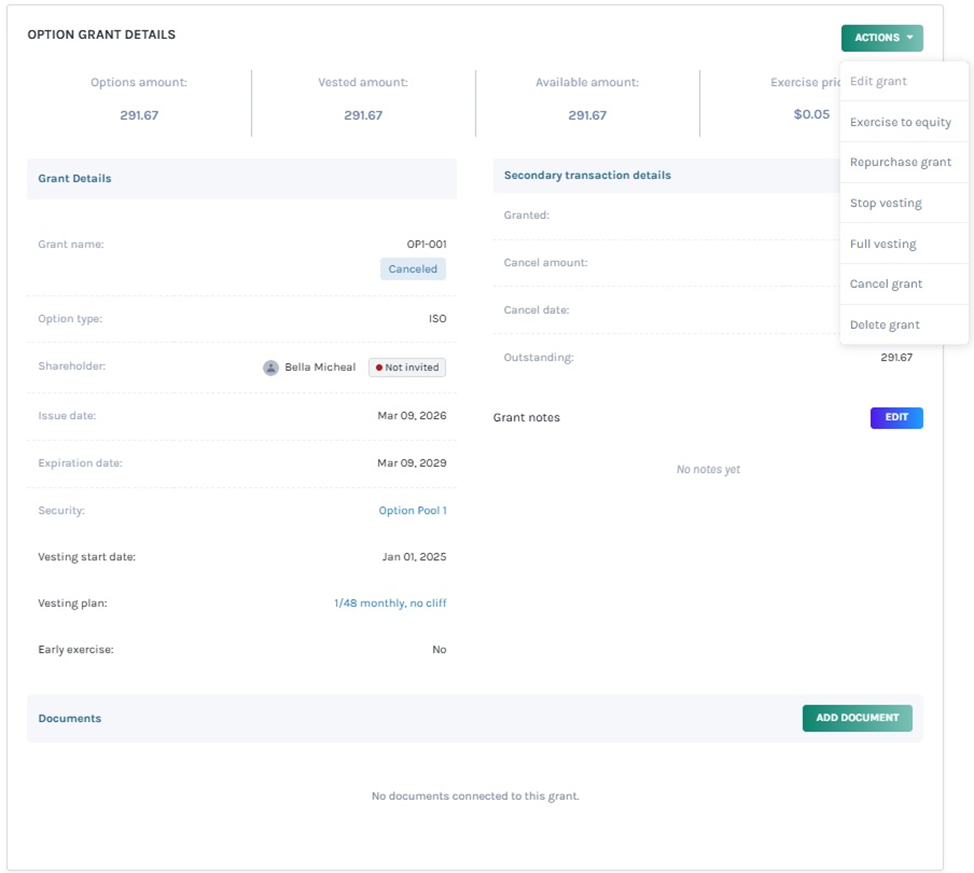
Here, you will see all the options – Edit grant, Transfer shares, Repurchase shares, Stop vesting, Full vesting, Cancel grant, and Delete grant.
Edit is for changing the details, transfer is for transferring, repurchase for purchasing again, stop vesting for halting the vesting, cancel for cancelling and the delete option will delete the grant.
Then, click on “Cancel grant” to partially cancel the shares issued to the shareholder.
Step 4: By doing this, a window will appear where you can begin the process of cancellation. You begin by choosing the option partial cancellation and filling in the cancellation date.
The amount gets automatically filled based on the entered cancellation date. It is the unvested amount remaining after the cancellation date. The earlier the cancellation date, the larger the cancellation amount, resulting in a smaller remaining option amount.
Note: You can also cancel all the shares issued to the shareholder by clicking the option “Cancel all shares”.
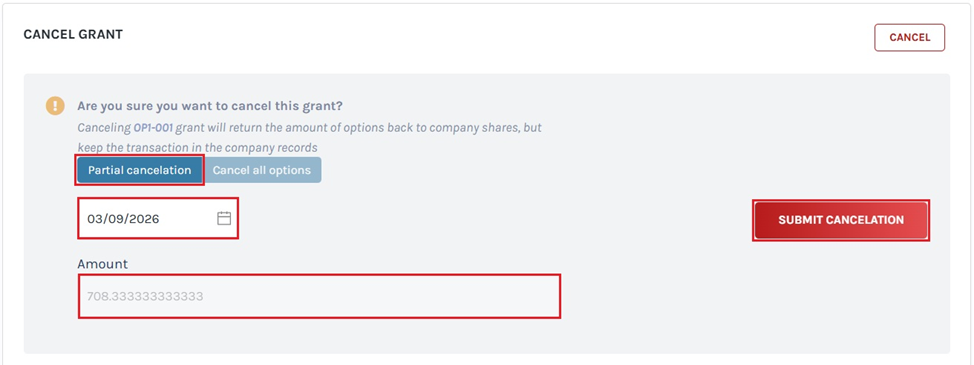
Once you have done this, click on “Submit Cancellation”.
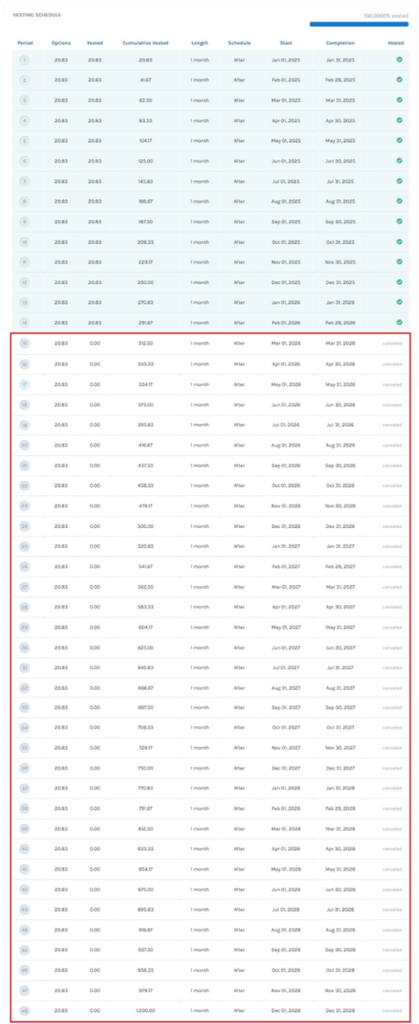
Step 5: The impact of partially cancelling the shares can be seen in the vested schedule. The partially cancelled shares are labelled “cancelled” as shown below.
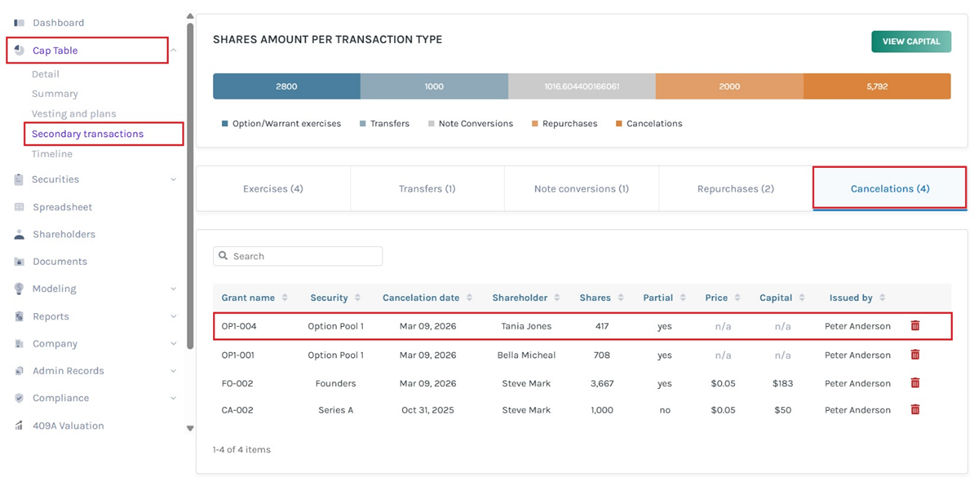
Step 6: The record of the cancelled grant can also seen by clicking “Cap Table” on the left-hand side to get a drop-down menu. Then, click on “Secondary Transactions” and you will see all the transactions – Exercises, Transfers, Note conversions, Repurchases, and Cancellations.
On this page, click on “Cancellations” to check if the grant is cancelled.

Under cancellations, you will see “No” in the partial column if the granted amount is totally cancelled and “Yes” if it is partially cancelled.
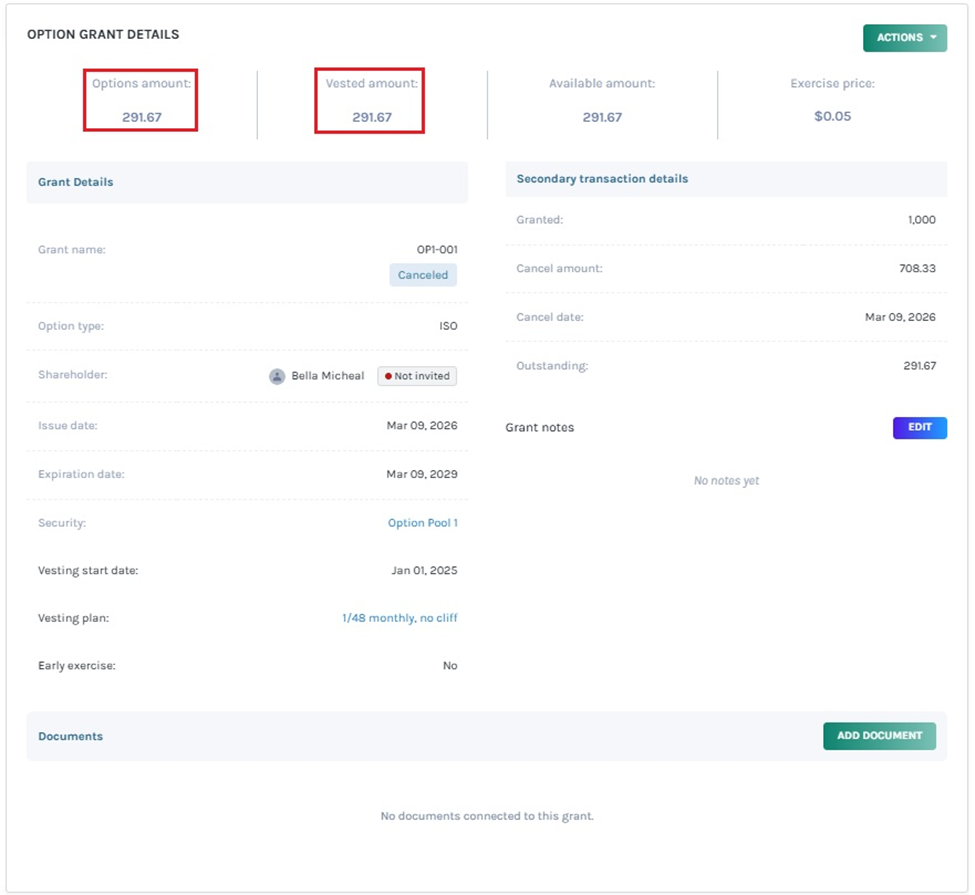
Step 7: On the Options page under Securities, the remaining shares after partial cancellation are still “Active” and you can perform all the actions – Edit grant, Transfer shares, Repurchase shares, Stop vesting, Cancel grant and Delete grant similar to normal grant.
To perform any action, click on the grant name “OP1-001” and you will be redirected to the option grant details page.
Note: After partially canceling the shares, you cannot edit the grant details. You can add document to the grant by clicking on “Add Document”. Check out the support article to know more about adding documents to grants.
Partial cancel using spreadsheet
Step 8:Suppose you want to perform partial cancellation using the spreadsheet feature. At the top of the table, click on “Option Grants”. Under the Secondary Transaction section, the first one is “Secondary Transaction” which provides the different options to choose from. Once you select “Partial Cancelation” from the drop-down menu, enter the date and the amount gets filled automatically based on the selected date.
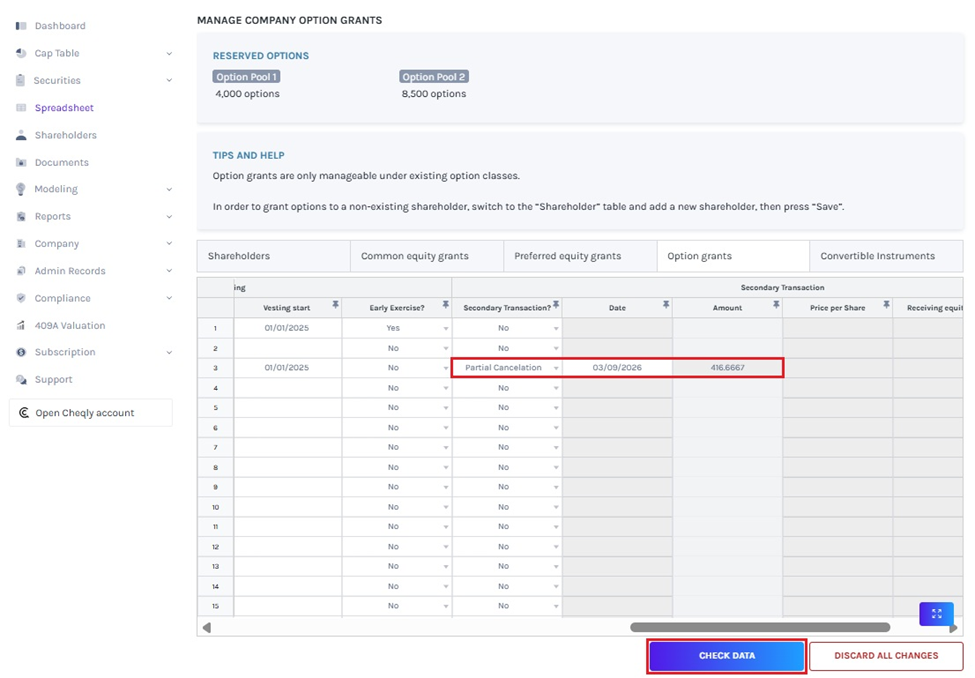
After adding the details, click on “Check Data”. If you want to cancel the process, click “Discard all Changes”.
Step 9: Once your details have been checked, a data validation message will appear: either the entered details are correct and you can save them, or some information may be missing or incorrect.
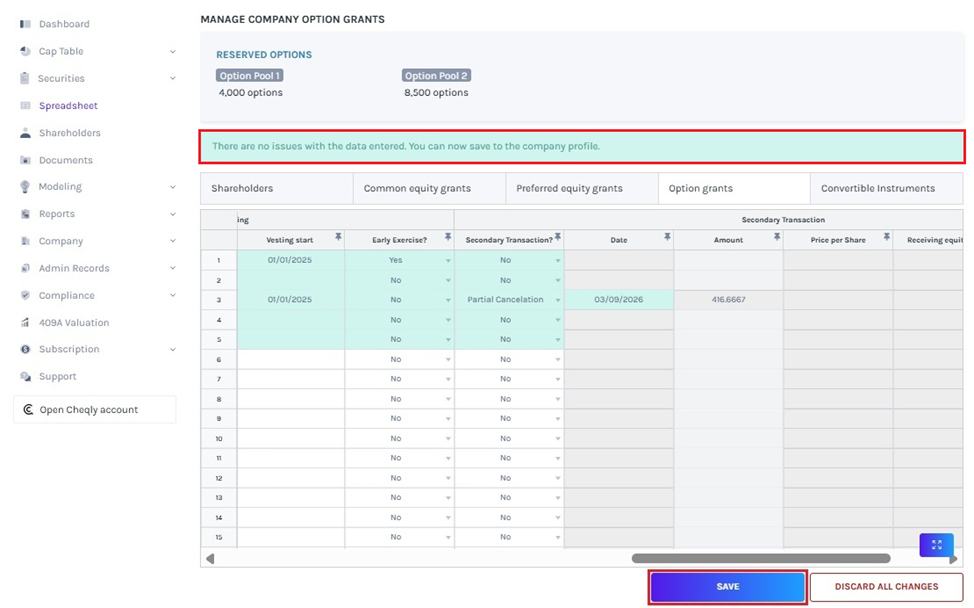
When there are some issues or missing information, the validation message will appear in “Red” along with the details of the issue.
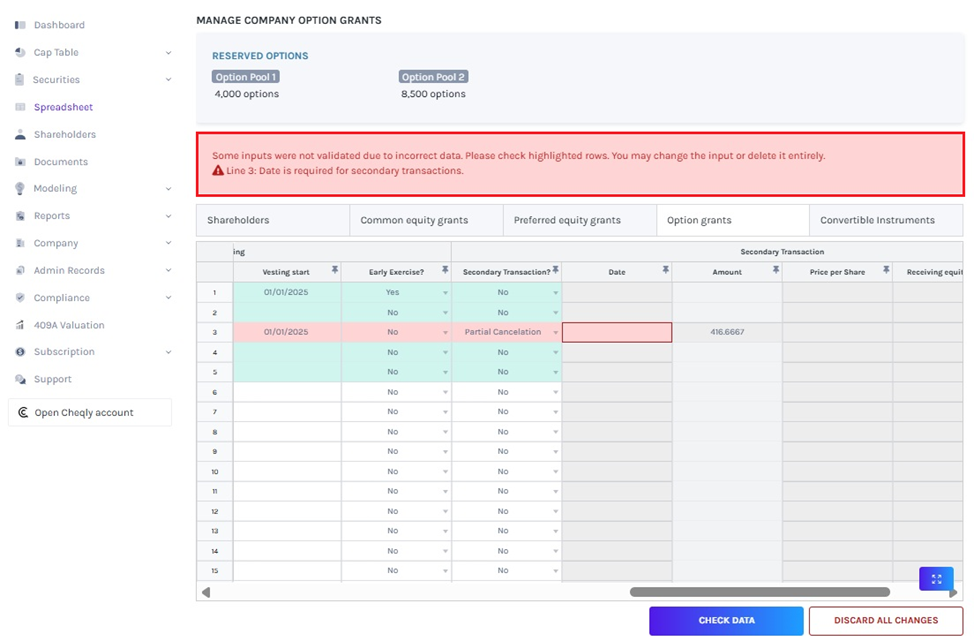
Once the details have been checked, click on “Save”.
Step 10: The record of the cancelation can be seen by clicking “Cap Table” on the left side to get a drop-down menu and selecting “Secondary Transactions”. On this page, click on “Cancelations” to verify if the grant is canceled.
In this way, issued equities and warrants can be partially canceled.
For more information on Eqvista’s processes, check out our support articles or contact us today!
